Making a leather wallet doesn’t require a workshop full of expensive tools. What it does require is the right tools for each step of the process – cutting, marking, stitching, gluing, skiving, and finishing edges. That’s it. If you can cover those six categories you can make a wallet from start to finish and it’ll look like you knew what you were doing (eventually 🤪)
This list is built for anyone just getting started. We’re not going to tell you about every tool that exists in leathercraft — we’re going to tell you what basic hand tools we suggest to complete a leather wallet project. Everything on this list we use ourselves or have used extensively. Everything we tell you to skip, we’re telling you from experience.
Cutting Tools
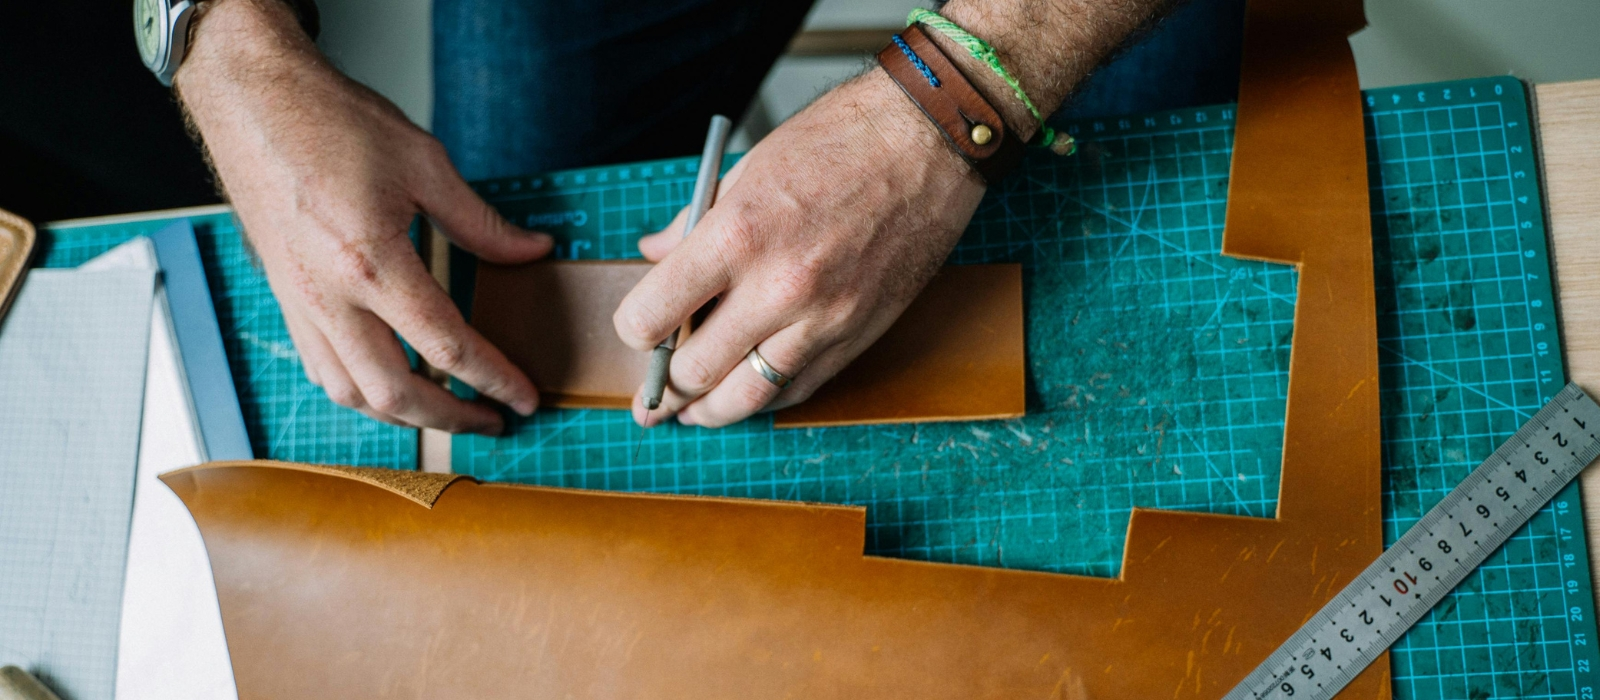
Let’s start with how you’re actually going to cut your leather.
Leathercraft Knives
You (ideally) need two knives and they’re both utility knives. Nothing fancy. The first is a standard utility knife, the kind with replaceable blades you can find at any hardware store. This is your workhorse. Use it to break down larger pieces of leather into smaller ones. The second is a #2 X-Acto knife. Finer point, pen-like handle, way easier to maneuver on smaller pieces. Card slots, tight curves, detail cuts — that’s what the X-Acto is for.
We’ve been running this exact combination in the shop for over a decade.
One thing worth mentioning: some leather tool companies make utility-style knives with non-replaceable blades. If you go that route, make sure you’re comfortable sharpening knives first. The second that blade goes dull it’s basically an expensive paperweight.
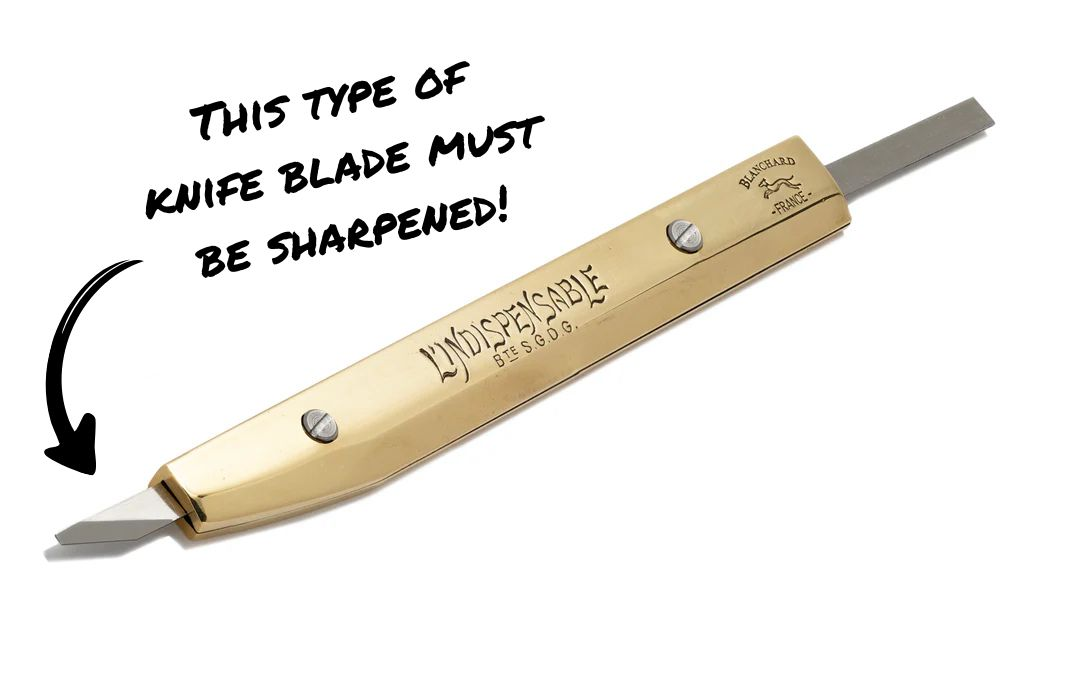
And speaking of sharp: keep your cutting tools sharp at all times. A dull blade is the number one way people get hurt in leathercraft. You force it, it slips, now you’re on the way to the ER. Sharp tools are SAFE tools.
Cutting Mat
Non-negotiable. You need a self-healing cutting mat or you will destroy your table, your blades, and your work. Get one that fits your workspace. Big table, big mat. Small table, small mat. No brand preference here, they all do the same thing.
Metal Ruler
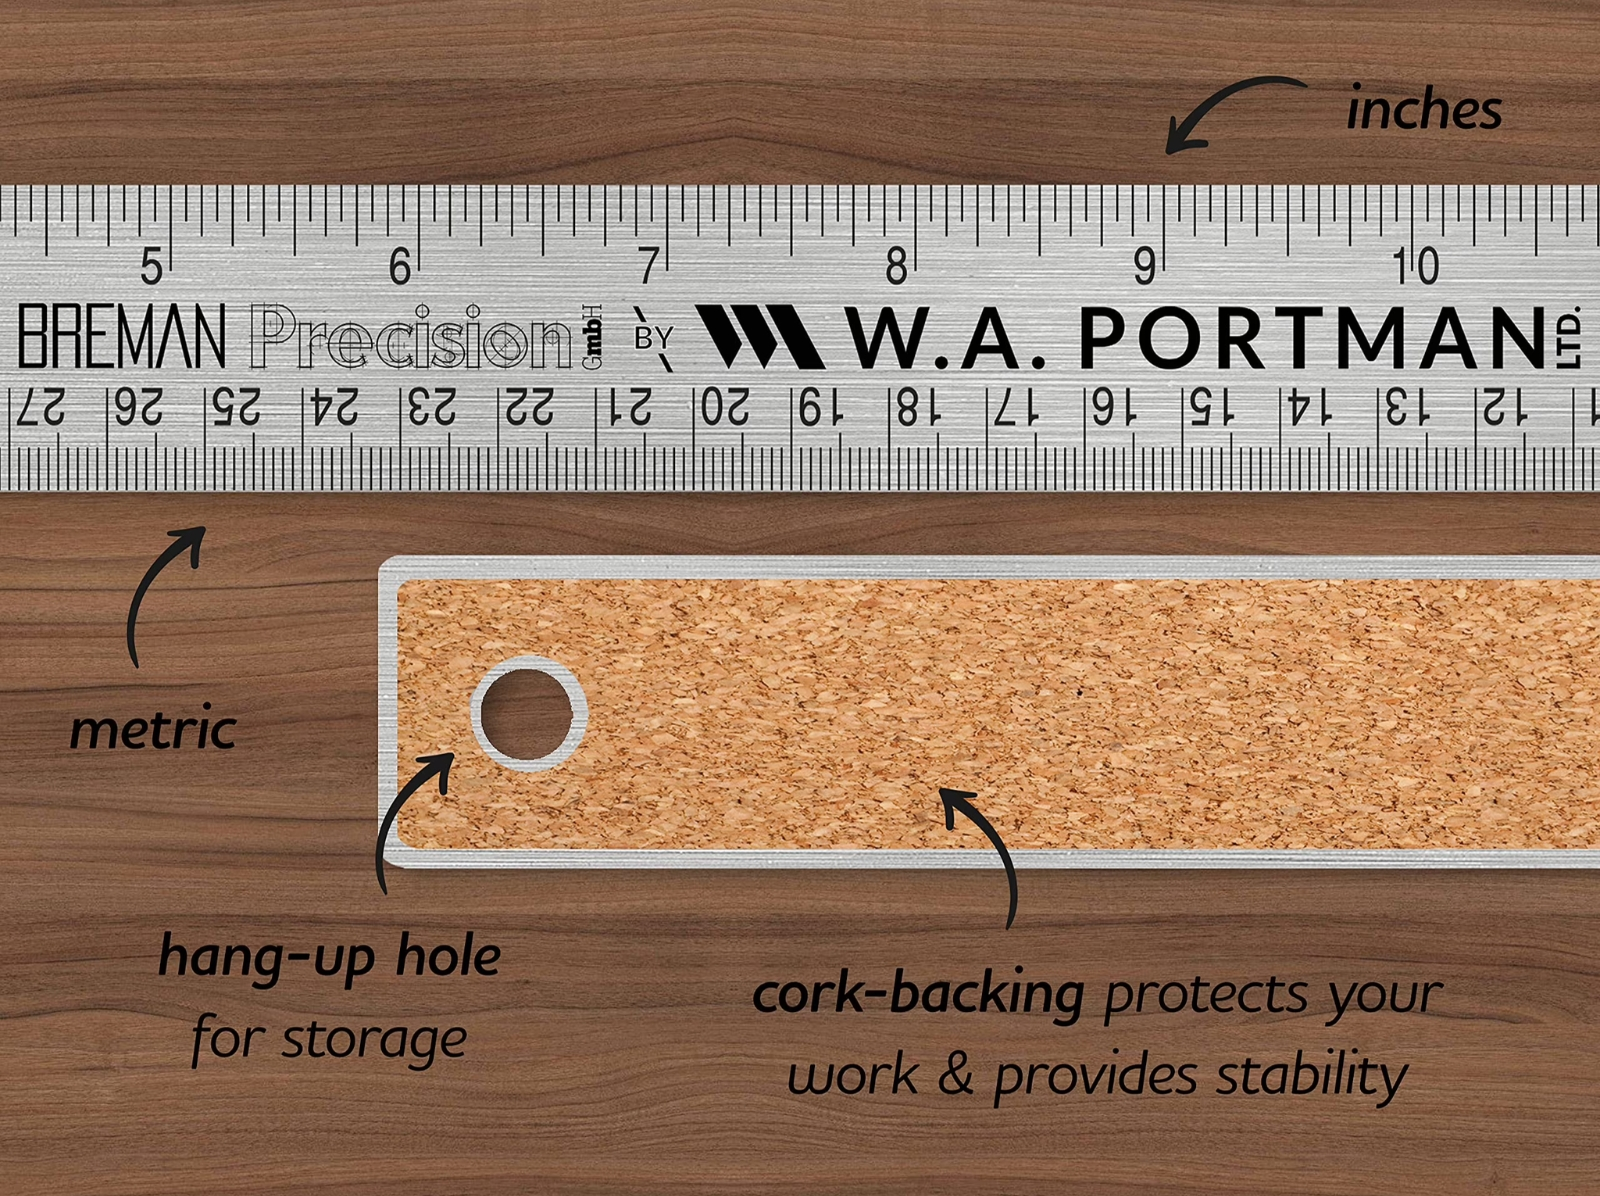
Technically this could live in the marking and layout section but it’s also a cutting tool so it goes here. Get a couple of cork-backed metal rulers in different lengths, one long and one or two shorter ones. The cork backing keeps it from sliding around on the grain side of the leather, which is often slippery. The metal edge protects against your knife blade. A sharp knife will eat through a plastic ruler in one pass if you aren’t careful.
What You Don’t Need
Rotary cutter — fine for breaking down large hides but terrible for cutting wallet pieces. Skip it.
Head knife — a beautiful tool built for thick leather and large cuts, think saddlery. Not what you need for a bifold. Leave it for later if you ever go down that road.
Marking & Layout Tools
Good news: you don’t need much here.
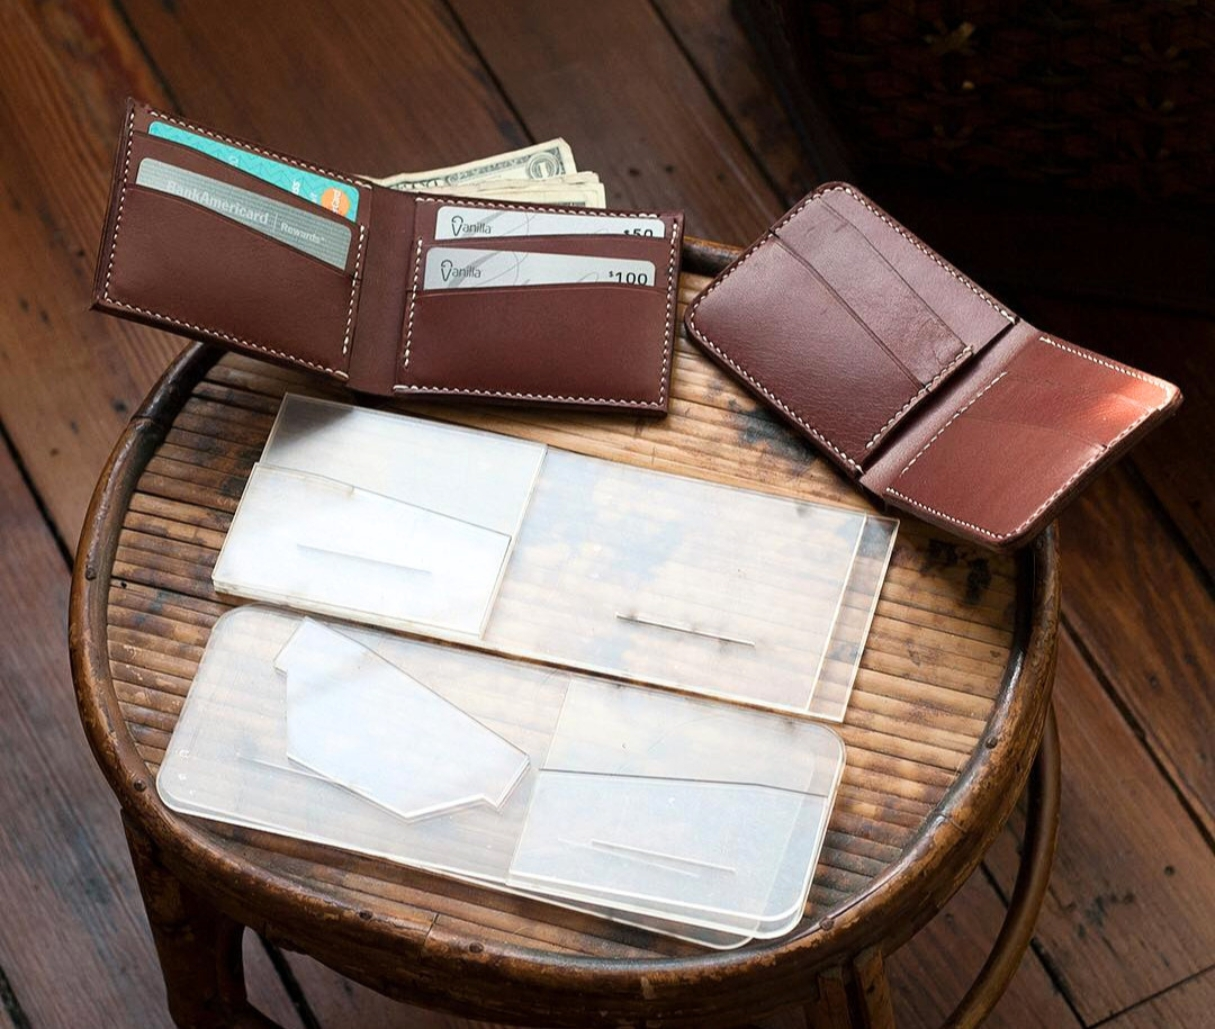
Wallet Pattern
This might seem obvious but you’re going to need a pattern. If this is your first time making a wallet, use one drafted by someone who has already worked out the dimensions rather than trying to figure it out on the fly. You will waste a lot of time and leather going that route. If you need somewhere to start, we have free leather wallet patterns available to download and print, and a full roundup of the best free wallet patterns on the internet right now. Some are going to be more complicated than others so we recommend starting with a simple wallet pattern even if you don’t particular like the design. The techniques you learn at that stage will serve you in the more complicated designs you try later.
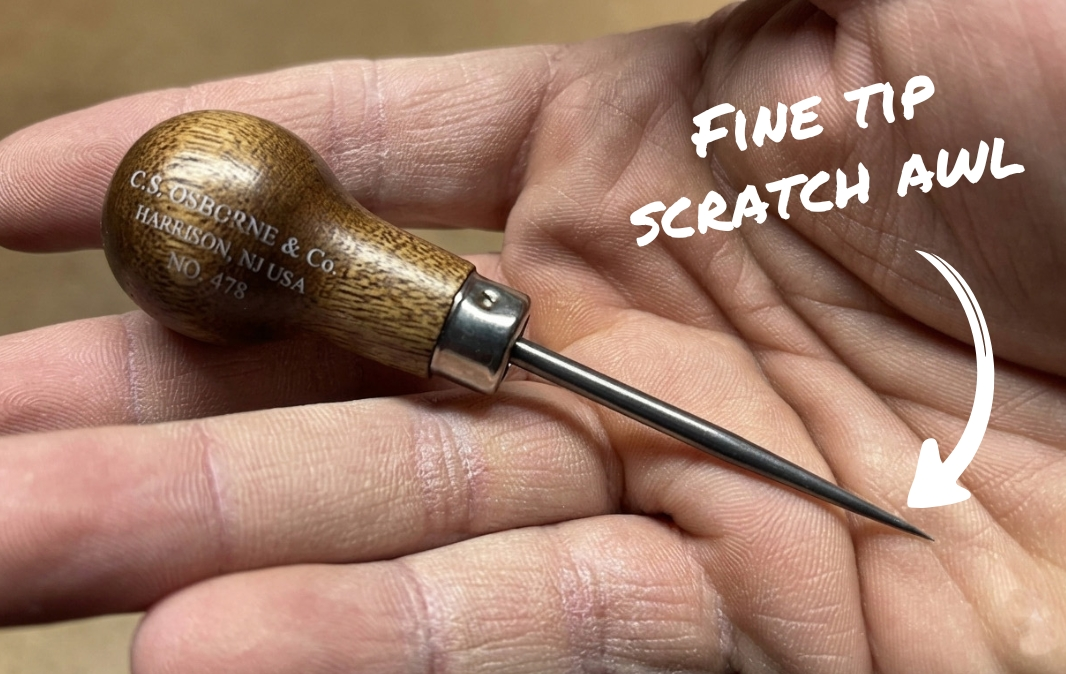
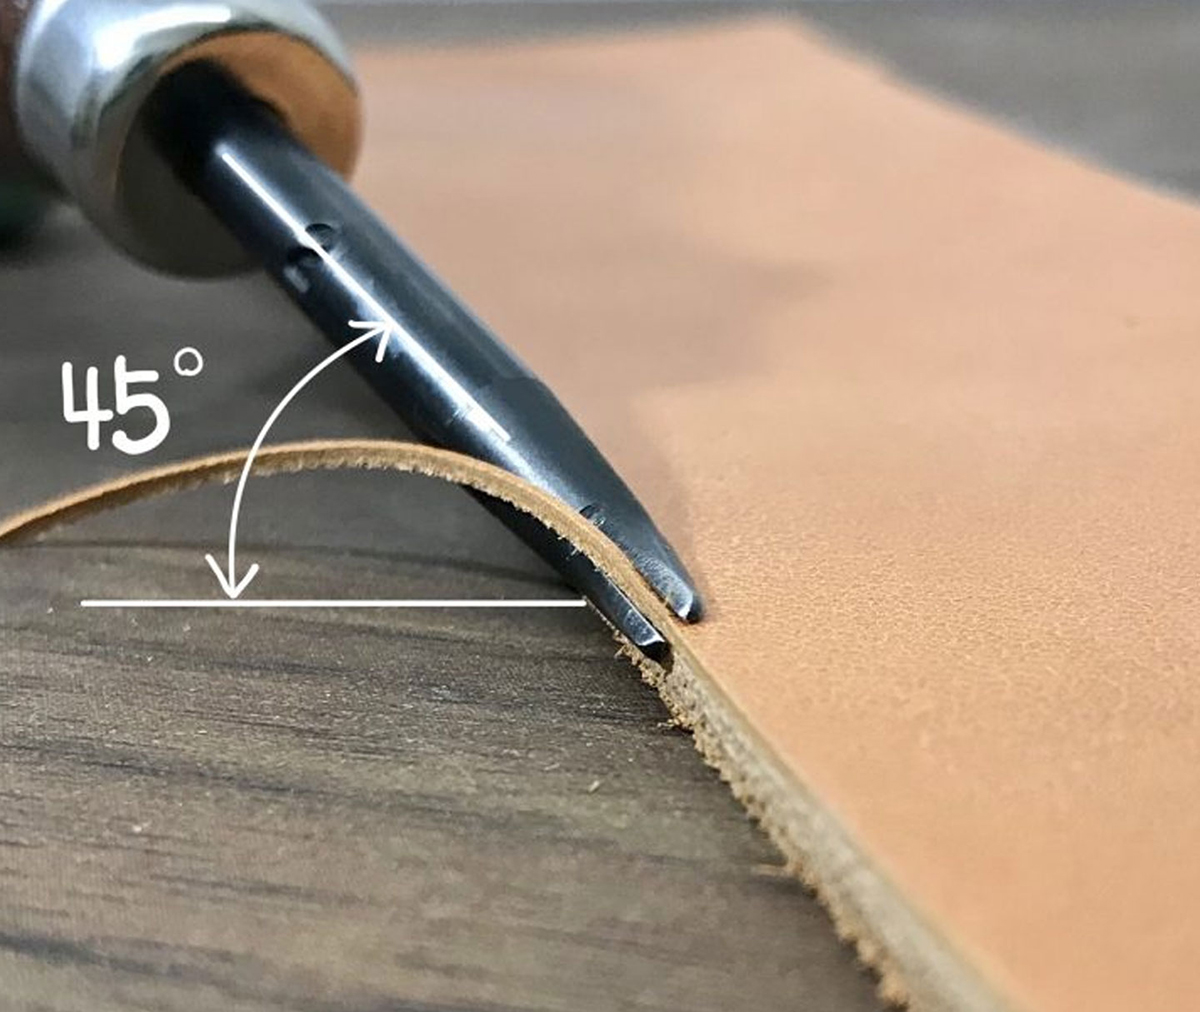
Scratch Awl
In leathercraft we don’t use pens or markers to trace our patterns. That’s because pens and markers will bleed and leave permanent marks. To trace your pattern pieces onto the leather before cutting, you need a scratch awl. You can find versions of these at hardware stores since woodworkers use them too, but get one made for leathercraft. The generic ones tend to have a larger, duller point that doesn’t mark leather cleanly. The C.S. Osborne scratch awl has a fine, sharp tip that leaves crisp cutting lines and clean hole markings. We’ve been using the same scratch awl for the past decade so as long as you don’t lose it, it will be a one time purchase.
Wing Divider
This tool could also live in the stitching section and we’ll talk more about it there. For now just know you need one. Wing Dividers range wildly in price but you don’t need an expensive one. They are all functionally the same so don’t overthink it.
Products Mentioned | Link |
| ; | |
| ; | |
| ; |
Stitching Tools
Now we’re getting into the meat of it. Stitching tools are also where you’ll have to make a decision about how you want to work, because there are a couple of different paths. We’ll give you our recommendation at the end of this section.
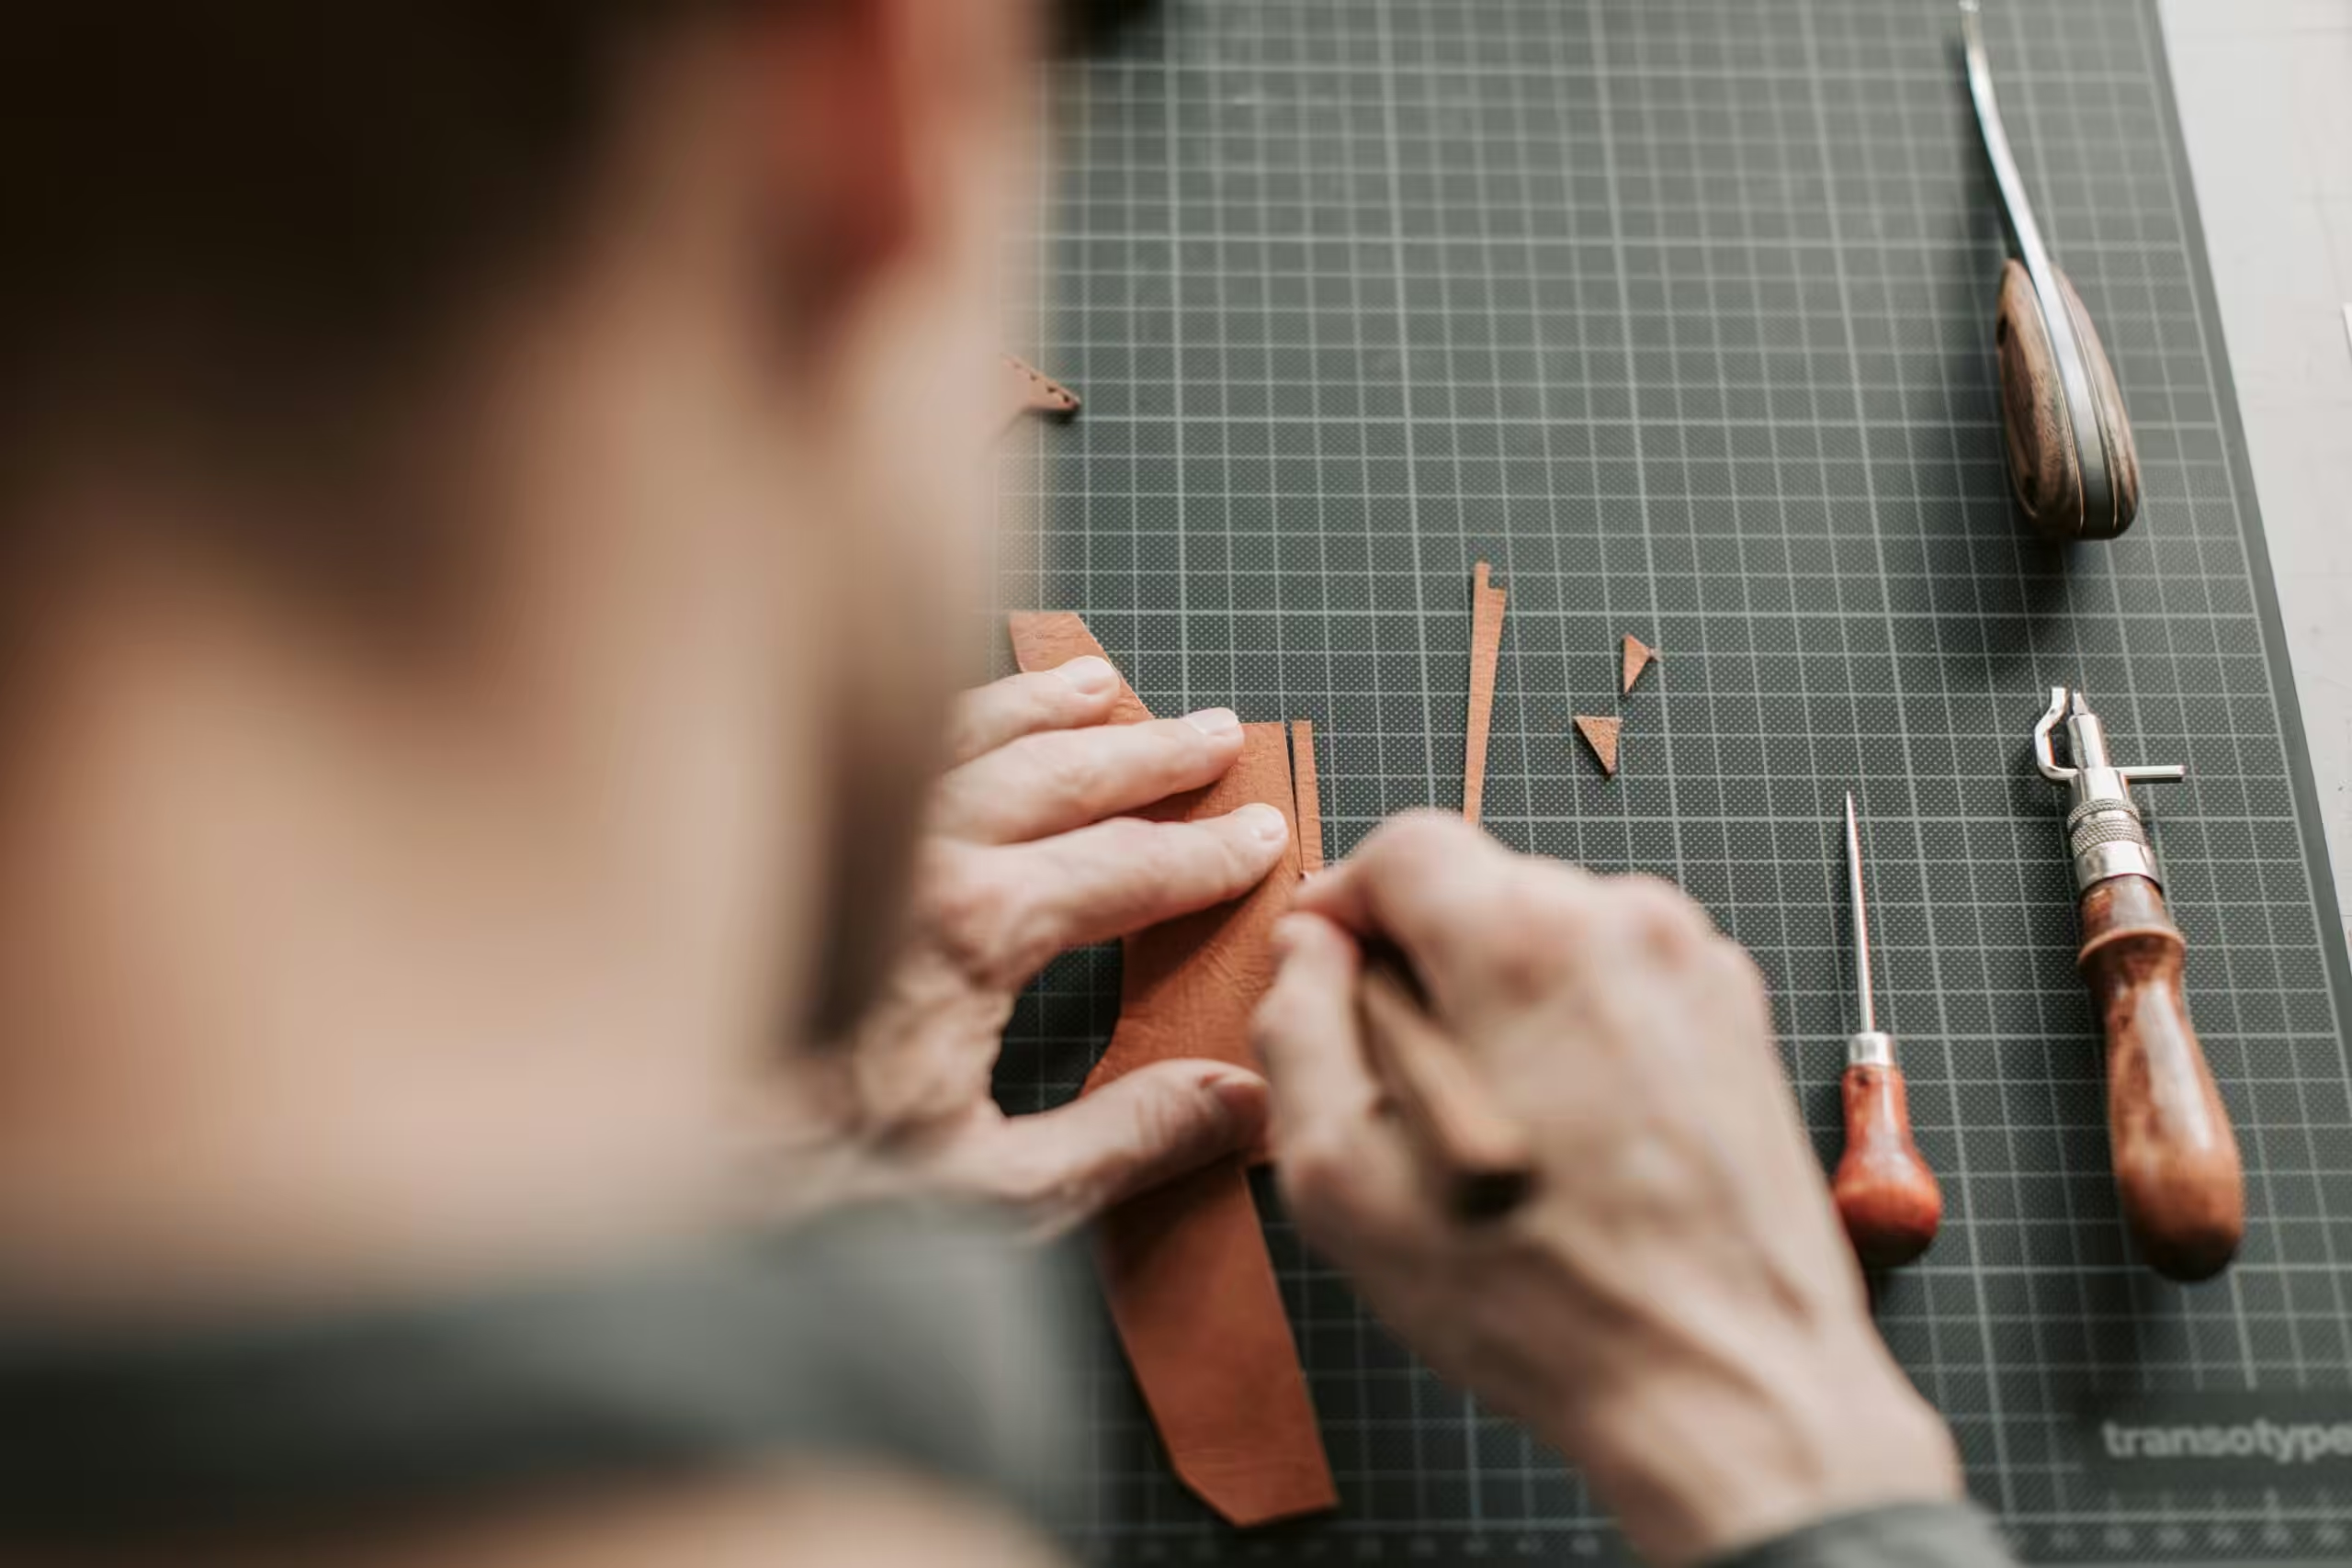
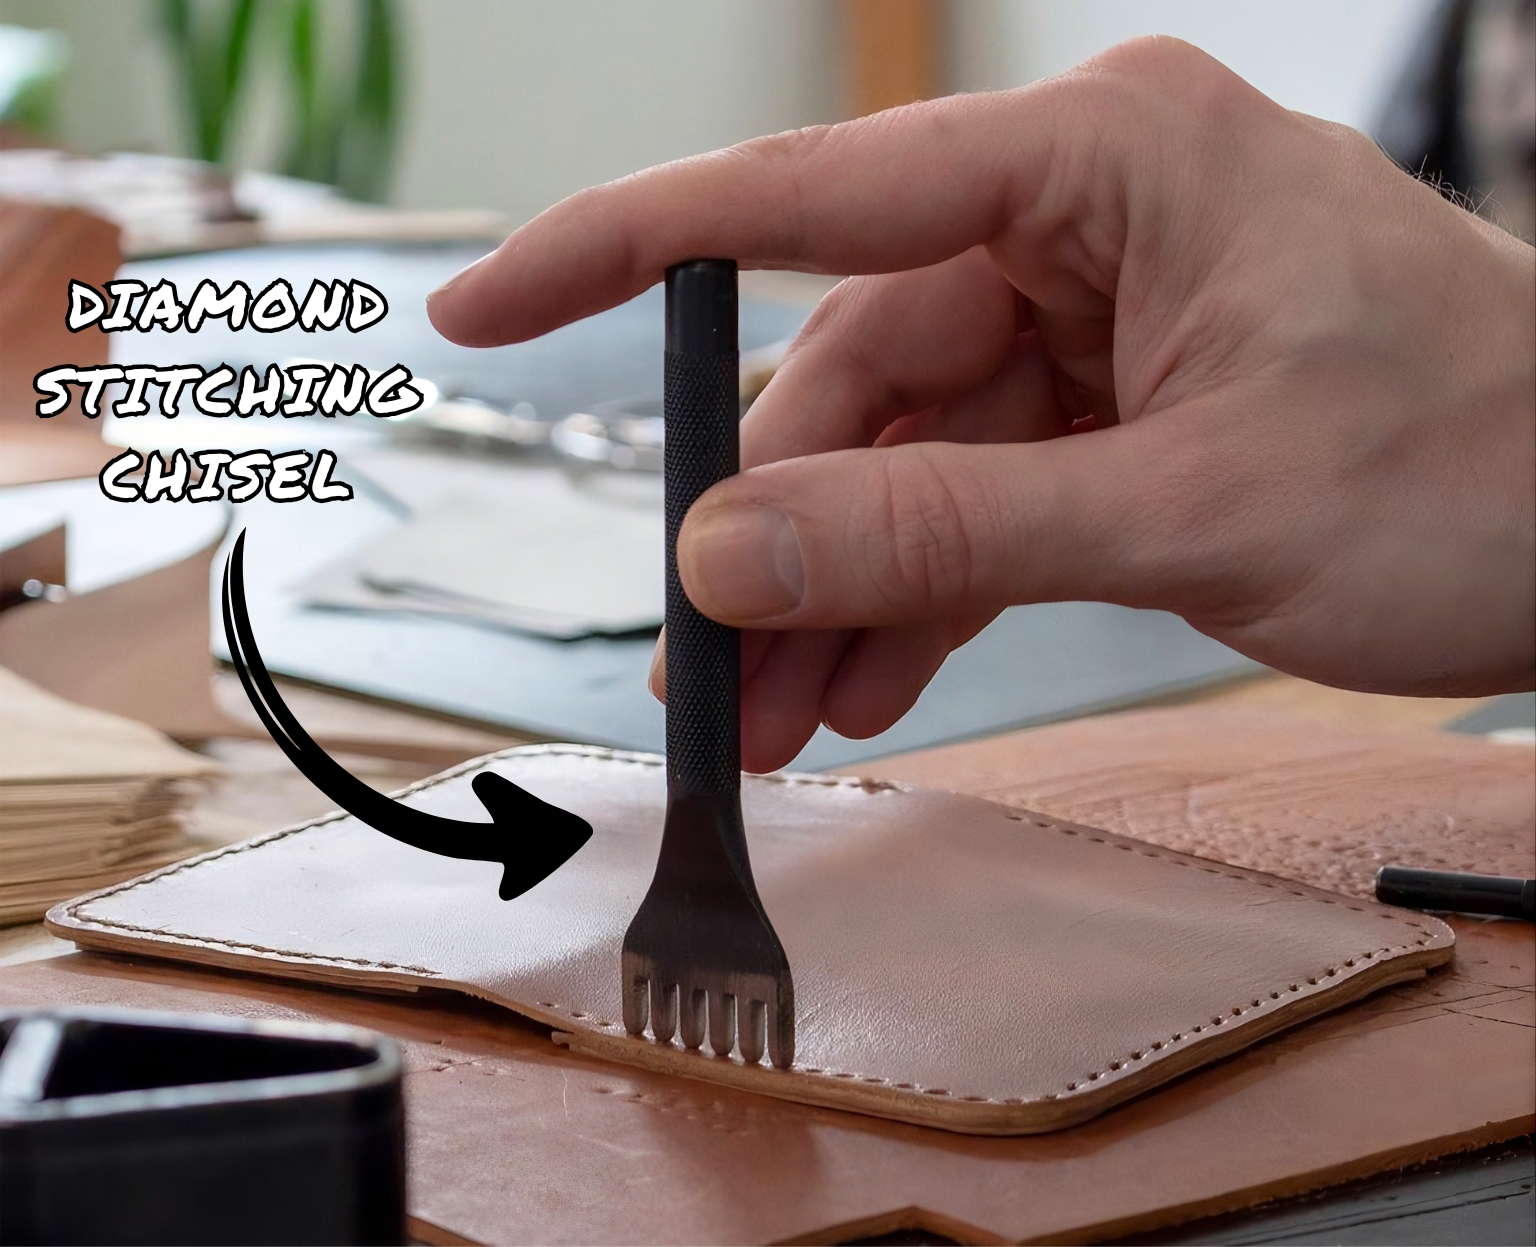
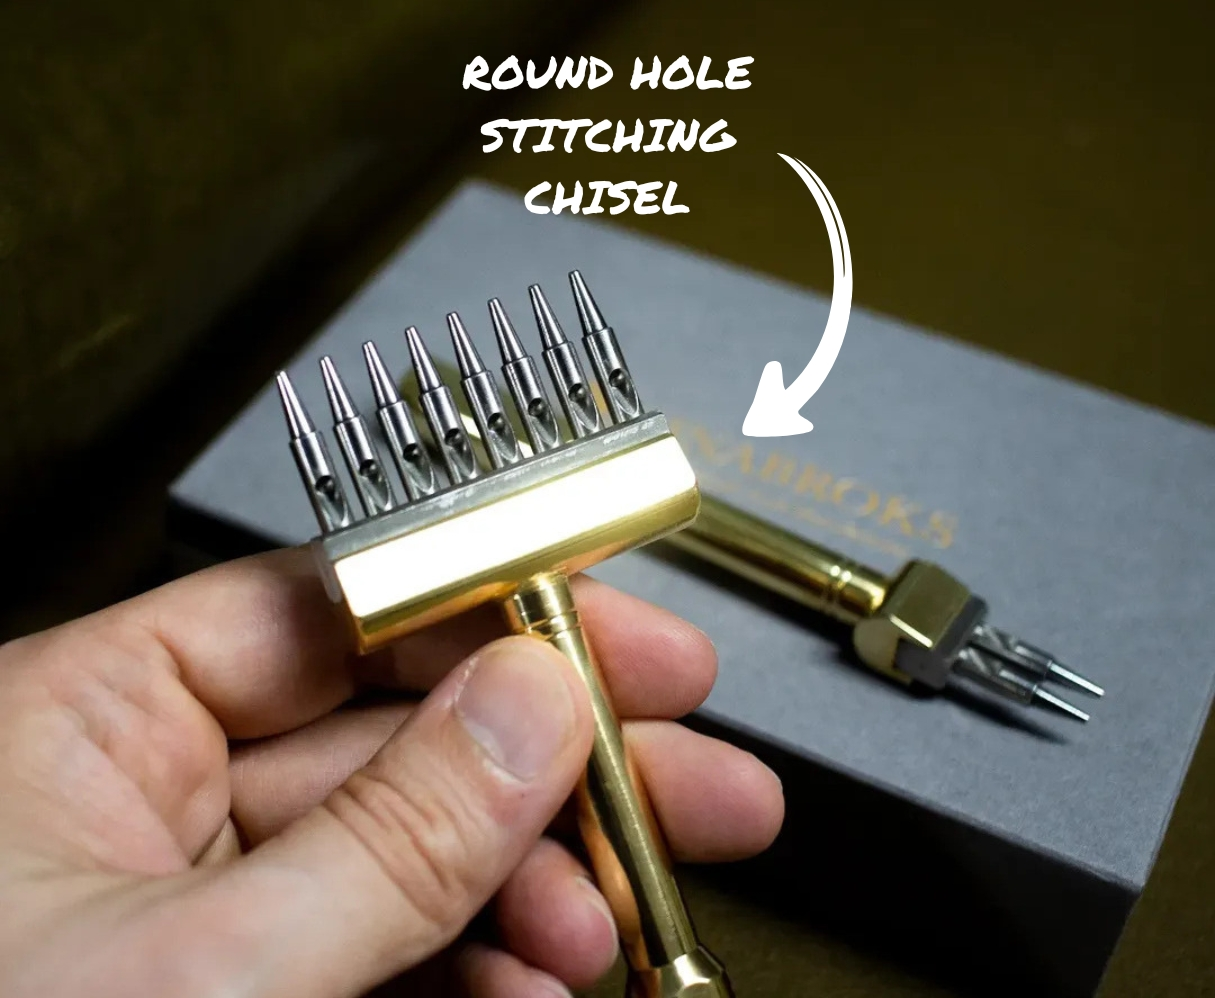
Stitching Chisels
Stitching chisels are the tool that actually punches the holes through your leather in specified spacing increments. Unlike pricking irons which only mark the surface, stitching chisels cut all the way through in one strike. Those holes are where your needle and thread pass when you stitch the wallet together. Stitching chisels traditionally come in a diamond shaped tooth but also come in round hole versions.
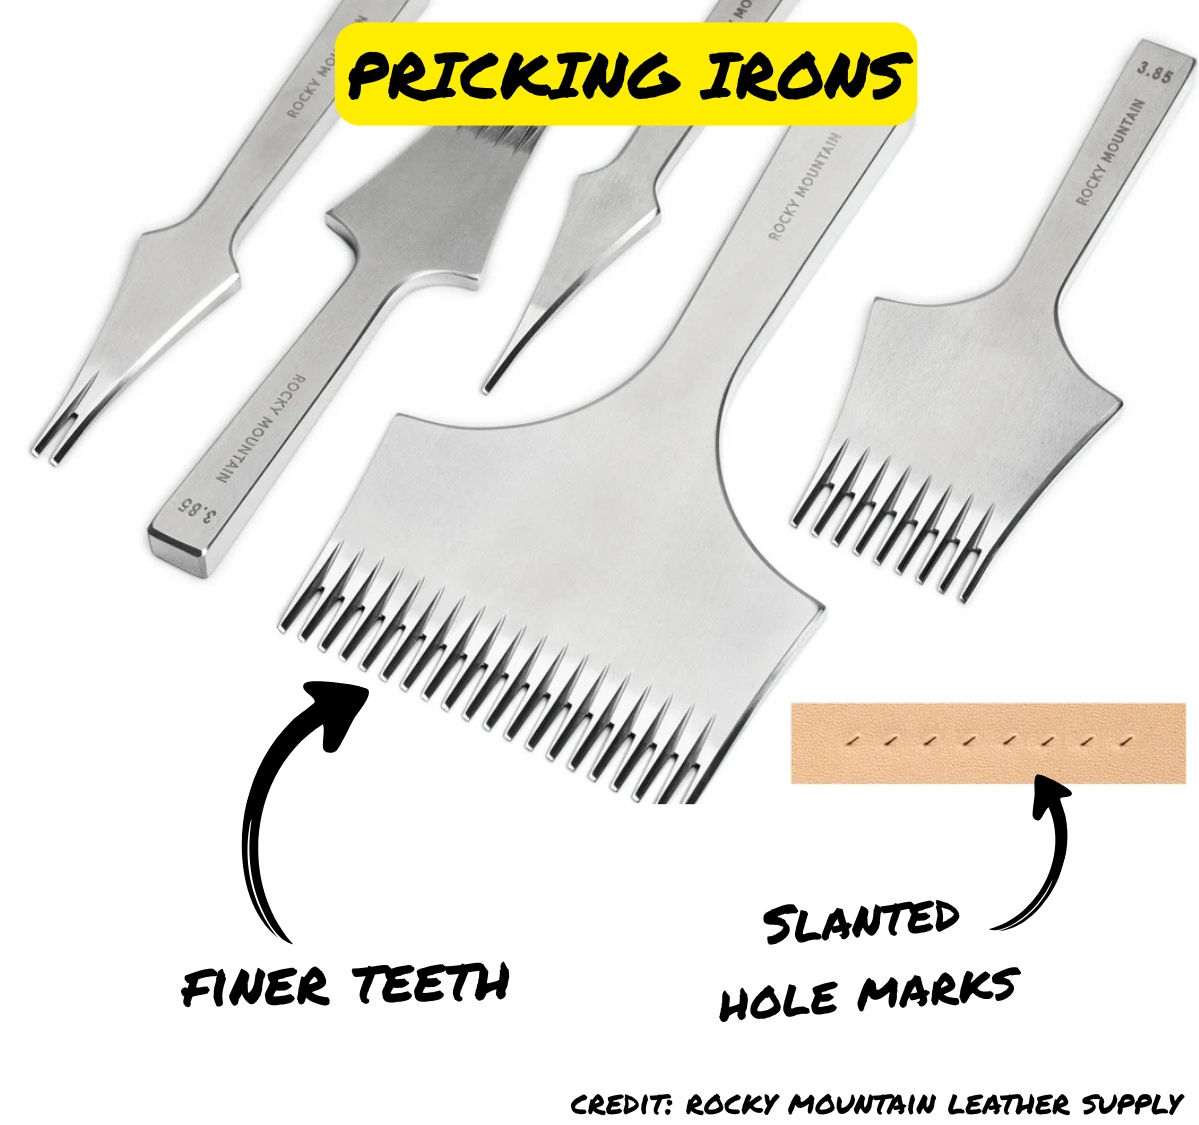
Pricking Irons
Pricking irons, which look very similar to stitching chisels, only mark the leather rather than punch all the way through. You use them to create evenly spaced stitch hole guides on the surface, then follow up with a diamond stitching awl to open each hole individually before passing your needle through. Traditional pricking irons mark at a slant, which dictates the angle you’re supposed to pierce the leather with your awl.
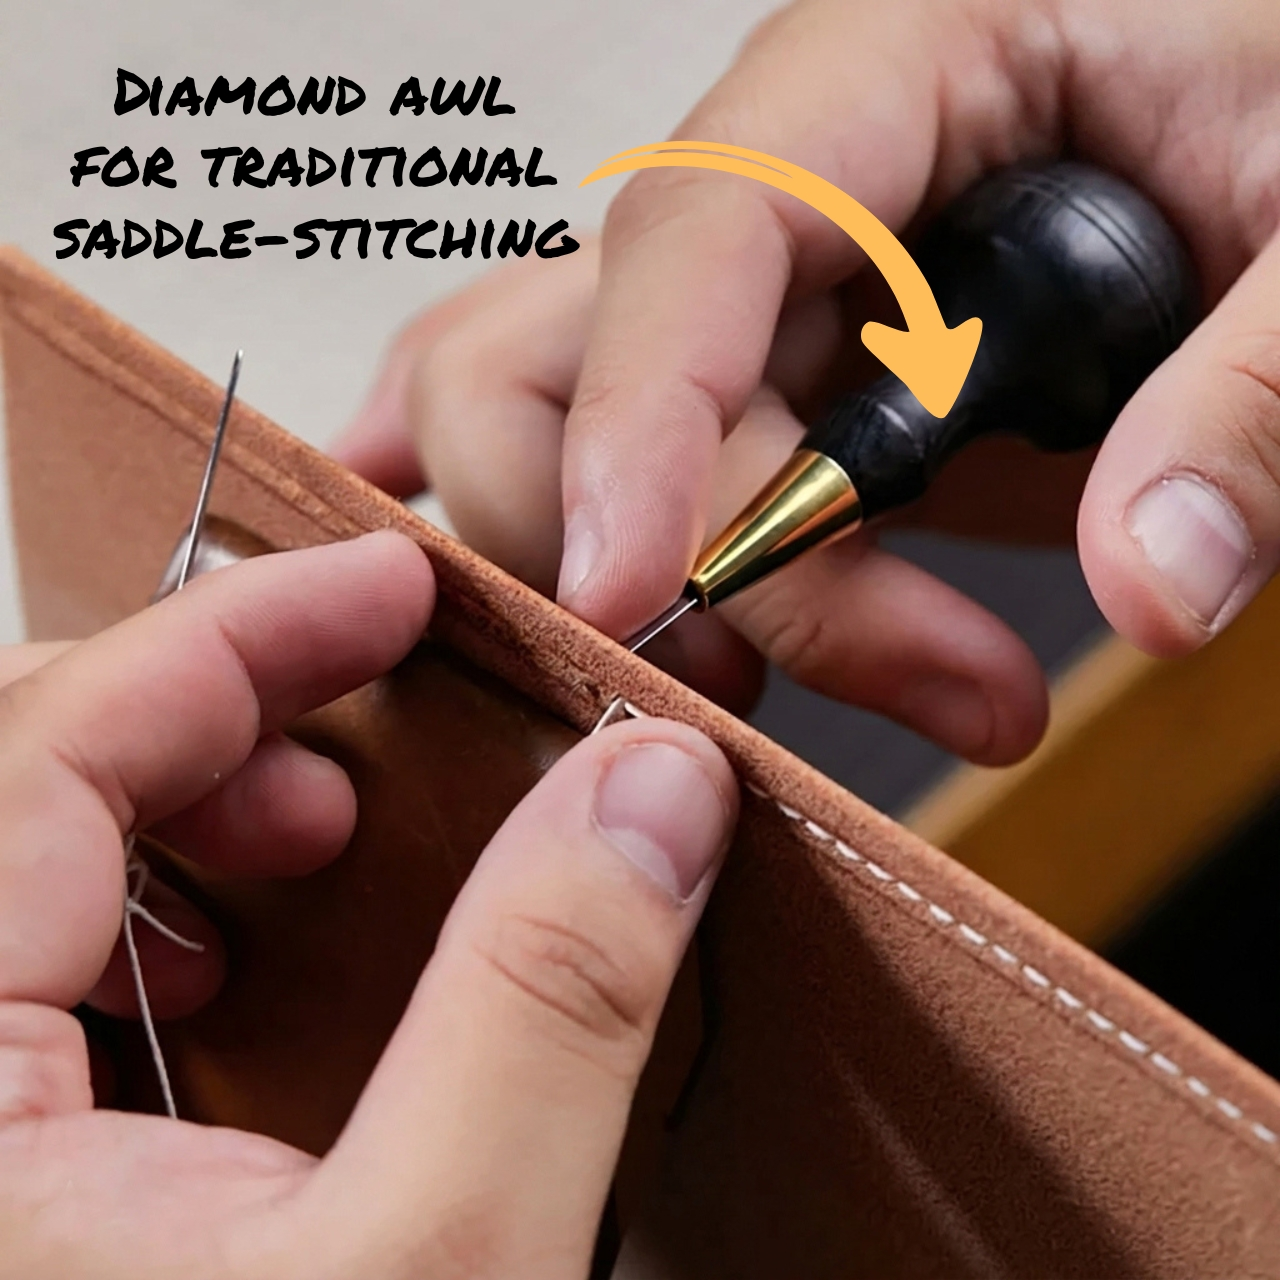
Diamond Stitching Awl
A diamond stitching awl is a small hand tool designed to individually pierce each hole while hand stitching. The name refers to the shape of the tip, not what it’s made of. That diamond shaped tip creates just enough space for the needle and thread to pass through cleanly. You only need one of these if you go the pricking iron route.
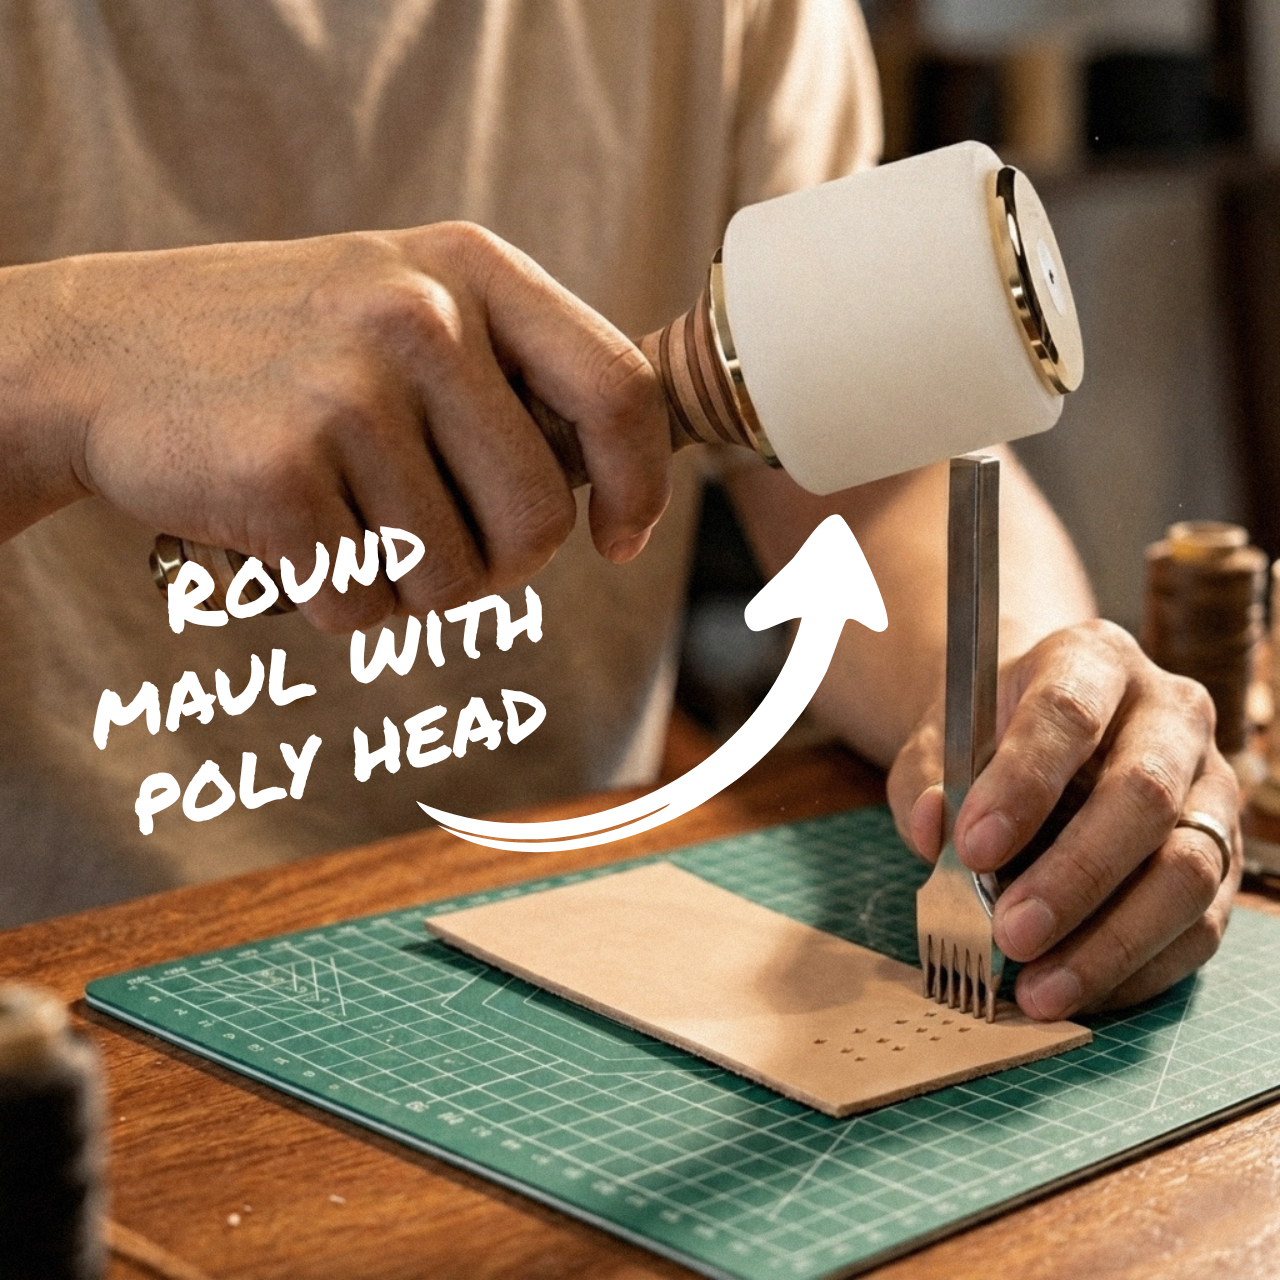
Mallet / Maul
Your mallet (or maul) is the striking tool that drives your stitching chisels through the leather or leaves marks with your pricking irons. Don’t use a regular hammer here — the small striking head will damage your tools. For wallet making we recommend a poly head maul with a bit of weight to it. You need one regardless of which stitching method you choose.
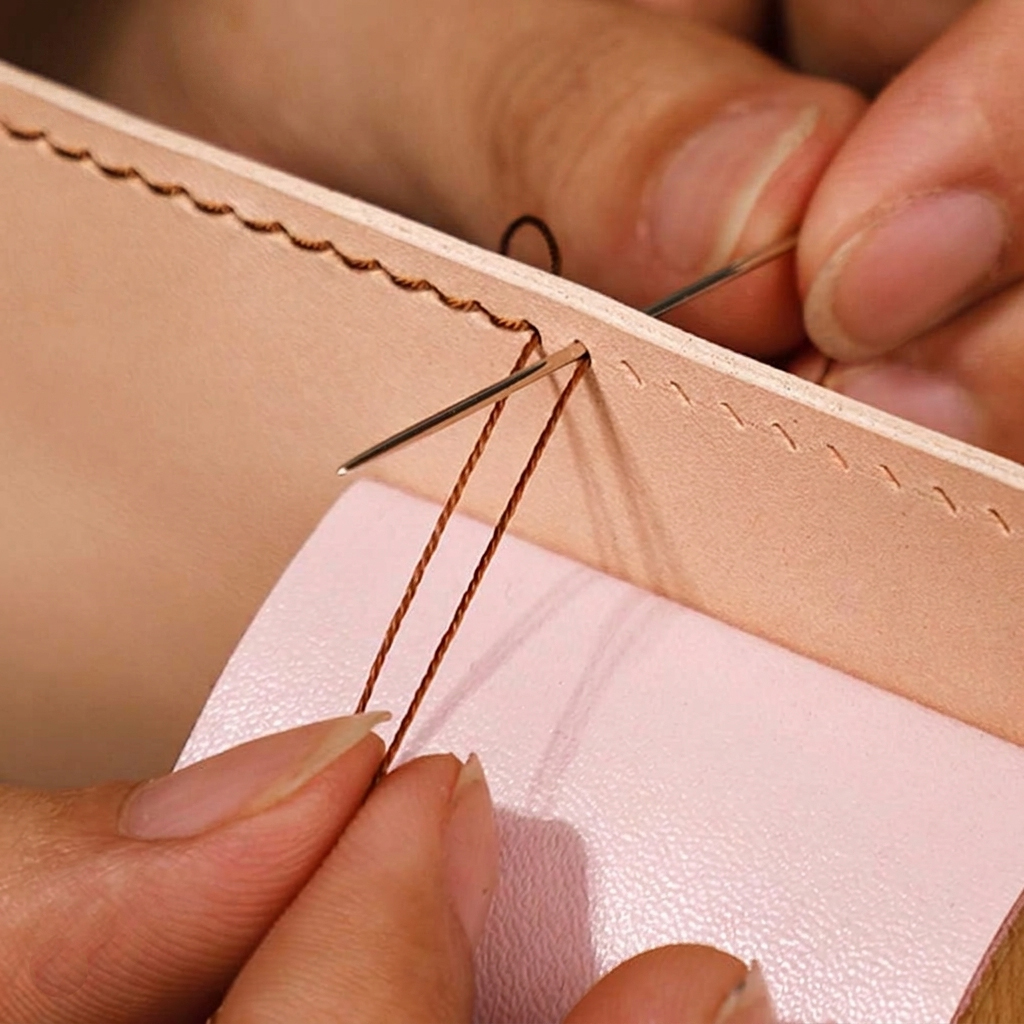
Needles and Thread
You could write a book on needle and thread options so we’ll keep this high level. The needles you want are called “harness” or “saddlers” needles, designed specifically for hand stitching. They’re larger and blunter than sewing machine needles, which saves your fingers. Needle size depends mainly on your thread diameter — thicker thread needs a larger needle. Any reputable manufacturer will tell you the right combination for their product.
Thread is the same story. Nylon, polyester, linen, cotton, round, flat braided, twisted — it goes on. A lot of it comes down to personal preference. We use flat braided poly thread for everything. Plenty of crafters prefer twisted nylon. Traditional leathercrafters swear by hand waxed linen. Pick one type to start with and go from there. All of our wallet patterns tell you exactly what we used, and most tutorial makers do the same. Pay special attention to the weight of thread they’re using. For example (1mm, .8mm, .6mm, etc).
Wing Divider
Mentioned this in the last section but in the context of stitching, your wing divider marks the line where your stitch holes will go around the edge of your wallet pieces. Keeps everything in a clean, consistent line.
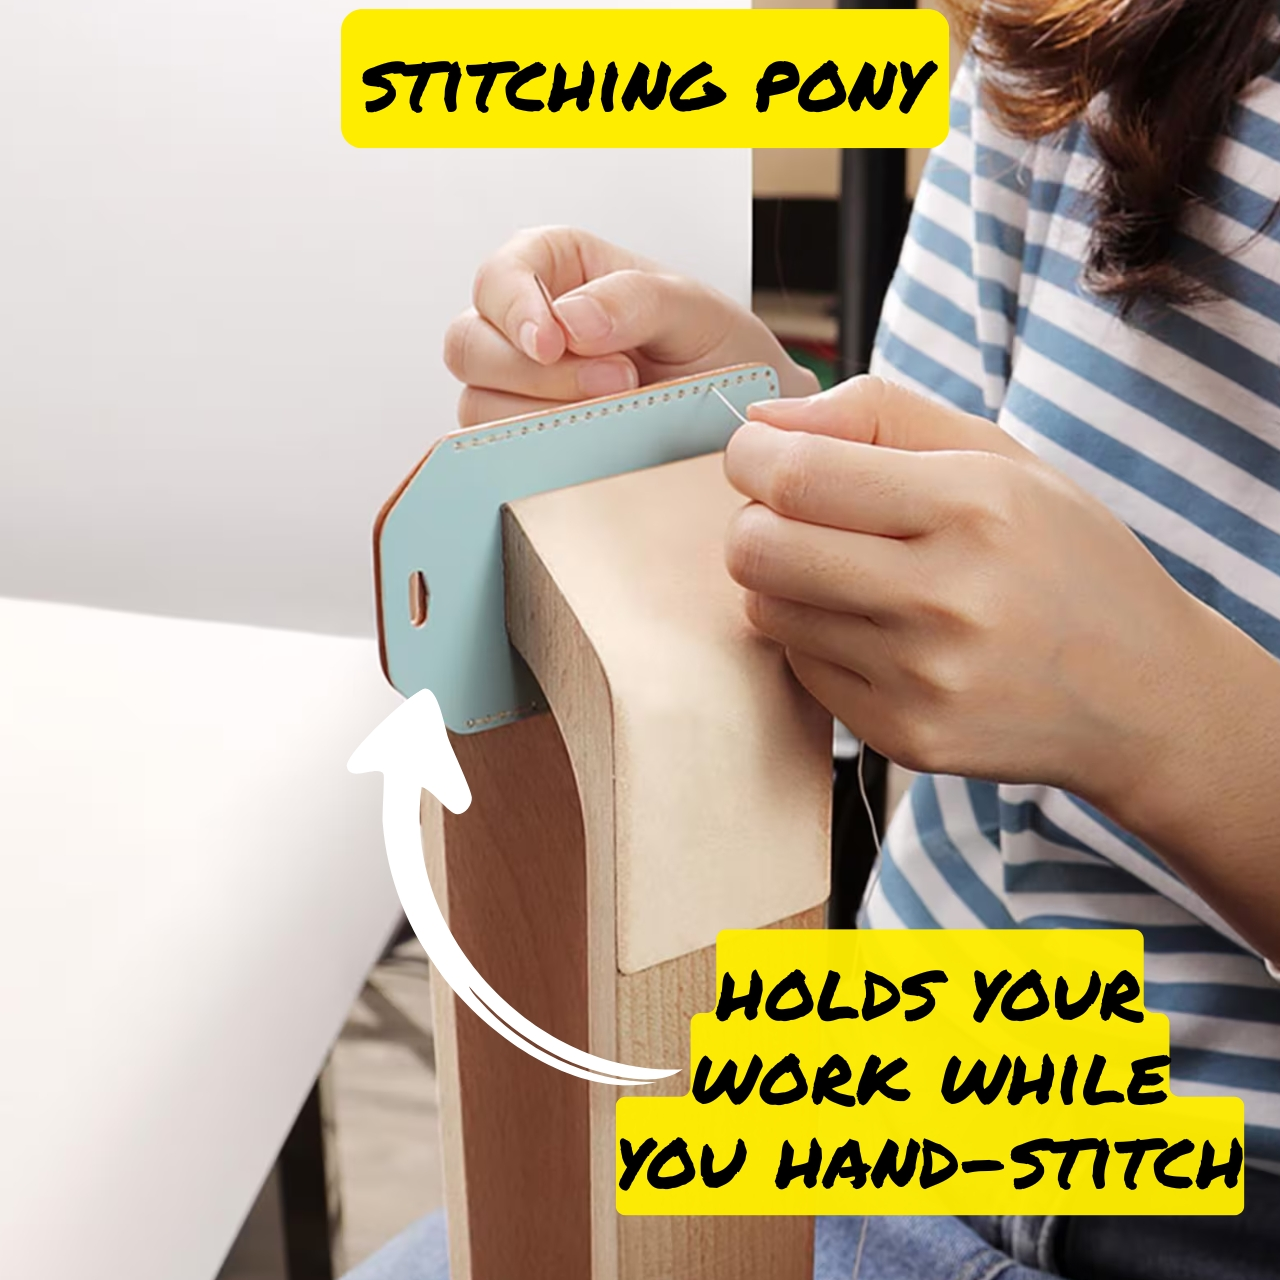
Stitching Pony
A stitching pony (also called a Saddlers clam sometimes) holds your work while freeing up both hands to stitch. They come in all shapes, sizes, and price points. We suggest starting with a smaller one that clamps to the edge of a table. If you end up going deeper into leathercraft, upgrade later. Worth knowing: if you’re punching holes with stitching chisels, this tool is not strictly required. If you’re going the pricking iron and diamond awl route, you will need one.
So Where Should You Start?
Start with stitching chisels. It’s by far the most common method people use to make leather wallets today and will line up with the vast majority of tutorials you find on YouTube. Our patterns use 6mm spacing but 4mm and 5mm are also common. 5mm is a solid middle ground.
The only reason to go pricking irons and diamond awl is if you’re committed to doing leathercraft the most traditional way possible. If you want to work like a Hermes atelier, go for it. Otherwise, start with chisels.
If you plan on going to uber-traditional route, you will need to purchase a stitching pony. Non-negotiable. If you’re using chisels, you don’t but I would highly recommend grabbing one to make your life easier.
What You Don’t Need
Stitching wheel — shows up from time to time but it’s a frustrating working experience. Old school saddlery stuff, not relevant here. Choose chisels or irons.
Stitch groover — designed for very thick leather where you need the stitching line to sit below the surface. Wallet leather is thin. You don’t need it and you don’t have enough material to dig into anyway. Just use a wing divider.
Adhesives
There are a few different types of leathercraft glue to choose from and it really comes down to personal preference. They all do the same fundamental job: keep your leather pieces permanently bonded together.
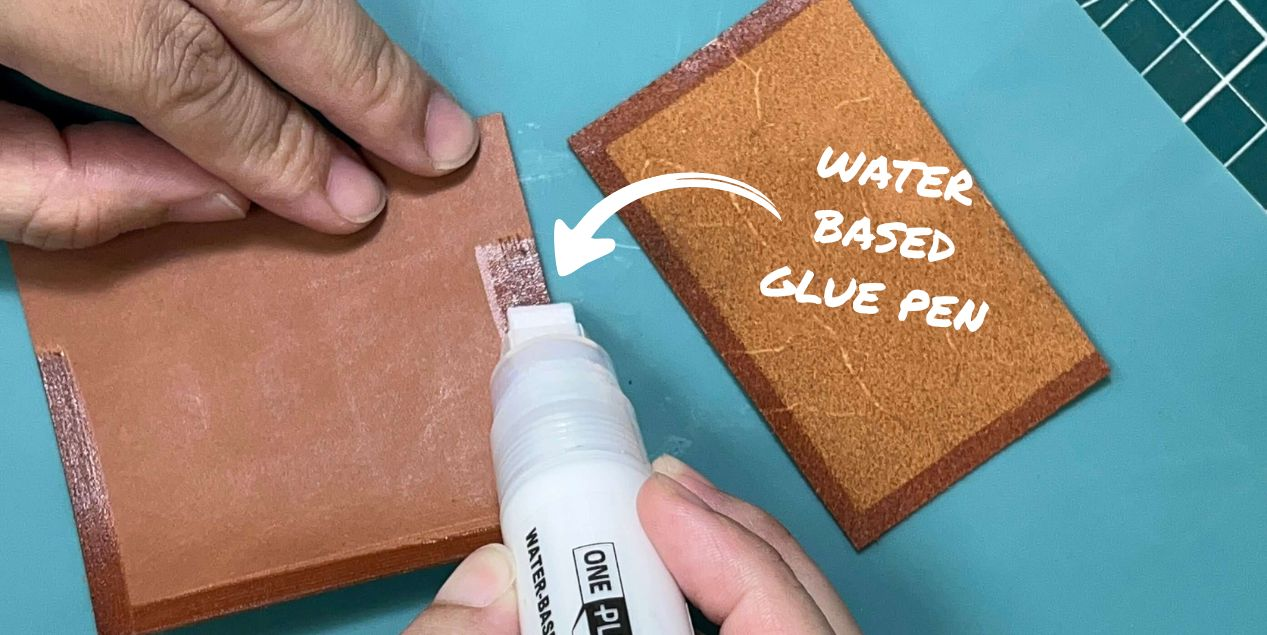
Water Based
Water based glues are the milder, non-toxic option. They come in small bottles with a spreader or in a marker format. We use the marker format in our shop and love it. The two downsides worth knowing: the bond isn’t as strong as solvent based glue, and on heavily finished leather they sometimes won’t adhere properly.
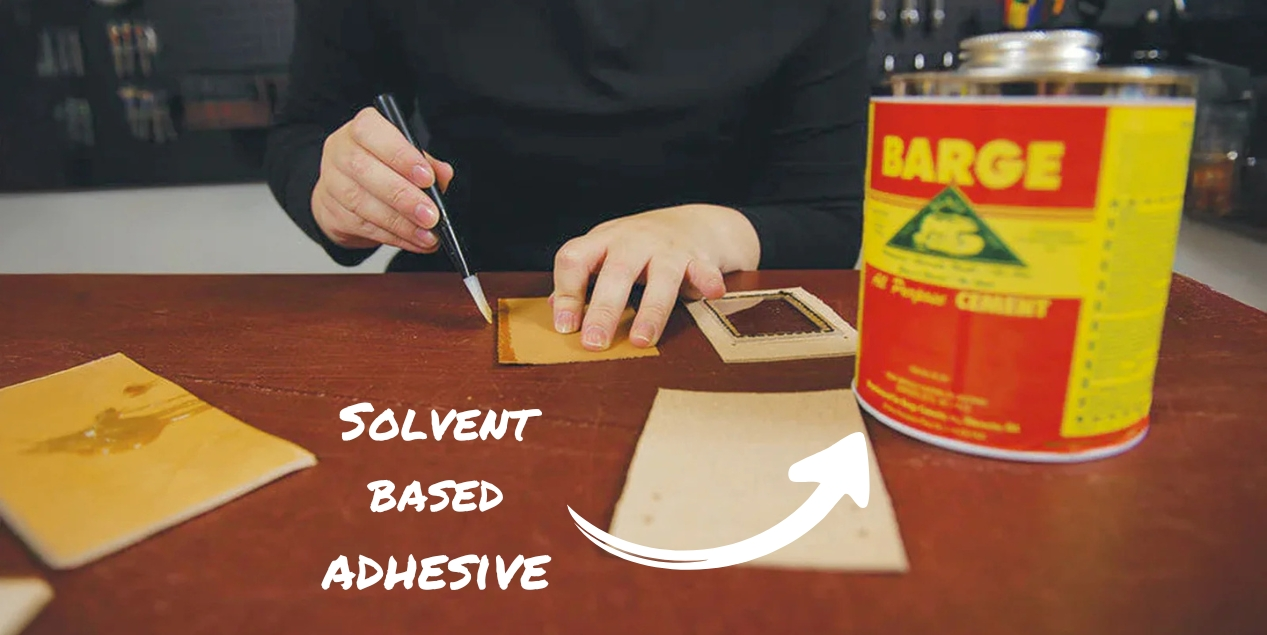
Solvent Based
Solvent based adhesives like Barge Cement are the heavy hitters. Extremely strong bond but they’re toxic and the fumes will give you a headache fast so make sure you’re working in a ventilated space. This is the kind of adhesive shoemakers will use to glue the soles of your shoes on with no stitching. For wallet making we think it’s a little overkill, but if your leather isn’t responding to water based glue this is what you’ll reach for.
Products Mentioned | Link |
| ; | |
| ; | |
| ; |
Skiving Tools
At some point between cutting and stitching you’re going to need to address the thickness of certain wallet pieces. That process is called skiving. Skiving is removing material from specific areas of your leather so that when multiple pieces are stacked together the wallet is still thin enough to actually go in your pocket. Wallets are meant to carry cards and cash. Managing the thickness of the leather itself is a big part of making that work. There are three main styles of skiving knife worth knowing about.
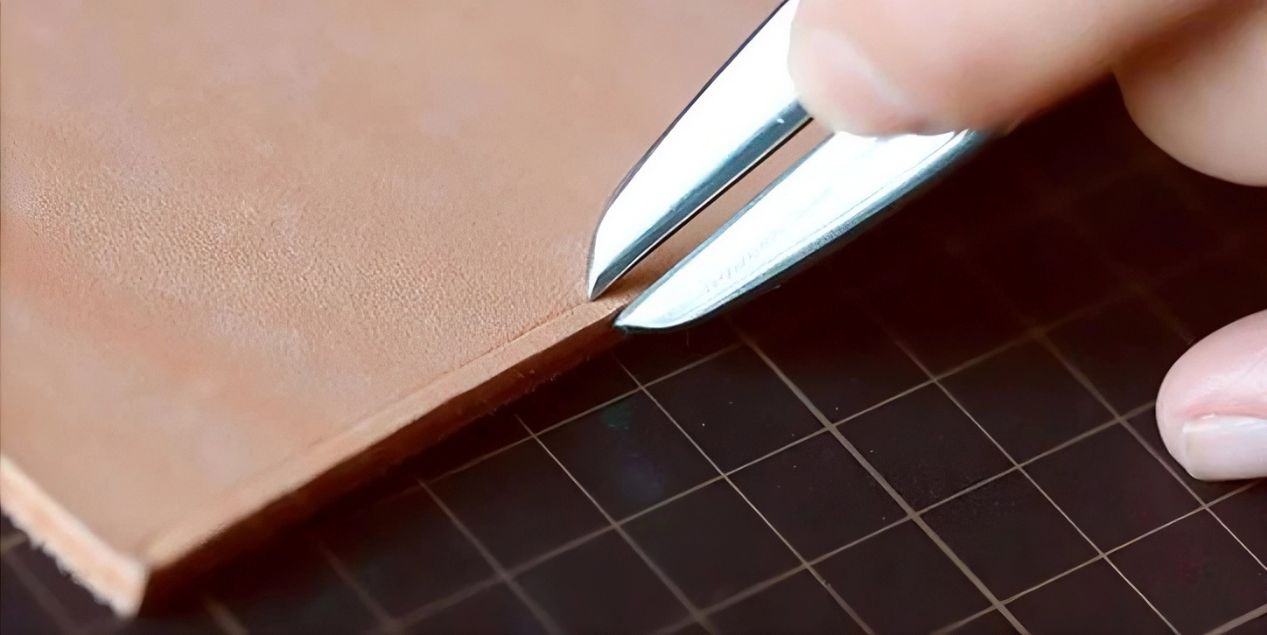
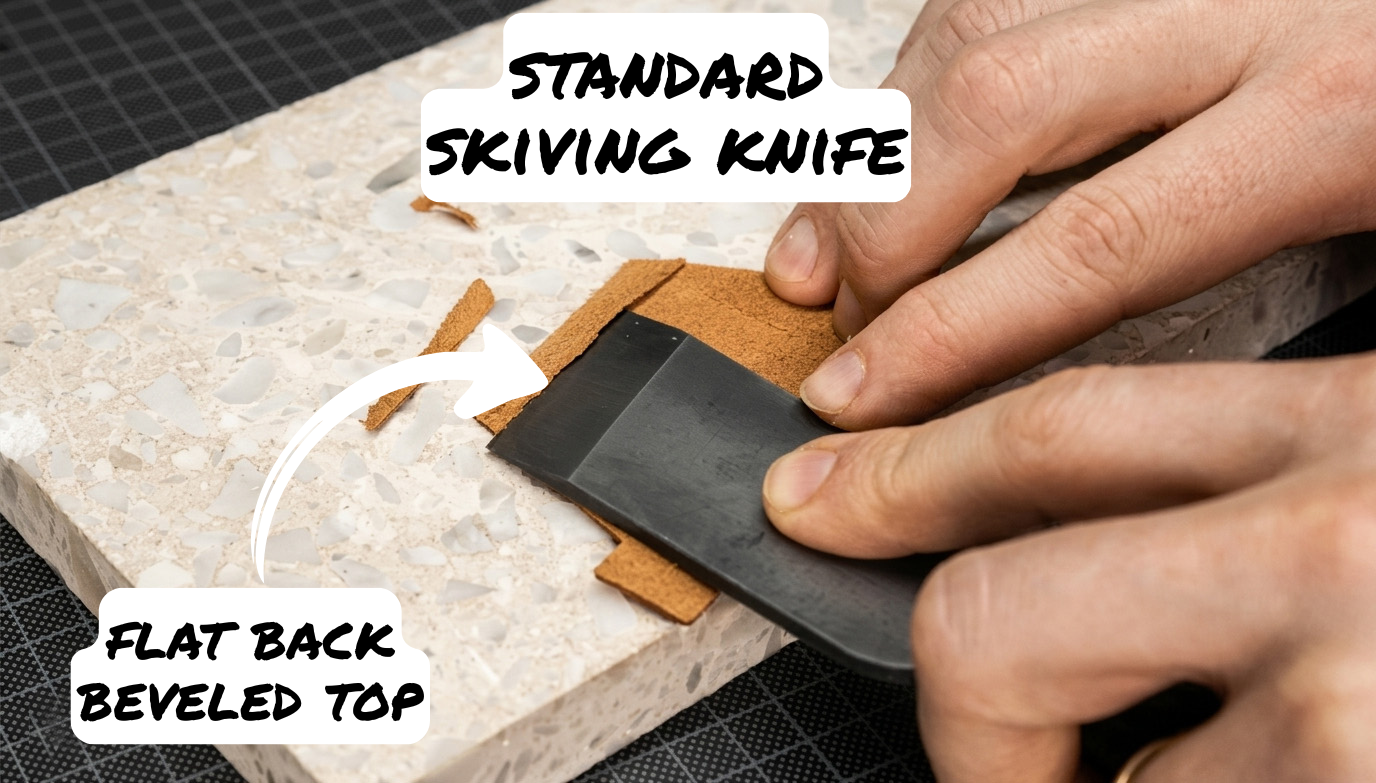
Standard Skiving Knife
The standard skiving knife comes in many different shapes and sizes but the key feature is the bevel on the blade. One side is beveled, the other is completely flat — that combination is what lets you control how much material you’re removing as you work across the leather. You’ll use it to thin out key areas like the t-slots and edges where layers stack up. It does require a little technique to get comfortable with but once it clicks it’s the most capable and versatile tool for wallet skiving work.
“French Style” Skiving Knife
The French style, usually called a French Edger, has a more aggressive blade profile and is a bit more of a brute force tool compared to the standard skiving knife. Less finesse, more push. Some crafters prefer it for edge skiving specifically. Worth trying if you can, but if you’re choosing between the two start with the standard.

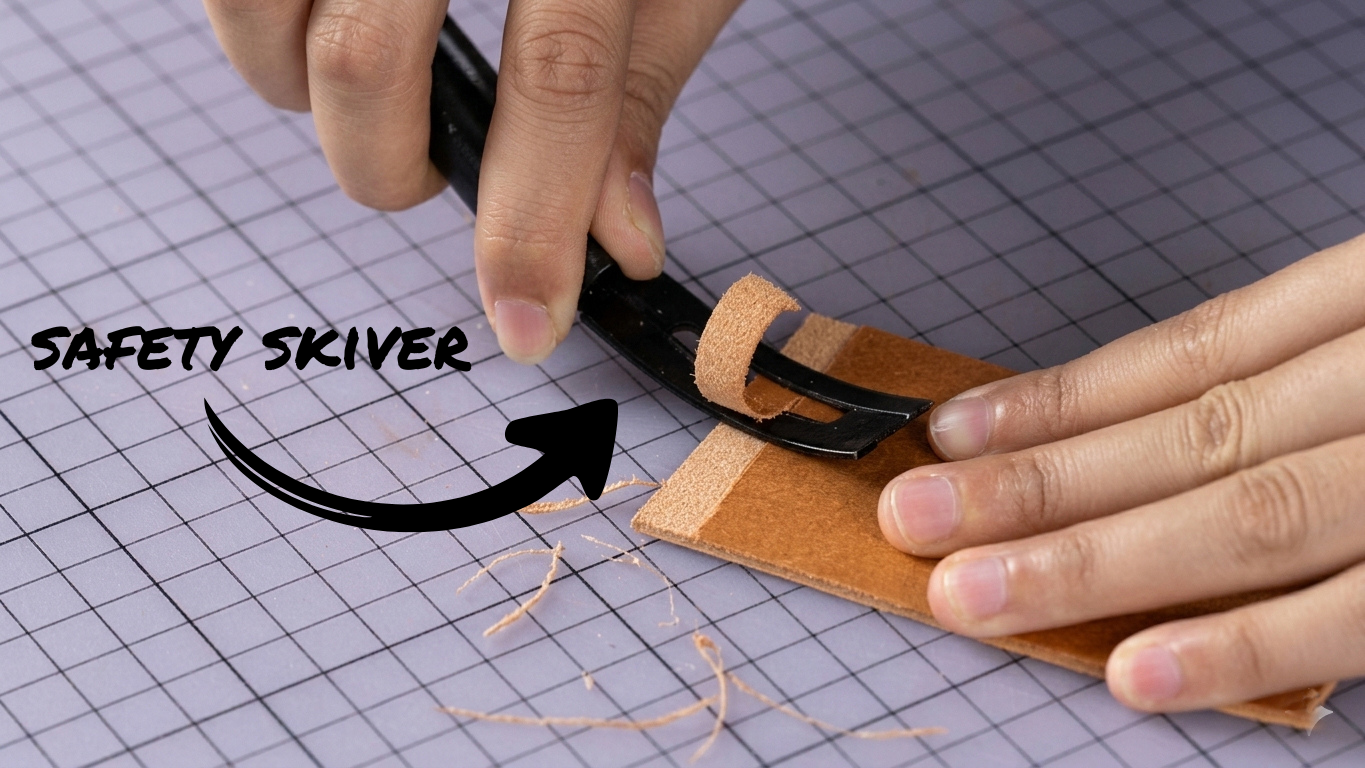
Safety Skiver
The safety skiver is a good beginner option. It has a replaceable blade cartridge and a built-in depth guide that limits how deep the blade can cut, which makes it much harder to accidentally take off too much material. It won’t give you the same control or versatility as a traditional skiving knife for detailed work, but if the idea of a freehand skiving knife feels intimidating this is a solid way to get started and build confidence before upgrading.
Products Mentioned | Link |
| ; | |
| ; | |
| ; |
Edge Finishing Tools
Edge finishing is the step that separates a wallet that looks handmade from one that looks hand-crafted. It’s worth doing right.
Sandpaper
Before edge finishing, you want your edges as smooth and even as possible. A few passes with sandpaper cleans up any unevenness from cutting and gets the edge fibers ready to burnish properly. Keep a few grits on hand — something in the 150-220 range to rough the edge up first, then 400 or higher to smooth it out before going on to the next steps.
Edge Beveler
Before you can smooth out your edges you need to bevel them first. An edge beveler removes the sharp 90 degree corner from the cut edge of your leather, giving it a slightly rounded profile that burnishes cleanly. They come in numbered sizes and the number corresponds to how much material the tool removes. For wallet weight leather, you’ll usually need #2 – #4. That said, pick up a set of sizes if you can. Different leathers and different thicknesses will call for different sizes and they’re inexpensive enough that a full set is worth having on the bench.
Burnisher and Tokonole
Once your edges are beveled you need to burnish them. Our recommendation for getting started is simple: Tokonole and a wood burnisher. Tokonole is a water based edge finish that conditions and seals the leather fibers when worked into the edge. Apply a small amount, let it start to dry, work it in with your wood burnisher using back and forth friction, and you’ll get a clean, smooth, professional edge. It’s easy to use, widely available, and works well on most vegetable tanned leathers.

Products Mentioned | Link |
| ; | |
| ; | |
| ; | |
| ; |
Conclusion
That’s the full list. Six categories, a handful of tools each, and you have everything you need to cut leather, mark your pattern, punch your holes, glue your pieces, manage your thickness, and finish your edges. A complete wallet from leather roll to finished product.
If you’re just starting out, don’t try to buy everything at once. Start with cutting tools, a pattern, stitching chisels, a mallet, needles and thread, and basic edge finishing. Everything else you can add as you go and as you figure out what kind of leathercraft you actually want to do.
When you’re ready to put these tools to work, grab one of our free leather wallet patterns and get started. Pick something simple for your first build — the techniques you learn on an easy pattern carry over to everything else you make.