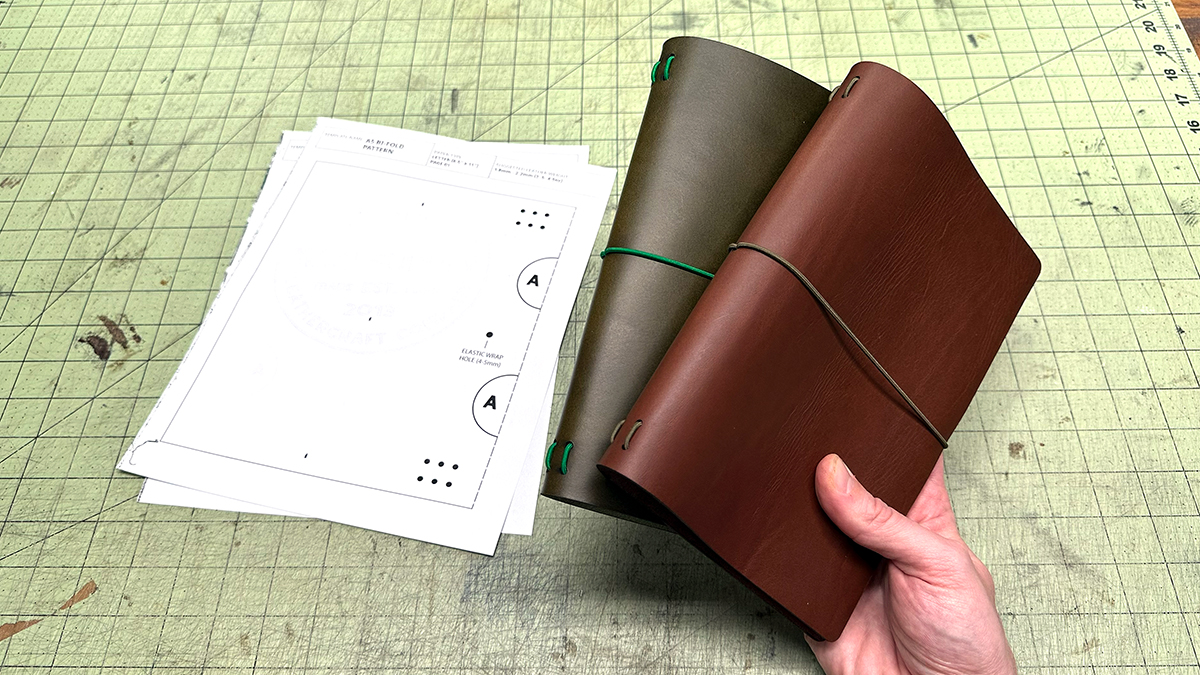
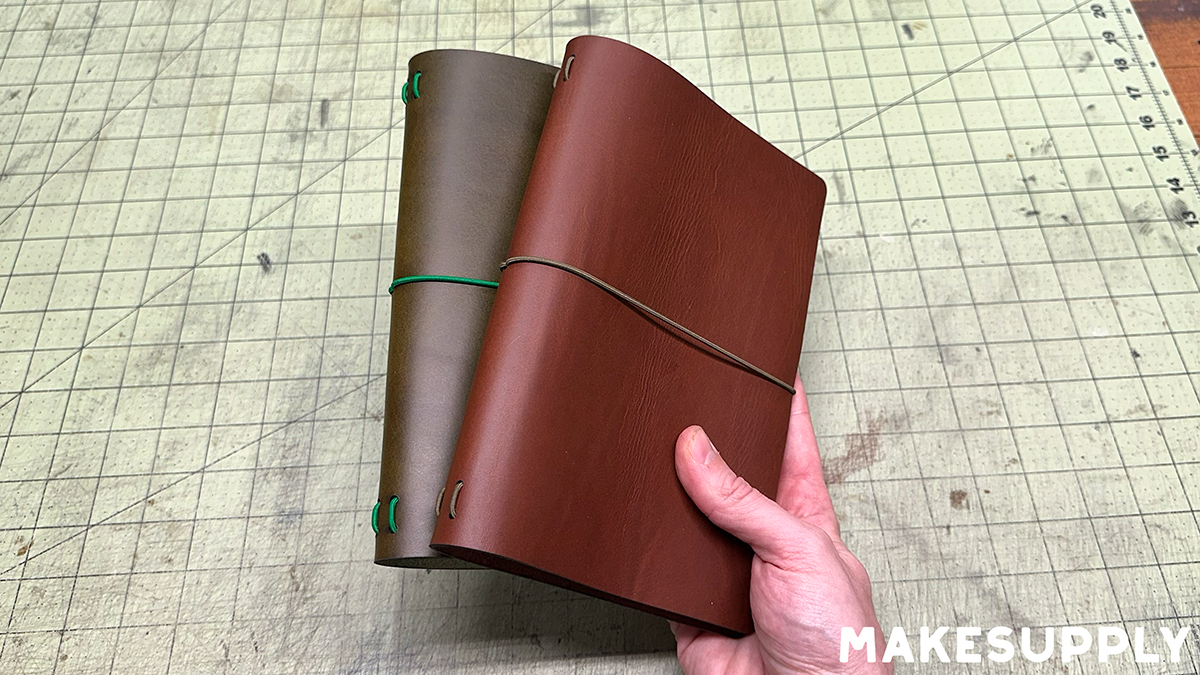
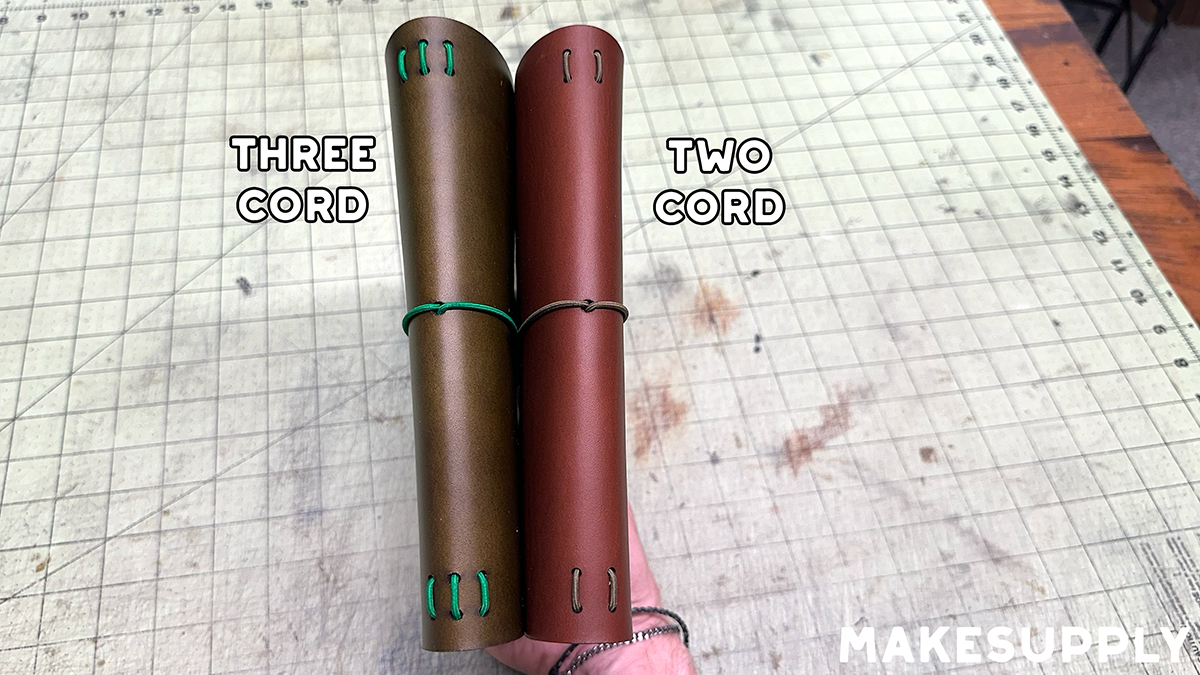
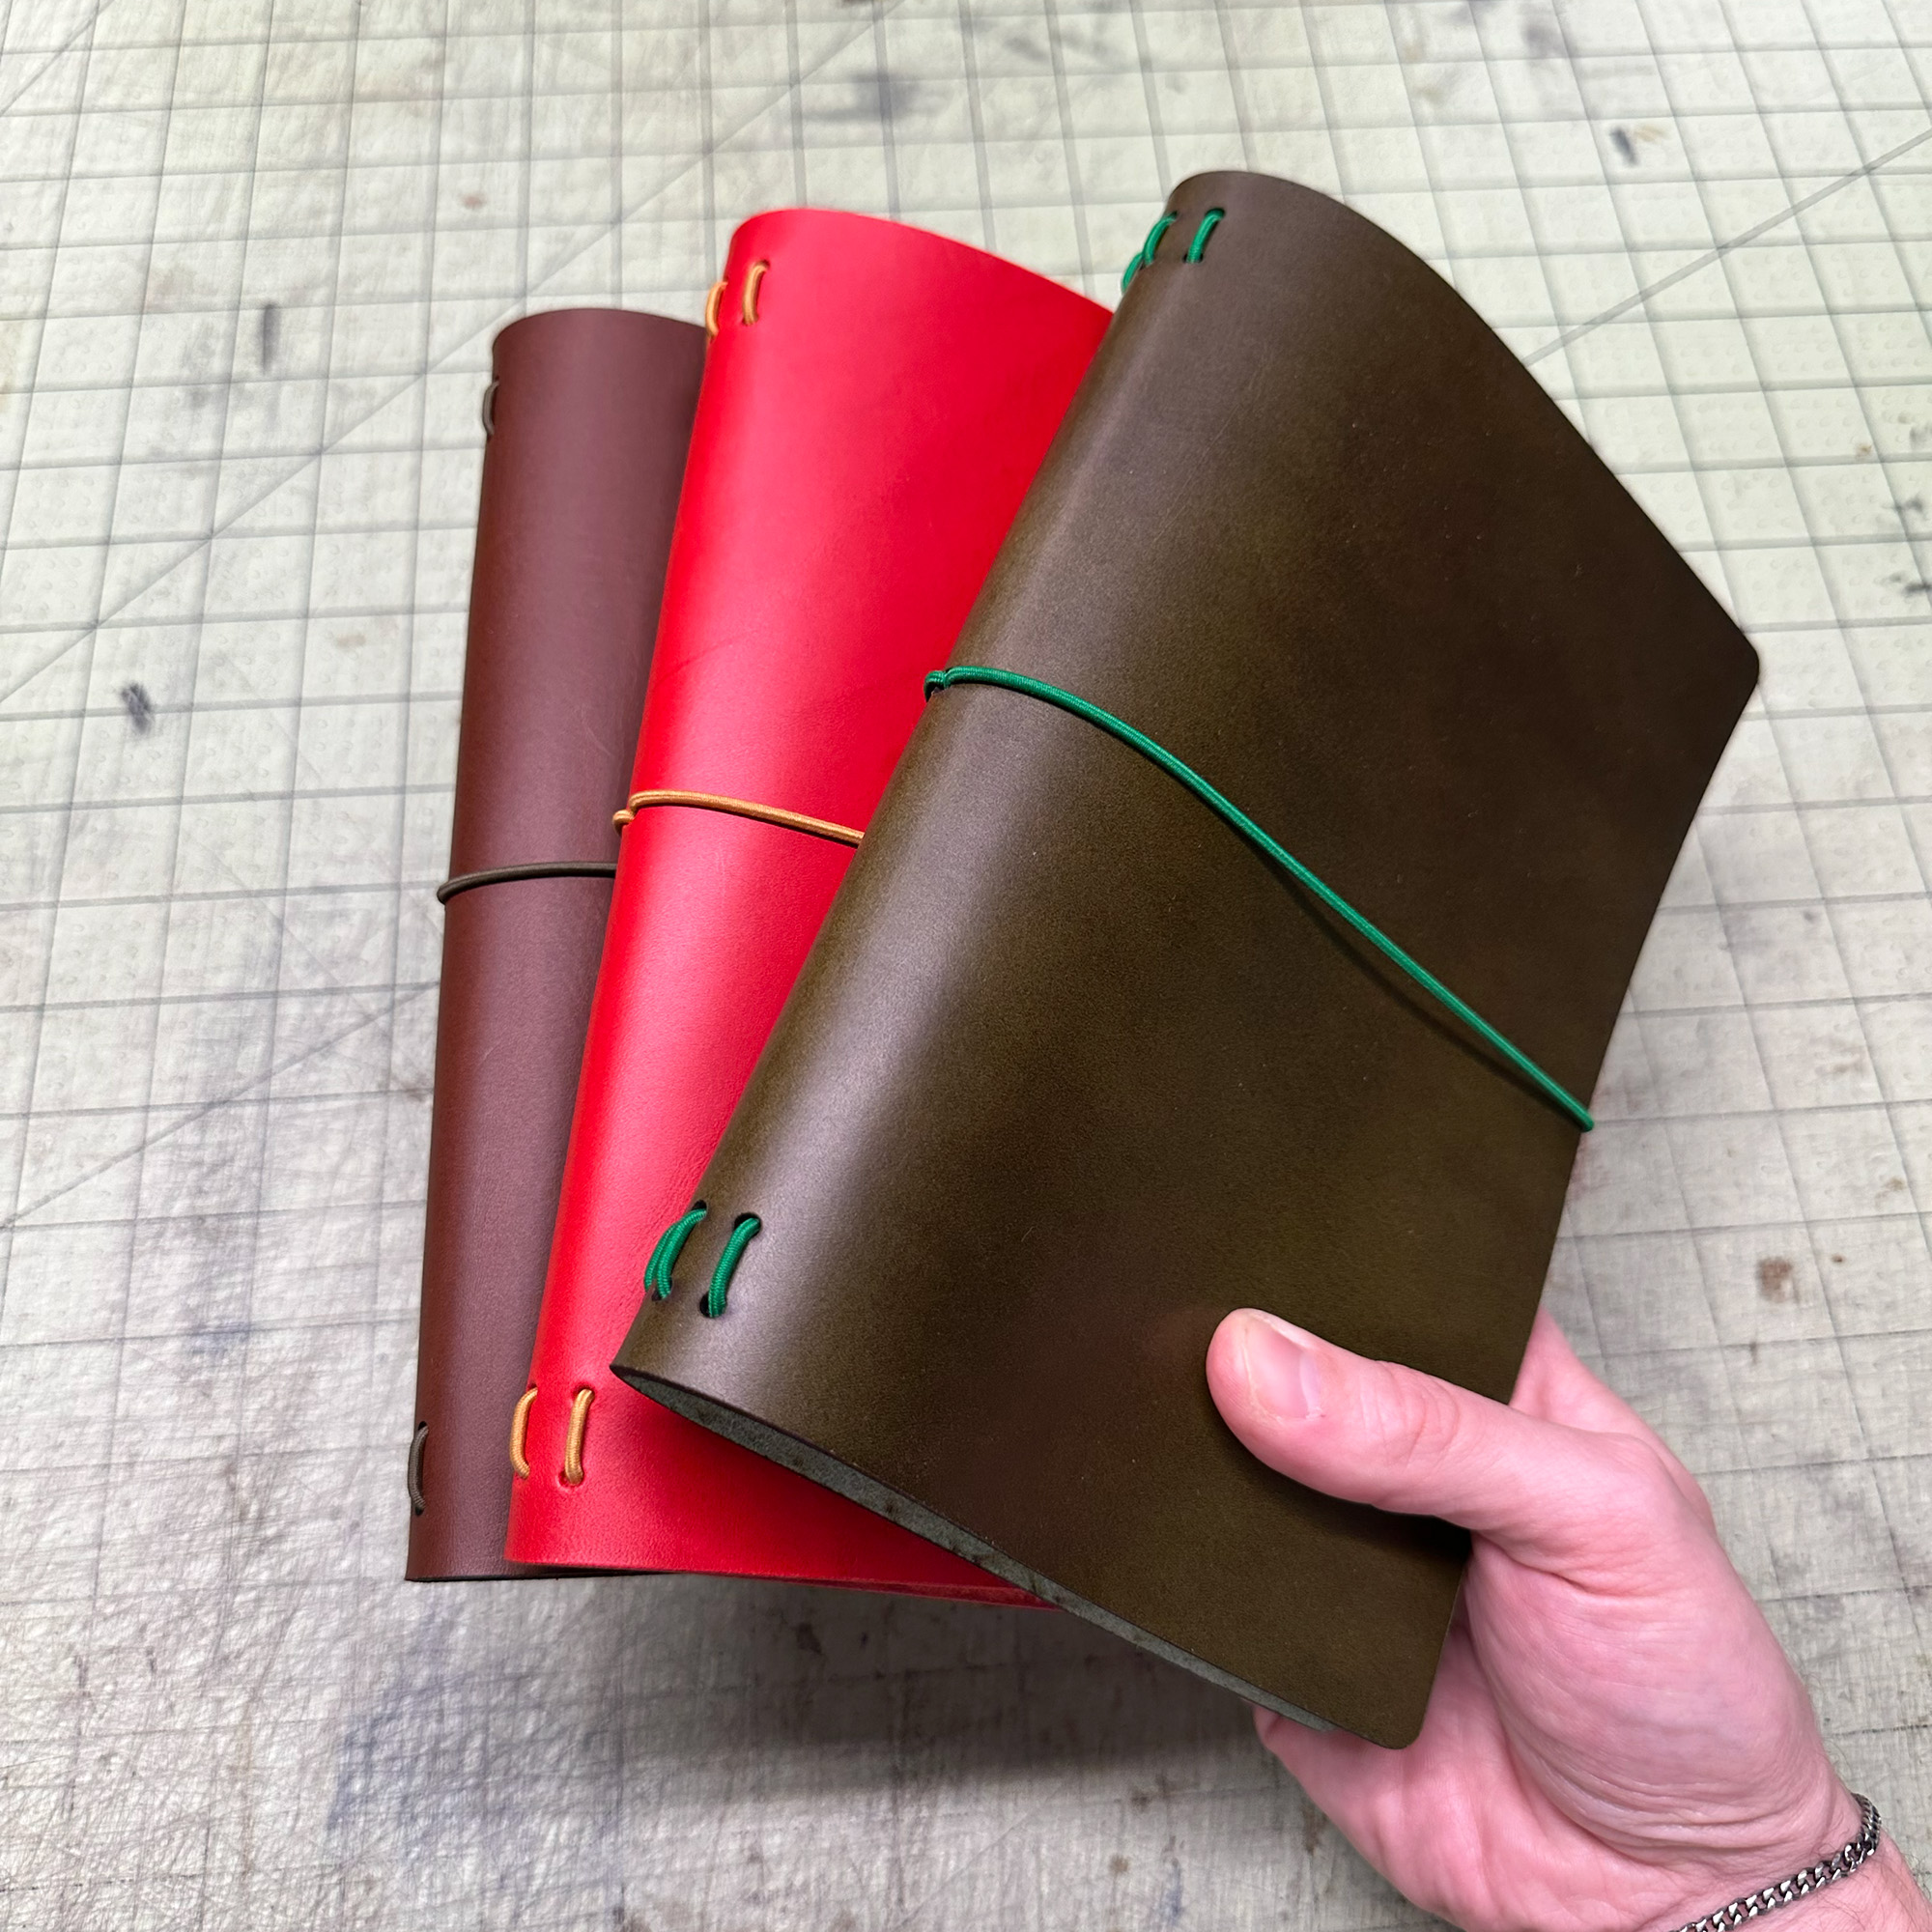
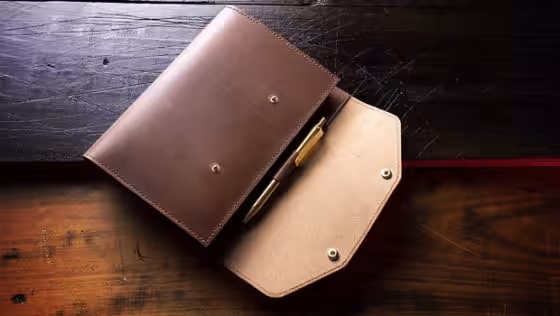
Download a free A5 bifold leather notebook cover pattern in print at home PDF format. This one shows you how to build a simple elastic notebook cover that holds multiple A5 inserts — no sewing, just leather and cord. It follows the classic traveler-style layout and comes with both 3-cord and 2-cord version. You can also make a 1-cord version based on the 3-cord template just using the center holes.
The pattern is sized specifically for standard A5 notebook inserts. Both square-corner and rounded-corner versions are included, and you get Letter and A4 print formats so it works with whatever paper you have on hand. Print it as many times as you need — just note the files aren’t editable.
Want to adapt this to a different notebook size? Check out our leather journal cover guide — it explains how to calculate your own panel dimensions from scratch.
If you’d prefer the editable source files, check out the Laser Ready / Source Files link below.
Note: Be sure to print at 100% scale for accurate sizing.
What You’re Making…

Template Options
This pattern is available in a few different formats depending on how you want to work. Grab the free PDF to print and cut at home, download the source files if you’re setting up a laser cutter, or pick up the acrylic template set if you want to skip the setup entirely.
⚡ Laser-Ready / Source Files
The laser-ready source files are for makers who don’t want to trace anything. SVG and formats included — perfectly scaled, clean cut paths, no setup guesswork. Drop them straight into LightBurn, Cricut Design Space, xTool Studio, or your preferred cutting software and go. If you’re customizing the design or adding engraving, these are the files you want.
🧩 Acrylic Template Set
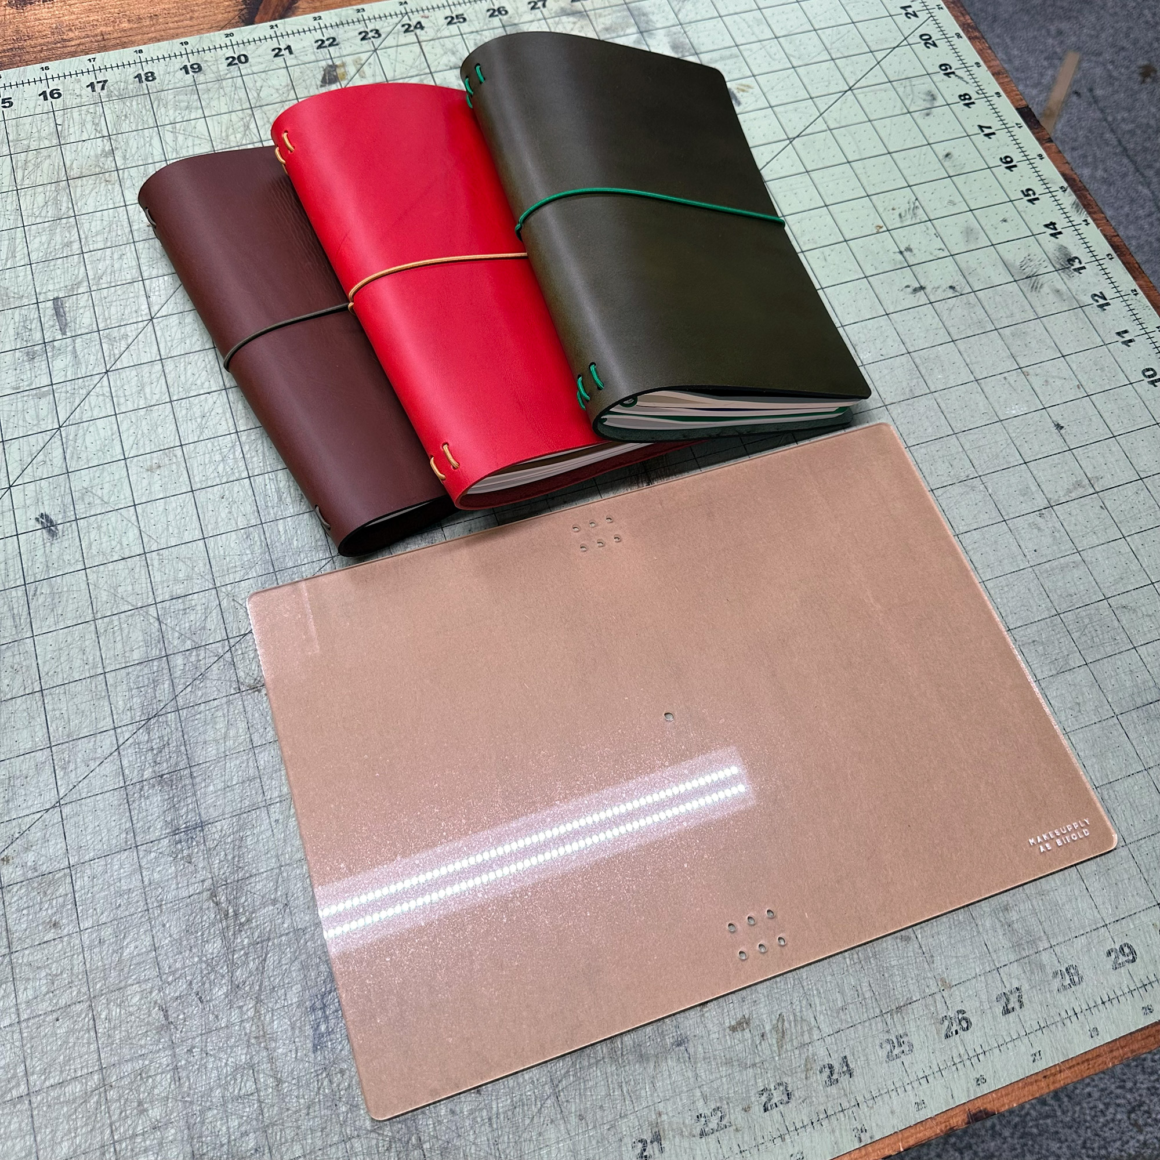
Paper patterns work fine for a single build. If you’re making multiples — for markets, commissions, or just because you like the project — the acrylic template is worth it. Precision-cut and built to last, the templates speed up layout and cutting while keeping every piece consistent. They won’t stretch, tear, or wear out, no matter how many times you reach for them.
🧩 FREE Print-Ready PDF Download!
Free A5 Bifold Notebook Cover PDF Patterns - 3.06 MB
Looking for the tri-fold version of this pattern?
Usage Note: You are free to use this design to create and even sell the end product. However, you cannot redistribute this template in any form.
If you need any general assistance with how our patterns work, check out our How To Use MAKESUPPLY Leather Templates Guide!
👇 Get notified when new free templates drop! 👇
Looking for more A5 Cover Patterns?
Free A5 Hardcover Leather Journal Cover Pattern
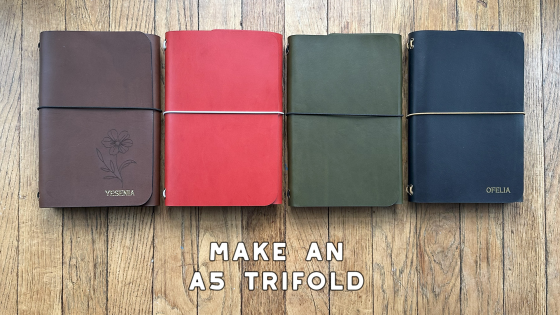
A5 Trifold Leather Journal Cover – Free PDF Template + Build-Along Video
A5 Leather Notebook Cover Pattern (Free PDF Template)
Video Instructions
PDF Pattern Assembly Instructions
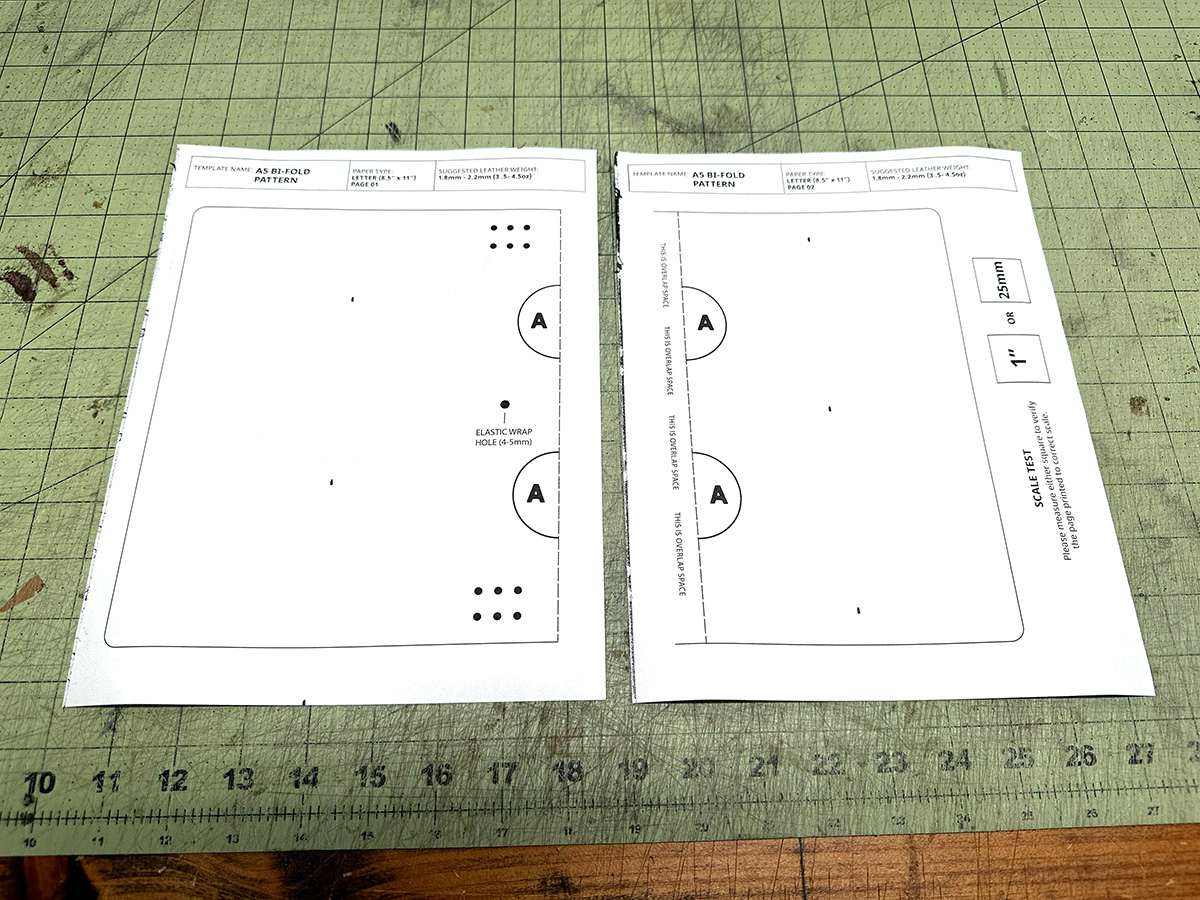
This pattern a bit too big for a single sheet of paper, so it needs to print on 2 pages and be assembled. Super easy—here’s how:
Step 1 – Print Your PDF
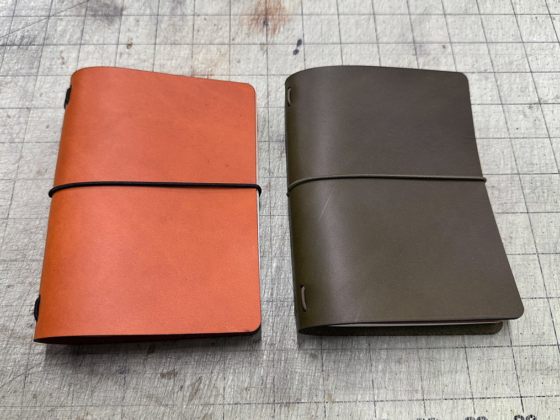
This pattern comes with several options. First – decide whether you want to do the three-cord version or the two-cord version. After that, you must choose whether you want the default rounded corners or square corners. Select the square corners if you plan on rounding your own corners later in the process.
The PDF will be two pages. Print out the file, and before you do anything, complete the Scale Test to verify the correct size. If your Scale Test is wrong, double check your printer settings and make sure scale is set to 100% and auto-scaling is turned off.
Step 2 – Cut Along The Dashed Line
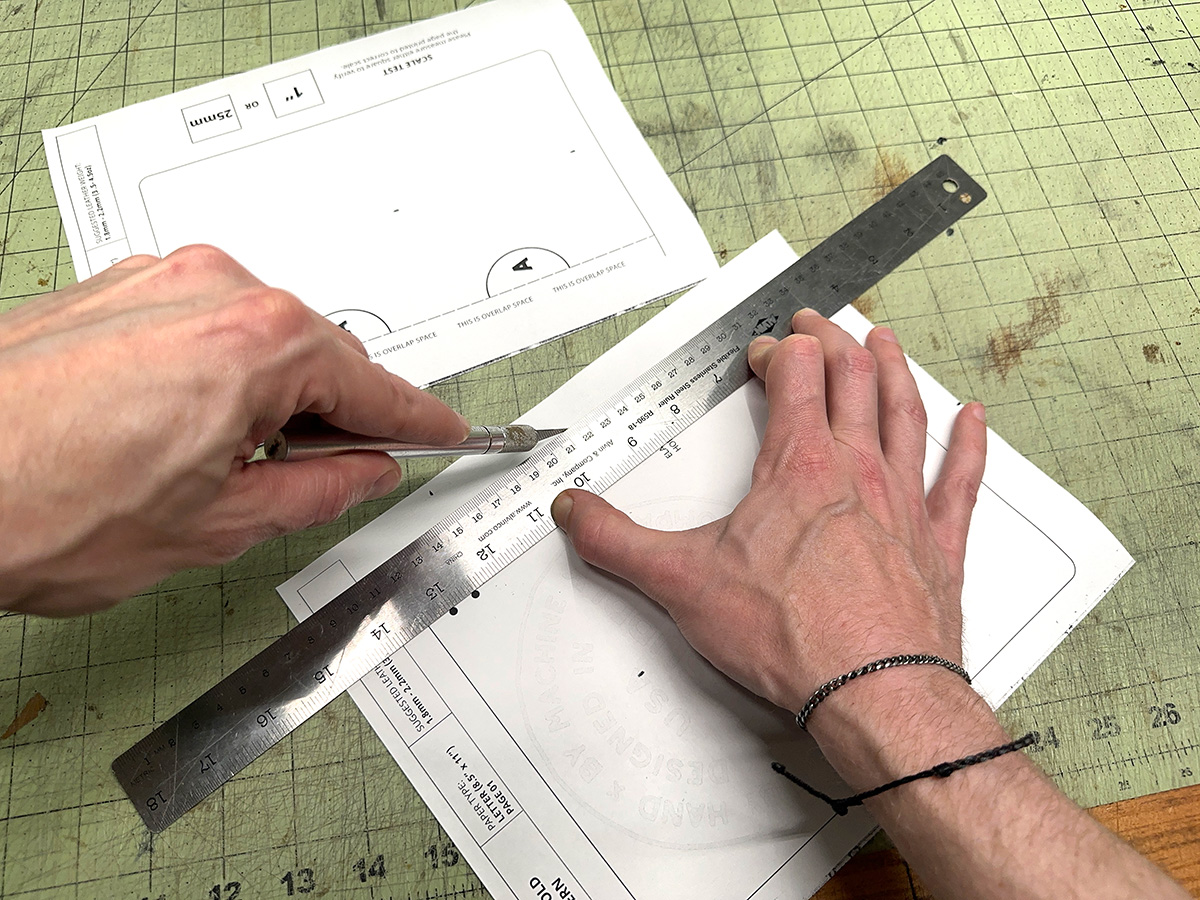
On Page One, cut along dashed line. I recommend using an X-acto Knife and ruler for this process but scissors will work too.
Step 3 – Attach The Pieces
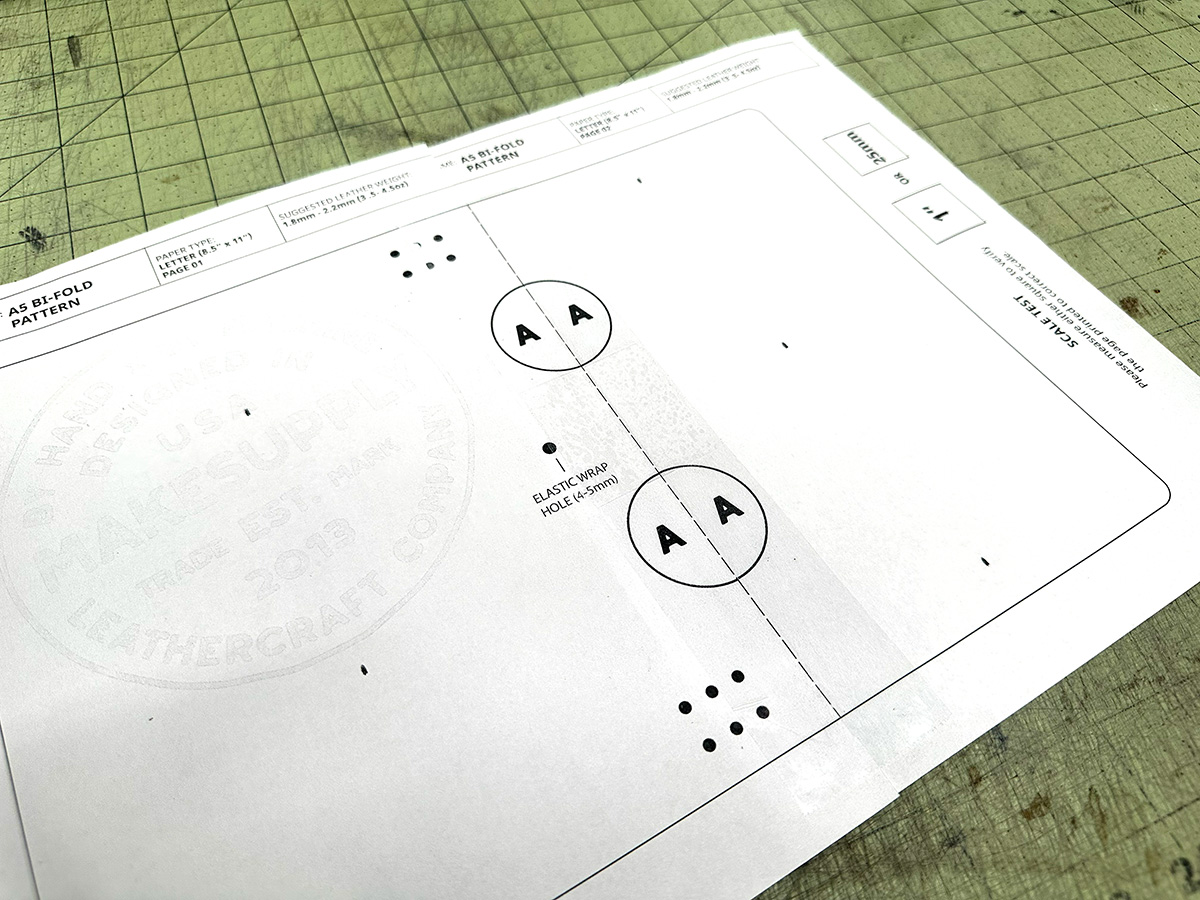
Take Page One and lay it on top of Page Two in the overlap space and line it up. Use the A | A alignment markers to make sure everything is straight. I recommend using a glue stick in the overlap space before placing the page down to hold it in place. Once you are aligned, tape across the seam.
Step 4 – Cut it Out!
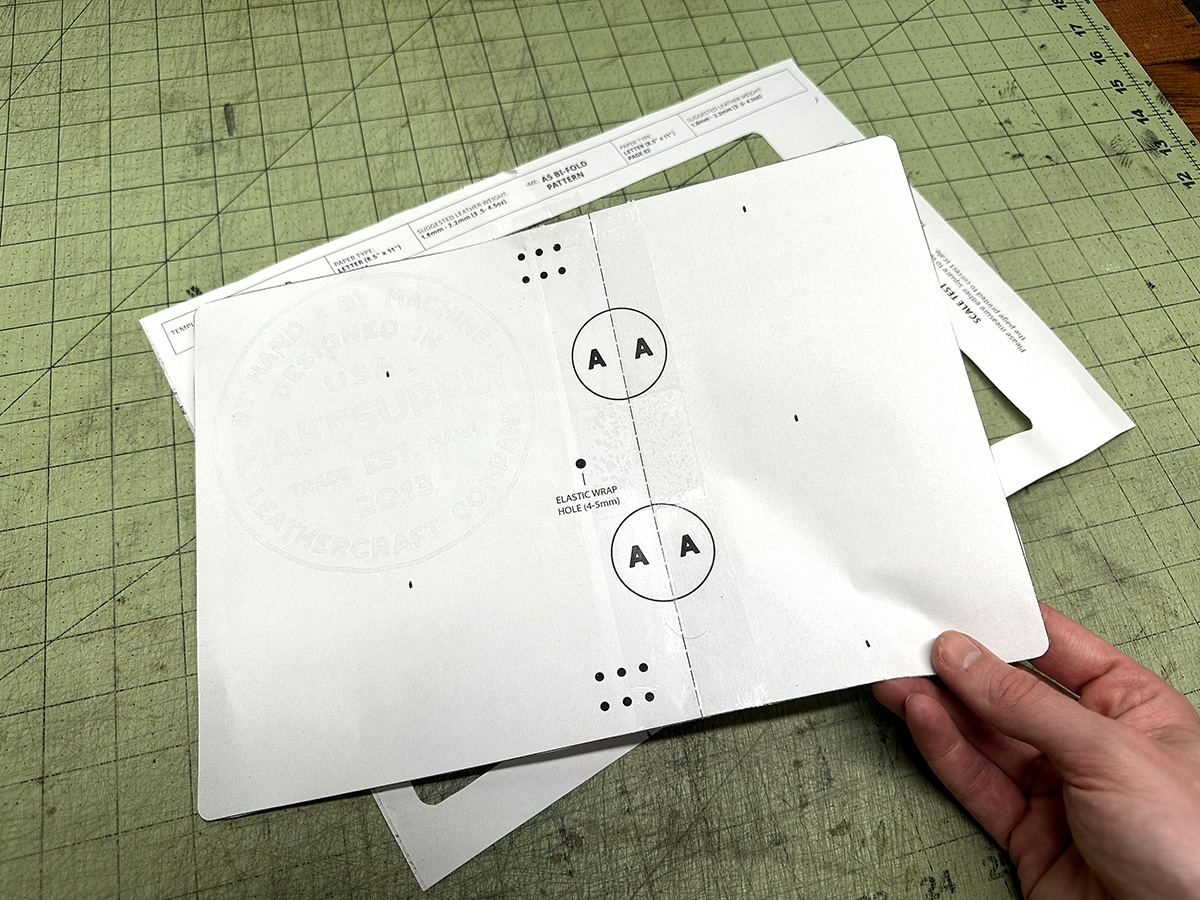
Cut out around the perimeter of the pattern. If you printed on regular printer paper, I highly recommend gluing/taping it down to a firmer backing like a manila folder, posterboard, or cardboard. Cereal boxes work great. Your pattern is ready for use!
Project Inventory
Product | Description | Link |
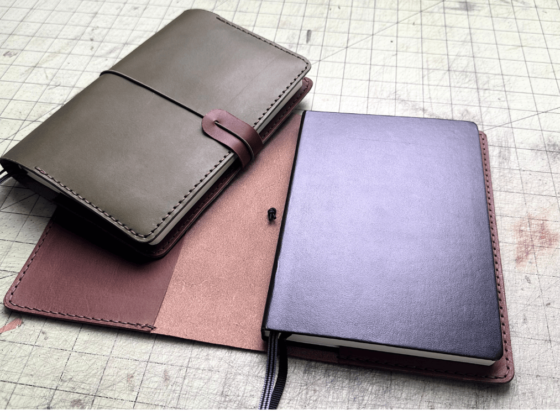
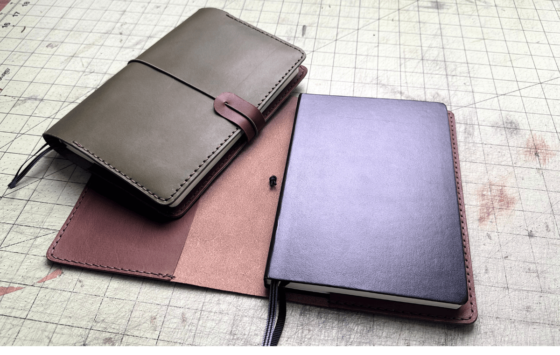
Fits (3) standard A5 “traveler” style notebooks by default, but more can be added. | ; | |
Protect your tools and work table | ; | |
Non-slip hammer head for punching holes and setting rivets | ; | |
Solid surface for setting eyelets (optional) | ; | |
Protects hole punches from damage | ; | |
For melting the ends of the frayed elastic cord | ; | |
Fast and reliable source, but limited color options | ; | |
2mm Elastic Cord (Option #2) | High quality cord with nice color options | ; |
High quality cord, great colors, thinner profile. | ; | |
Recommend having 1.5 – 4mm sizes to use. | ; | |
Leather thickness gauge to…. gauge the thickness of the leather 🙂 | ; | |
For tracing the pattern shape on the leather surface | ; | |
Excellent cutting knife for light to medium weight leather | ; | |
Edge Beveler | To bevel the edges of the journal (optional) | ; |
Used to burnish the beveled edges (optional) | ; | |
Used to burnish the beveled edges (optional) | ; |
Leather Selection
When making this notebook cover, you can use a wide range of leathers—but the two things that matter most are thickness and temper.
For thickness, I recommend around 1.8-2.2mm (about 4–4.5 oz). It’s a great all-around weight for covers like this. You can go a bit thinner or thicker, but I wouldn’t push much past about 2.4mm, since it starts to feel bulky.
Next is temper. Aim for at least a medium to medium-firm leather. Firmer leathers hold their shape better and stand up to the elastic over time, so it’s best to avoid very soft leathers like goatskin, sheepskin, or upholstery-style hides.
If you’re going for a Louise Carmen or Paper Republic–type look, stick with vegetable-tanned leather—especially Italian “vachetta” from tanneries like La Bretagna, Conceria Walpier, or Badalassi Carlo. In my photo and video, I use Buttero (Conceria Walpier). If you search for those leathers, you’ll usually find suppliers near you—or you can order directly from Italy through Buy Leather Online.
Here are a couple of options available from Amazon that we would consider suitable for this project:
Hardware and Elastic Selection
This design is best made with either 1.5mm or 2mm elastic cord. If you want a “daintier” look, go with the 1.5mm elastic. The only issue I’ve found is that the diameter is a bit more challenging to source. There is a link in the inventory section to an Etsy shop that offers great color options in 1.5mm. 2mm elastic is slightly heavier but much easier to find on Amazon, craft stores, and other retailers.
Choose a hole punch size that matches the diameter of the elastic cord you’re using:
- 1.5mm cord = 1.5mm / 2mm / 2.5mm hole punch
- 2mm cord = 2mm / 2.5mm / or 3mm hole punch.
Frequently Asked Questions (FAQs)
What style of notebook is this pattern designed for?
This pattern set is made for “travel-style” leather notebook covers that use elastic bands—popular for refillable journals with removable inserts. The layout follows the classic traveler notebook system, where elastic cords secure multiple inserts inside a single cover.
Is this compatible with Traveler’s Notebook or Midori inserts?
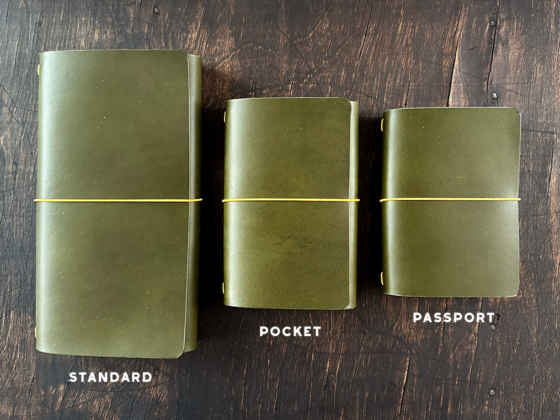
Traveler’s Company (formerly Midori) uses their own proprietary notebook sizes, such as Standard and Passport, which are slightly different from A5. This pattern is designed for A5 notebook inserts 8.15″L x 5.5″W (207mm × 140mm) rather than Traveler’s Company inserts.
However, the construction follows the same traveler-style elastic notebook system, so if you’re familiar with Traveler’s Notebooks, the concept will feel very similar. Simply use thin A5 notebook refills instead of the proprietary Traveler’s Company sizes.
Is this a free download?
Yes. The printable PDF patterns on this page are free to download and can be printed as many times as needed for personal projects.
Are the PDF files editable?
No. The free PDF files are intended for printing only and are not editable. If you need files that can be modified or resized, please see the Laser-Ready / Source files link below the free PDF download button. Those files are freely editable and perfect for sending to a die maker or laser cutting.
What experience level is this project suited for?
This is a very beginner-friendly build. There’s no sewing—just cutting the leather and punching a few holes. If you follow the build-along video, you should be able to knock this one out without any trouble.
What leather is best for this design?
Vegetable-tanned leather is the best choice for this style, especially leathers with a medium to firm temper that hold their shape when folded. Try to avoid very soft or “floppy” leathers like sheepskin, goatskin, deer, and most upholstery leathers. You’ll find specific recommendations in the leather selection section above.
Can I sell what I make using this pattern?
Yes — anything you make using this pattern is yours to sell under your own brand. The only restriction is on the pattern itself, which cannot be resold or redistributed in any form.
Guidelines of Template Usage
We put a lot of time and effort into producing these templates, videos, and blog posts. Please do not distribute the template you have purchased from Makesupply. It’s not cool and hurts our feelings (CRY EMOJI). However, you are free to do whatever you want with the end product you create using the template.