This roper style long wallet pattern is a classic western-inspired leather project designed for makers who want a clean, functional long wallet with a traditional profile. This download includes a free printable PDF template along with a full build-along video tutorial showing the complete construction process.
Roper wallets are known for their slim silhouette, long bill pocket, and simple interior layout, making them a popular choice for everyday carry and rodeo-style wallets. This pattern works well for hand stitching or machine sewing and can be built using vegetable-tanned or chrome-tanned leather.
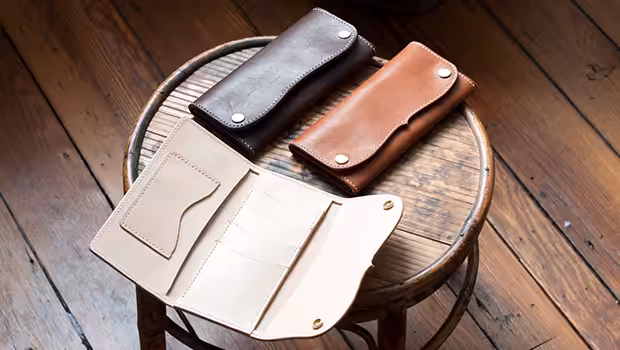
Finished Roper Wallet Examples


Template Options
You will have two design options to choose from when constructing your Roper Wallet: The classic and the “western peak”. Check out the finished photos above to see an example of both.
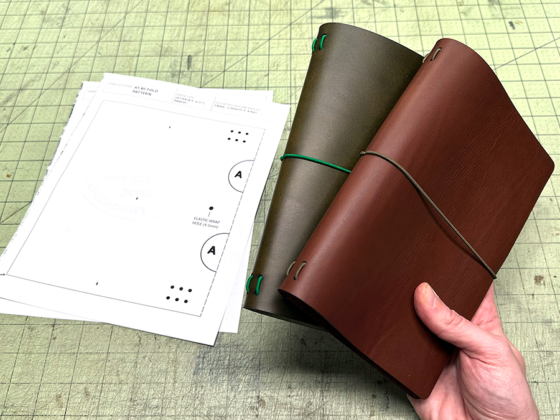
⬇️ DOWNLOAD FREE PDF PATTERNFree Roper Wallet Pattern PDF - 48.00 KB
Usage Note: You are free to use this wallet design to create and even sell the end product. However, you cannot redistribute this template in any form.
👇 Get notified when new free templates drop! 👇
Roper Wallet Instructions (Video)
This build along video is a little bit old, but the process is the same. We are currently working on a revamped video instruction for this pattern.

Inventory of Tools
- Wood Slicker
- Dremel Rotary Tool
- Dremel Cocobolo bit
- C.S. Osborne Rotary Punch
- Ron’s Tools Round Edge Beveler (#2)
- Japanese Leather Knife
- 15″ Cork Back Metal Ruler
- Amy Roke Linen Thread (532)
- Fiebing’s Leathercraft Cement
- Various Grit Sandpaper (120 grit and 240 grit)
- Rubber Mallet
- Block of Leathercraft Wax
- Solid Brass Line 30 Snaps (Long and Short Post)
- Binder clips
- Cup of water
Leather Selection Suggestions
In this video we used 3oz natural vegetable tanned leather sourced from Wickett & Craig. If you are just looking to purchase a smaller amount of something similar for this project I suggest looking for a 24″x12″ project panel or shoulder from Springfield Leather or other leather supplier. The template is larger than 12″ so a 12″x12″ project panel wont be enough. If you are outside of the USA I’m not as privy on suppliers. However you could try one of these natural veg tan sides from A & A Crack & Sons. They have an awesome selection of leathers available to ship worldwide.
For this wallet I would suggest anywhere from 3oz tp 5oz. The thicker leather will work OK for the panels but will get bulky when creating the stacked card slots. Make sure to skive if using a thick leather. A great all around weight would be 3oz.
If you are not using a vegetable tanned leather to create this roper wallet your edge finishing guidelines will probably be different. Chrome-tanned leathers and extremely soft leathers like sheepskin are difficult and sometimes impossible to burnish by hand. If you would like to follow this tutorial to spec, we would suggest acquiring a burnish-able vegetable tanned leather.
Guidelines of Template Usage
We put a lot of time and effort into producing these templates, videos, and blog posts. Please do not distribute the template you have purchased from Makesupply. It’s not cool and hurts our feelings. However, you are free to do whatever you want with the end product you create using the template design. Even sell them on Etsy!


7 comments
Justin, I just reviewed your latest video and it is super, as usual! I just completed a similar roper’s wallet for a customer, and sadly I used an interior from Springfield Leather. The interior was fine quality, made by them from Hermann Oak, but I would have been happier today create your design. I will be making another wallet using this design, and I am sure that it will be a hit ! Thanks for your time, and I look forward to seeing the next Makesupply video!
OK, from what I’ve seen, you’re sporting a fairly substantial beard and head of hair…also, I noticed the girlfriend playing music in the background…
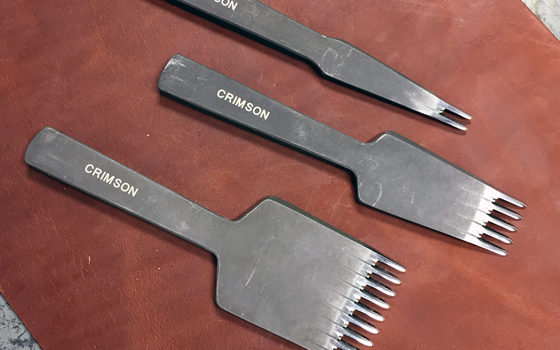
I went ahead and ordered the Crimson pricking irons, I will let you know what I think. Looks like you’re a believer.
Hope all is well, I will be making the roper’s wallet soon. Again, thank you for your expertise and the free pattern. If this wallet proves popular, I will be ordering the acrylics soon. Have a great week!
Hahaha thanks Ron. Pretty weak beard game but do have substantial a head of hair. Getting into my mid-30s Ill take what I can get haha.
Let me know how you like the irons they are quality tools!
Hey Justin, I may have missed it, but why have you switched to the leathercraft cement replacing the rubber cement? I’m still using the contact cement, but am always looking for the best way to complete my projects. Your input is greatly appreciated!
Hey Ron!
Whenever it was colder in my workshop the rubber cement would get gummy and hard to work with. Decided to try a new things and since started liking the Fiebings leathercraft glue. Dries quickly and not messy. Will stick with it for a little while maybe until something new comes along haha.
Thanks for the info…I might have to give it a try ! Always looking to improve also.
BTW, I received the Crimson pricking irons and am really pleased with them. Super quality and performance. I opted for the 4mm size, 2 and 5 prong. I might have to get another set…it’s going to be hard to return to the Craftool punches. Thanks for your time!
Grandioso video
Comments are closed.