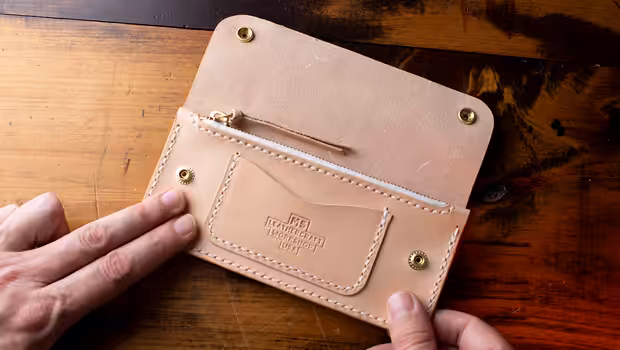
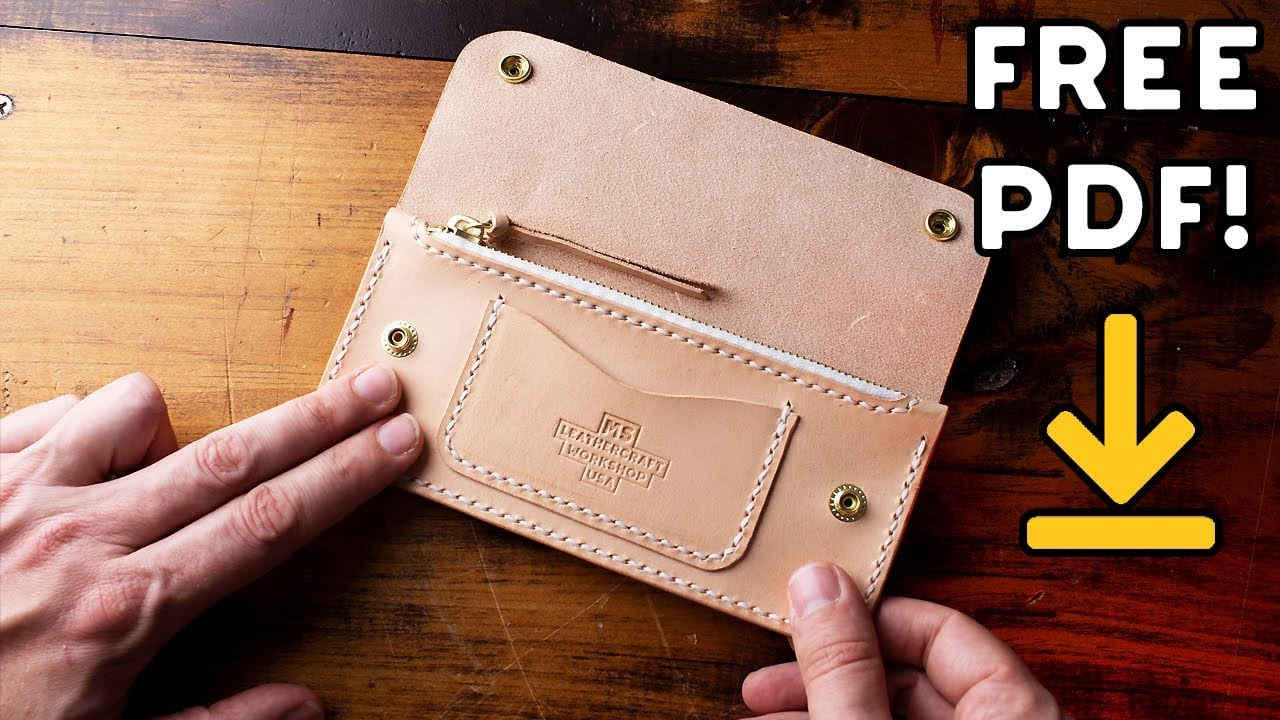
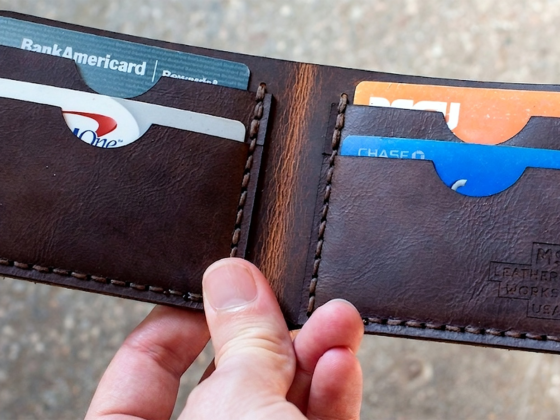
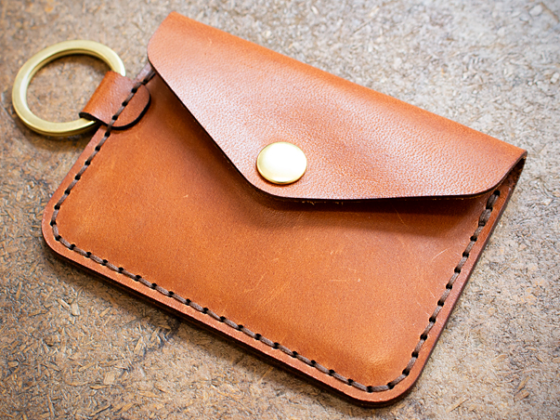
“Free leather trucker wallet pattern — download the printable PDF below and start cutting today. This classic long wallet design works for everyday carry, gifts, or building your leathercraft portfolio.
The construction is hand cut and hand stitched with a snap closure that finishes the look cleanly. Card slots, bill compartment, and a profile that ages beautifully in full grain leather. Beginner friendly but finished results that don’t look like a first project. Follow along with the full build video below.
Template Options
⬇️ DOWNLOAD FREE PDF PATTERNFree Trucker Wallet PDF - 813.29 KB
- Source / “Laser Ready” Files – Trucker Wallet No. 1
- Acrylic Template Set – Trucker Wallet No. 1 Acrylic
Usage Note: You may use this design to create and sell the end product. However, you cannot redistribute this template in any form.
👇 Get notified when new free templates drop! 👇
Video
Inventory of Tools
- 36″ x 24″ Self Healing Cutting Mat
- 110-Lb Card Stock Paper
- No.2 X-ACTO Knife
- Wood Slicker
- Leathercraft Glue
- Wing Divider
- C.S. Osborne Scratch Awl
- Seiwa 5mm Diamond Stitching Chisels (6 prong and 2 prong)
- John James Stitching Needles
- Generic Sandpaper – 320 grit
- Ritza Tiger Thread – .8mm (White)
- Tokonole Burnishing Gum
- Seiwa Edge Beveler (#1)
- Barry King Maul (24 oz)
- Punching Slab
- Rotary Punch
- Line 20 Snaps
- Line 20 Snap Setter Dies
- BG Hand Press
- RiRi Metal 6 Zipper Chain (brass teeth / white tape)
- RiRi Metal 6 Anello Zipper Pull
- RiRi Metal 6 Bottom Stop
- RiRi Metal 6 Top Stops
Build Instructions
Below are some instructions for putting together this template. We will be solely focusing on the build steps and no detail work (sanding, edge finishing, etc). This template set assumes some knowledge of Leathercraft skills such as saddlestitching, snap setting, and zipper setup. If you need assistance with any of those techniques please do a search on Youtube and you will find many helpful videos.
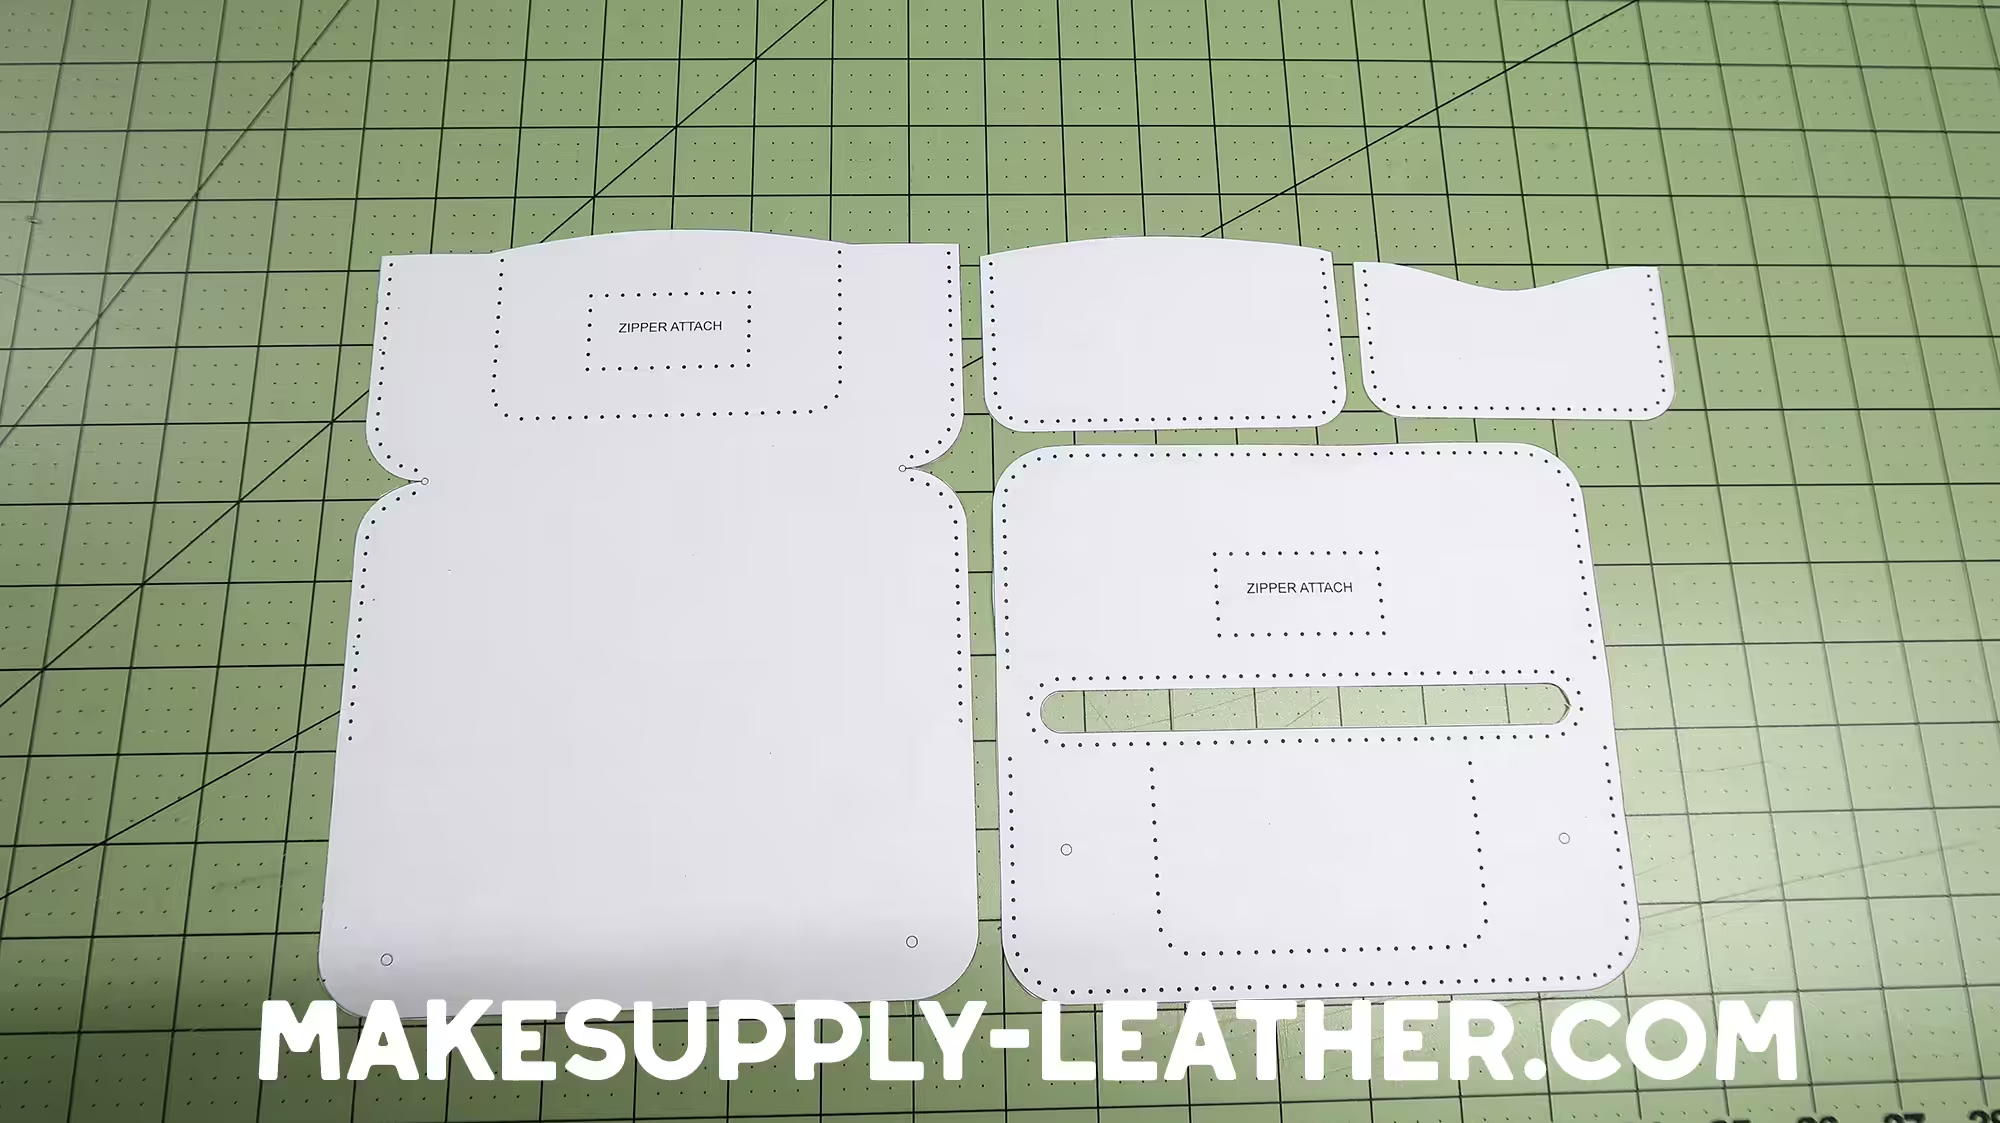
1. Print PDF Template Set
We suggest printing your (4) page PDF template set on the heaviest cardstock paper your printer can handle. We use 110lbs. PLEASE make sure the print scale is 100%. This is very important.
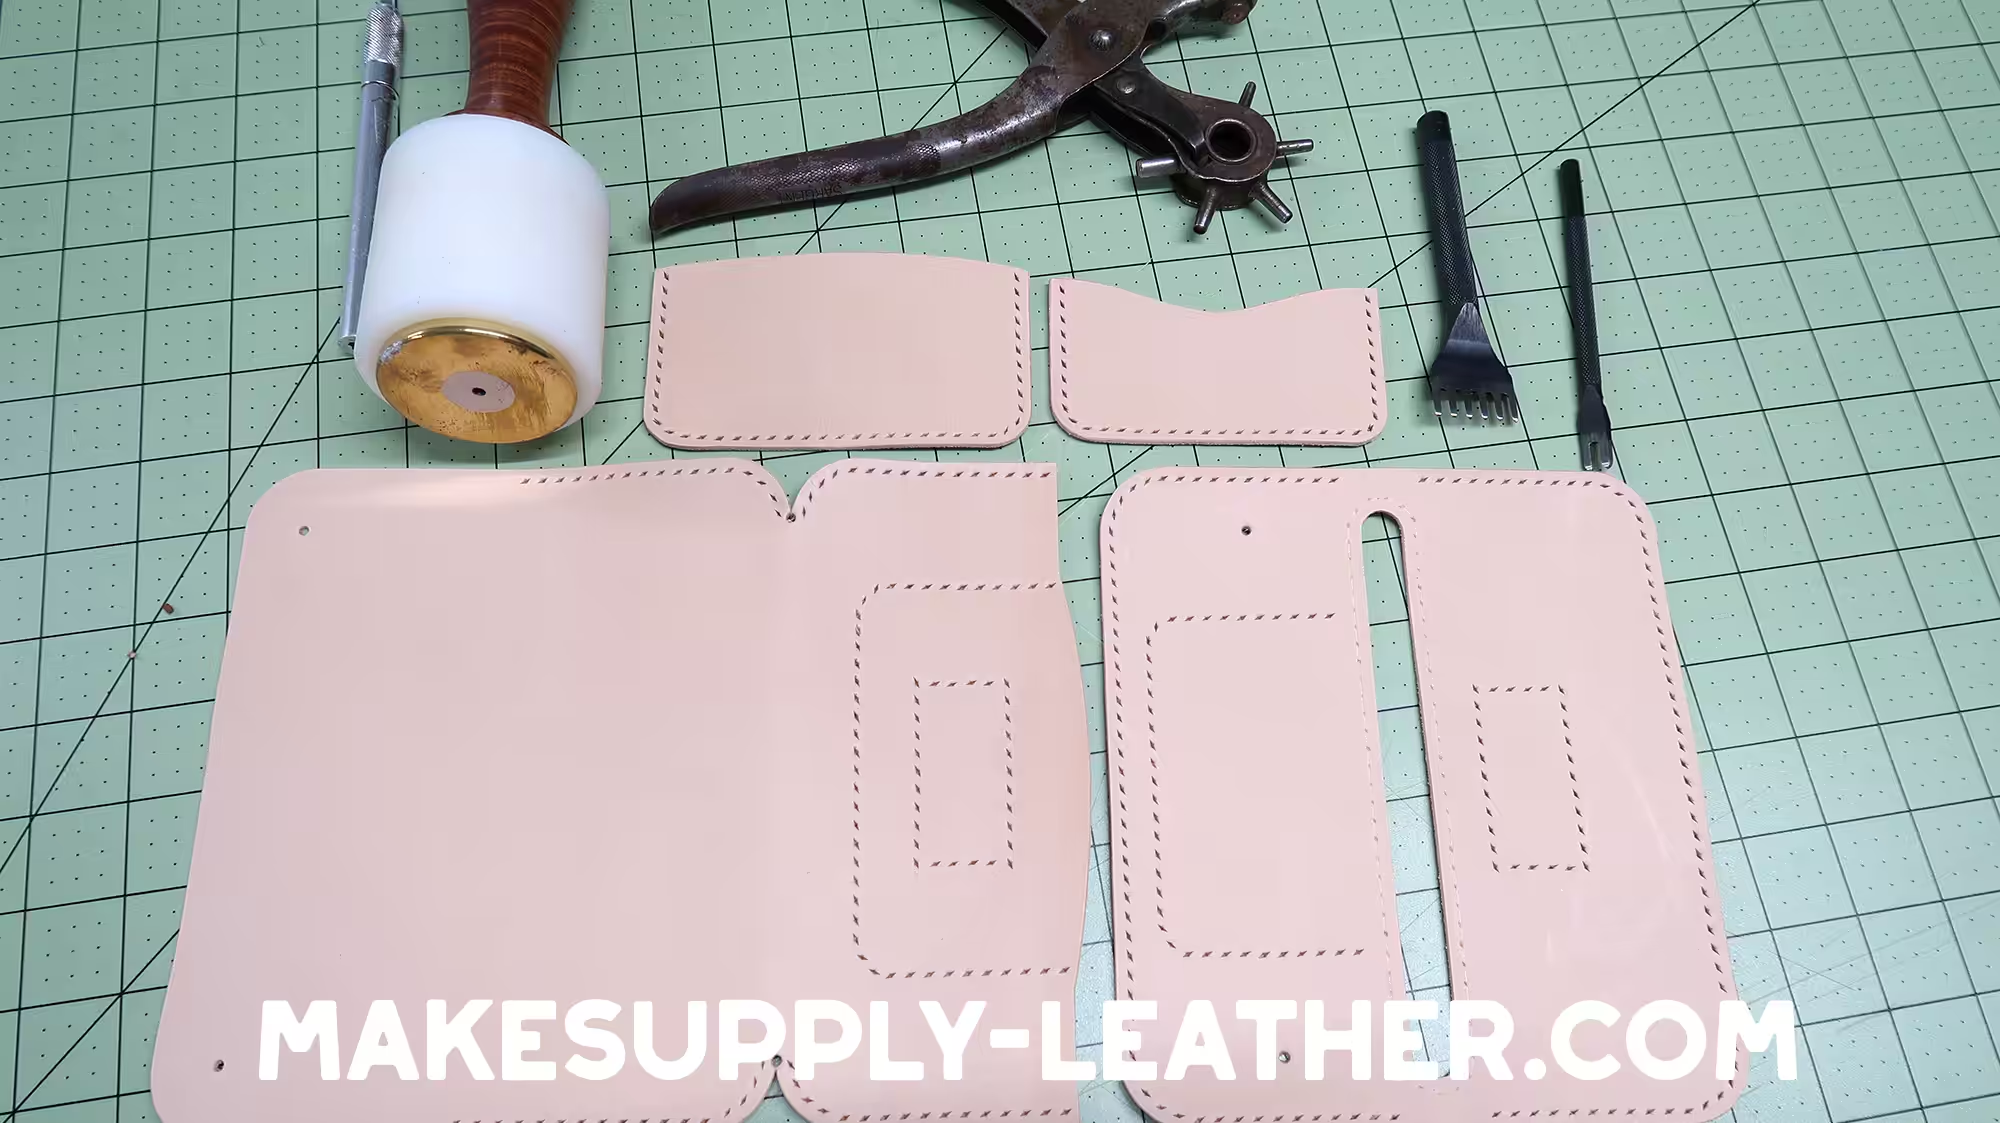
2. Cut Out The Pieces
Please cut out the (4) template pieces for this project. You will need to cut out the zipper section of the zipper pouch.
3. Prepare Your Zipper!
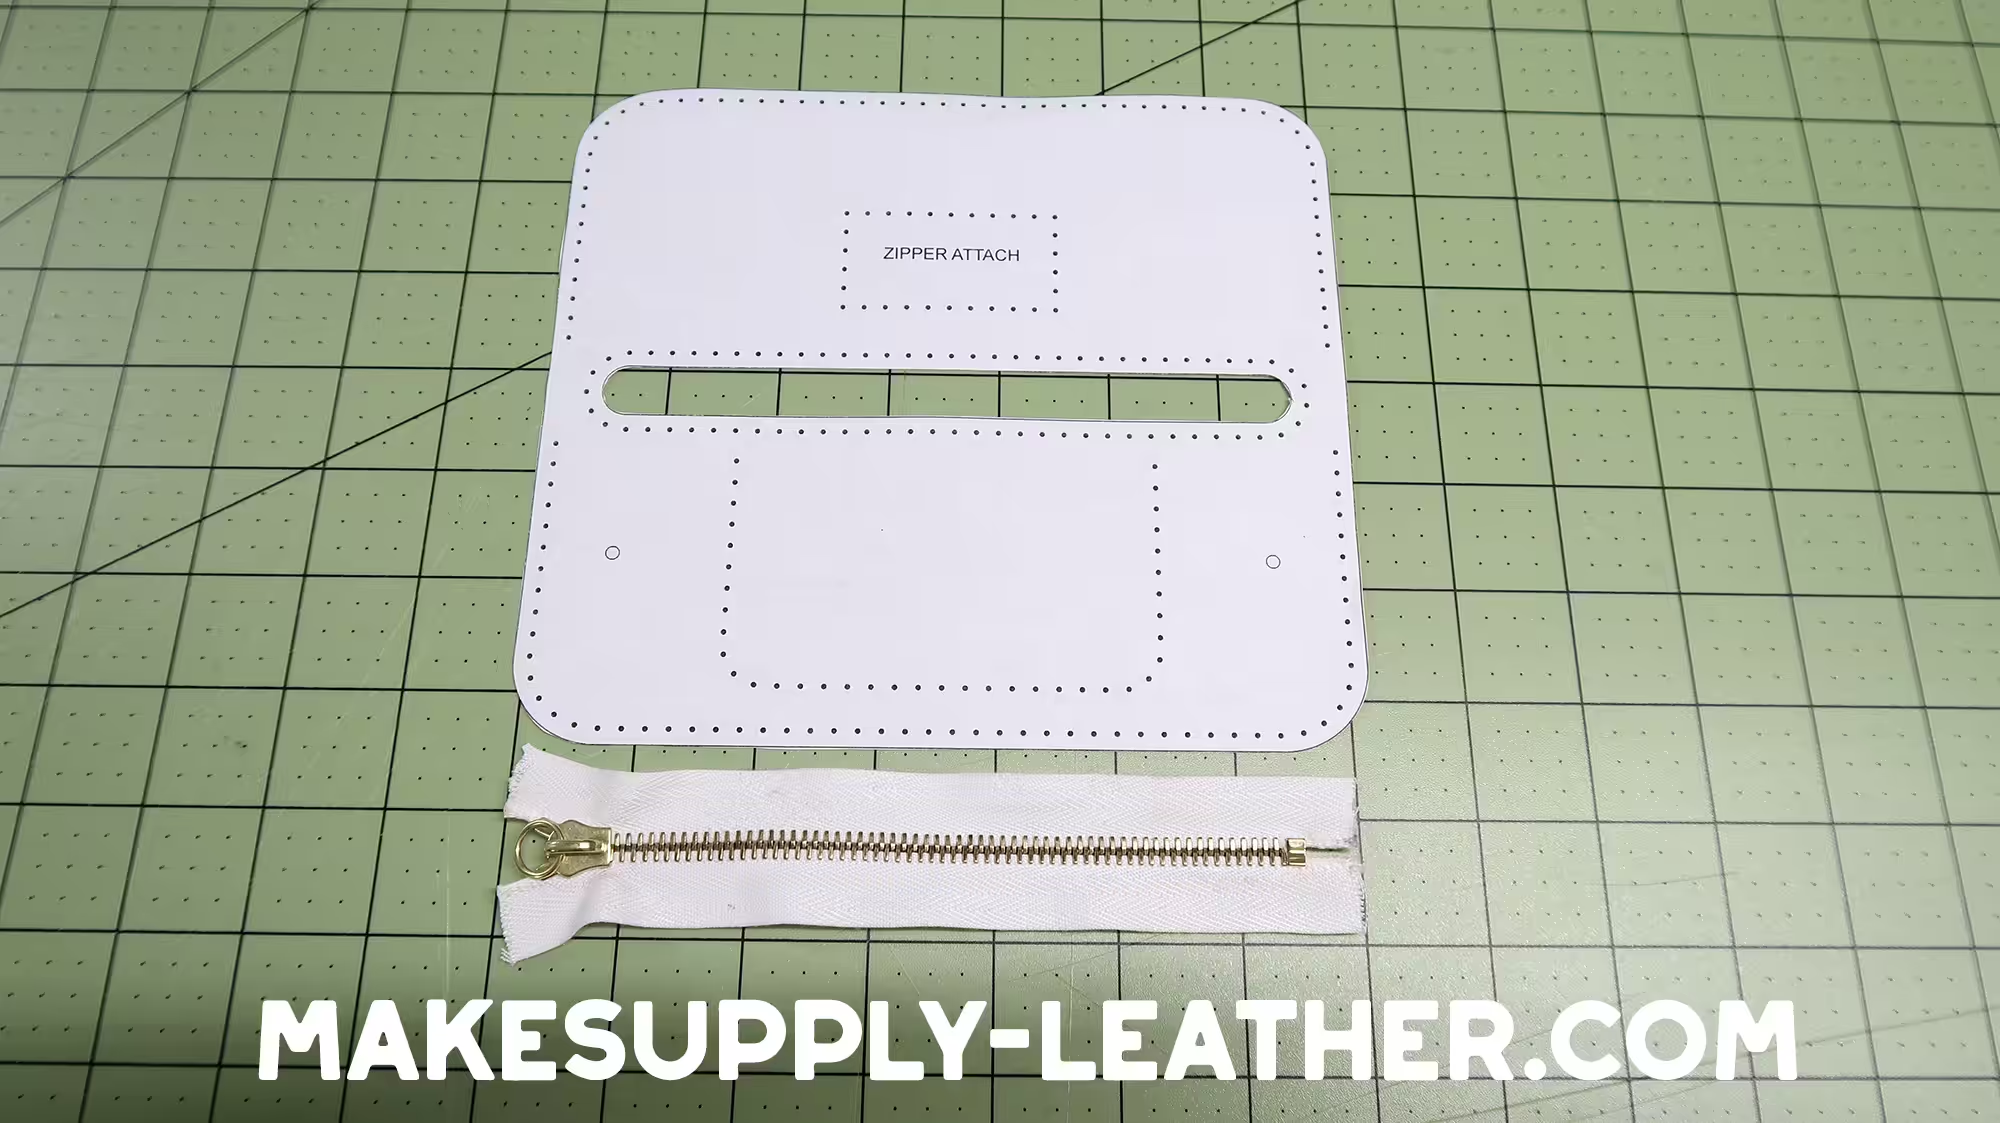
You need a zipper to complete this project. The zipper we used in this project is linked above in Inventory. Measure out 7″ of zipper tape and cut across. You will now want to remove roughly a half inch of zipper teeth on both sides. This will leave you with 7″ of zipper tape and roughly 6″ of zipper teeth. Install your zipper pull, bottom stops, and top stops. You completed zipper portion will be around 6.25″ end to end.
4. Trace Pattern on Leather and Cut

Trace all (4) pieces of the pattern on the grain side of your leather. If you are using the stitching holes as we are in the tutorial, please dont forget to mark them as well. You can use a single round or single diamond punch if you would like. You can also use any 5mm stitching iron set. Please make sure that the measurements are 5mm tip to tip. We will be pre-punching all of our stitching holes.
5. Pre-Punch The Stitching Holes
You can use a single round or single diamond punch if you would like. You can also use any 5mm stitching iron set. Please make sure that the measurements are 5mm tip to tip. We will be pre-punching all of our stitching holes. Punch out all of the stitching holes EXCEPT the holes around the cut out zipper pouch compartment. We will do that later.
6. Cut Out The Pieces
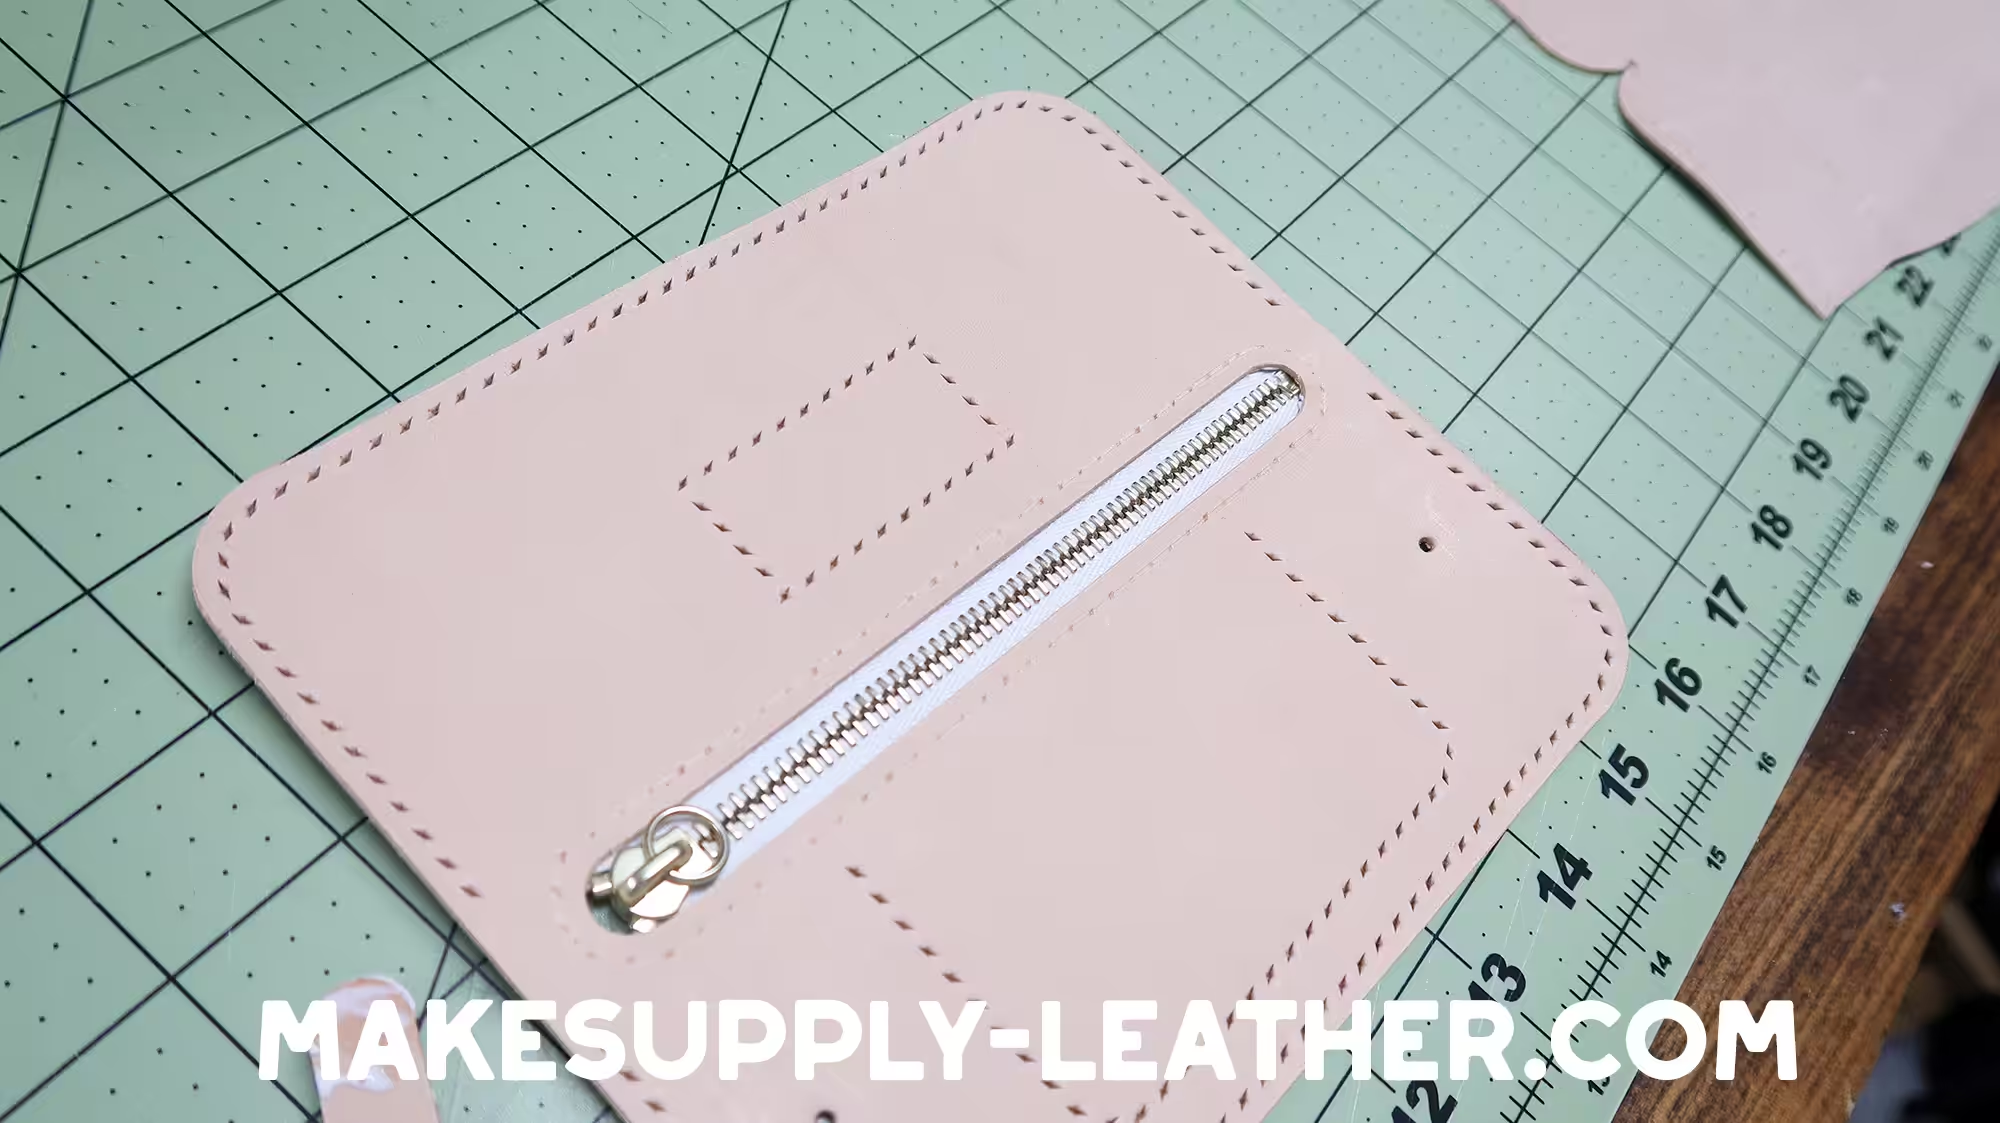
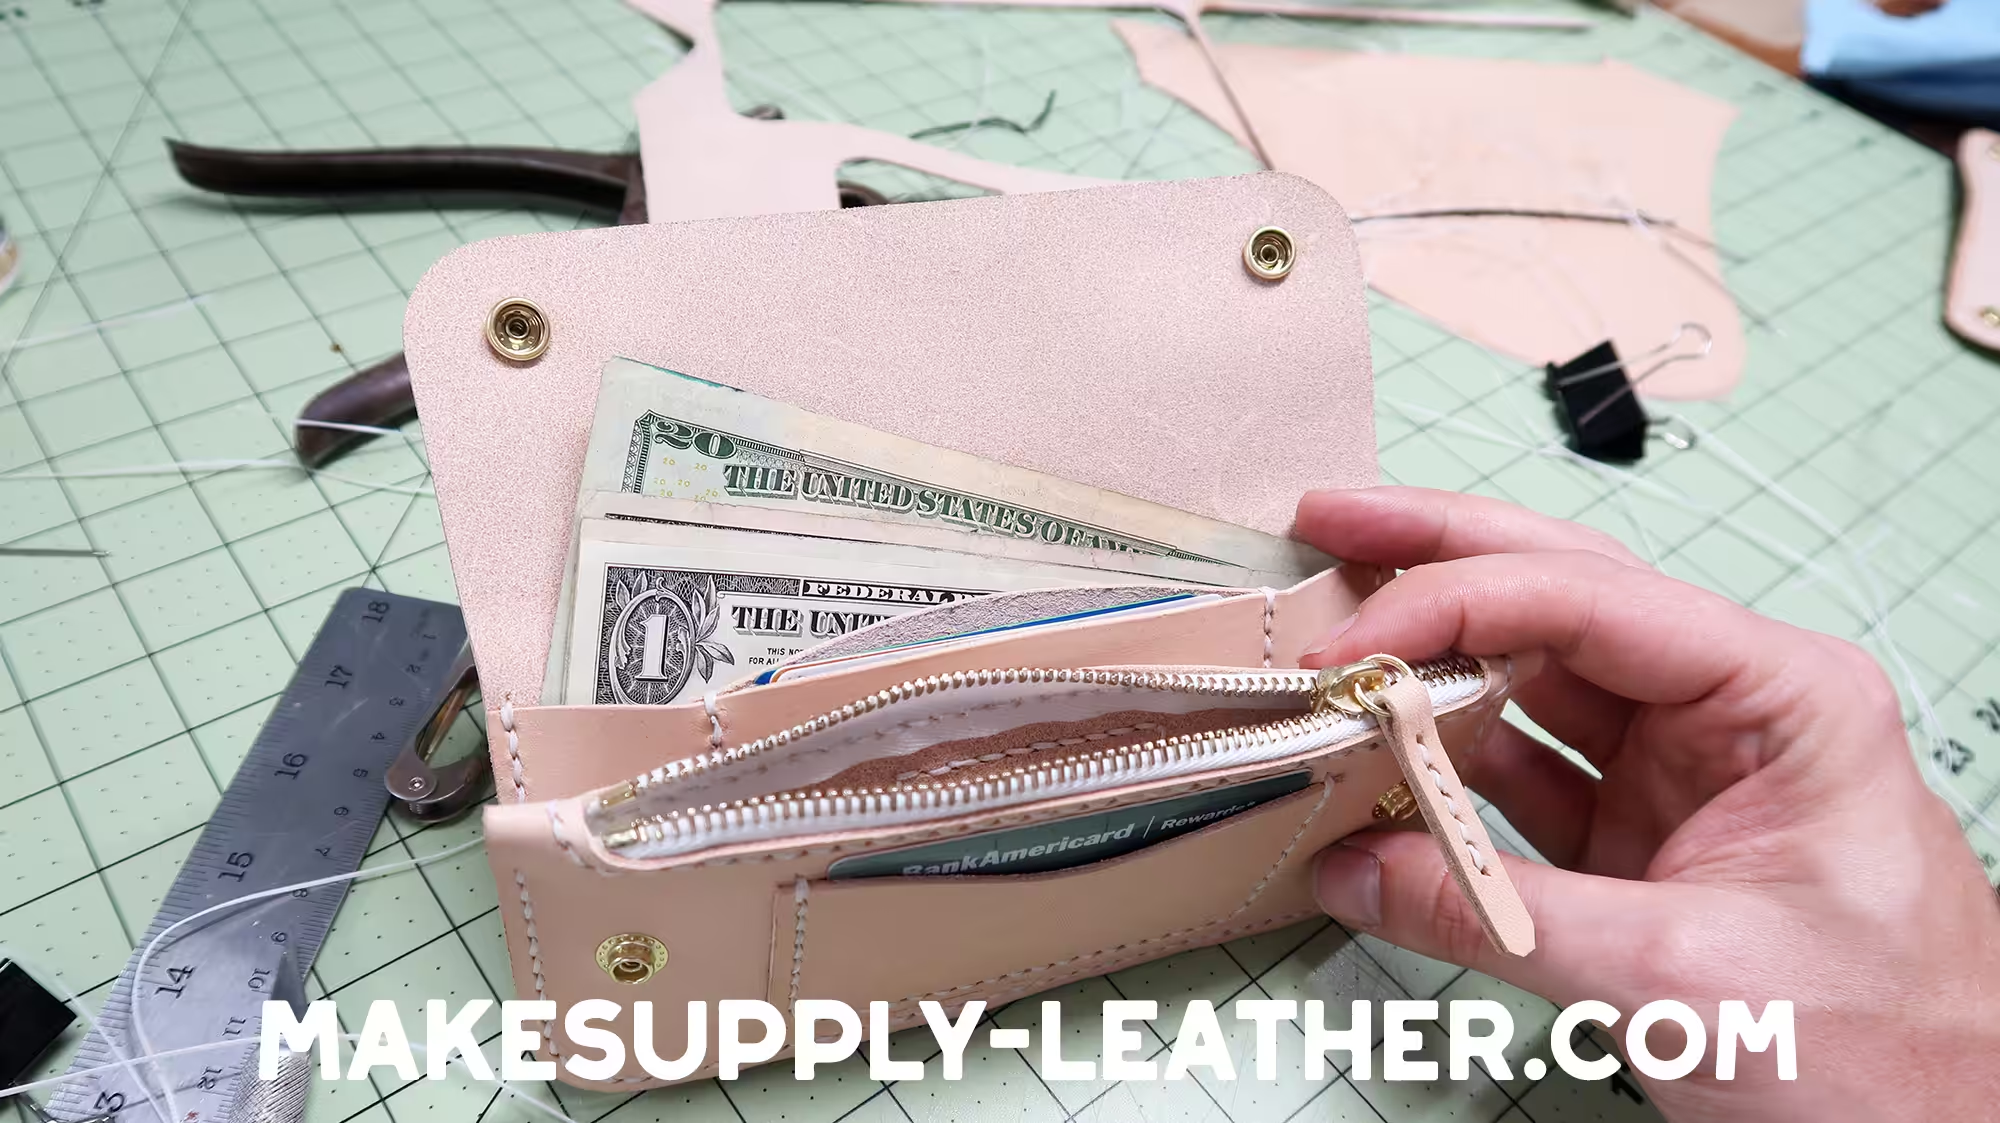
Insert your zipper into the zipper pouch cut out. You can use a little glue or seam tape to attach and hold in place for stitching.
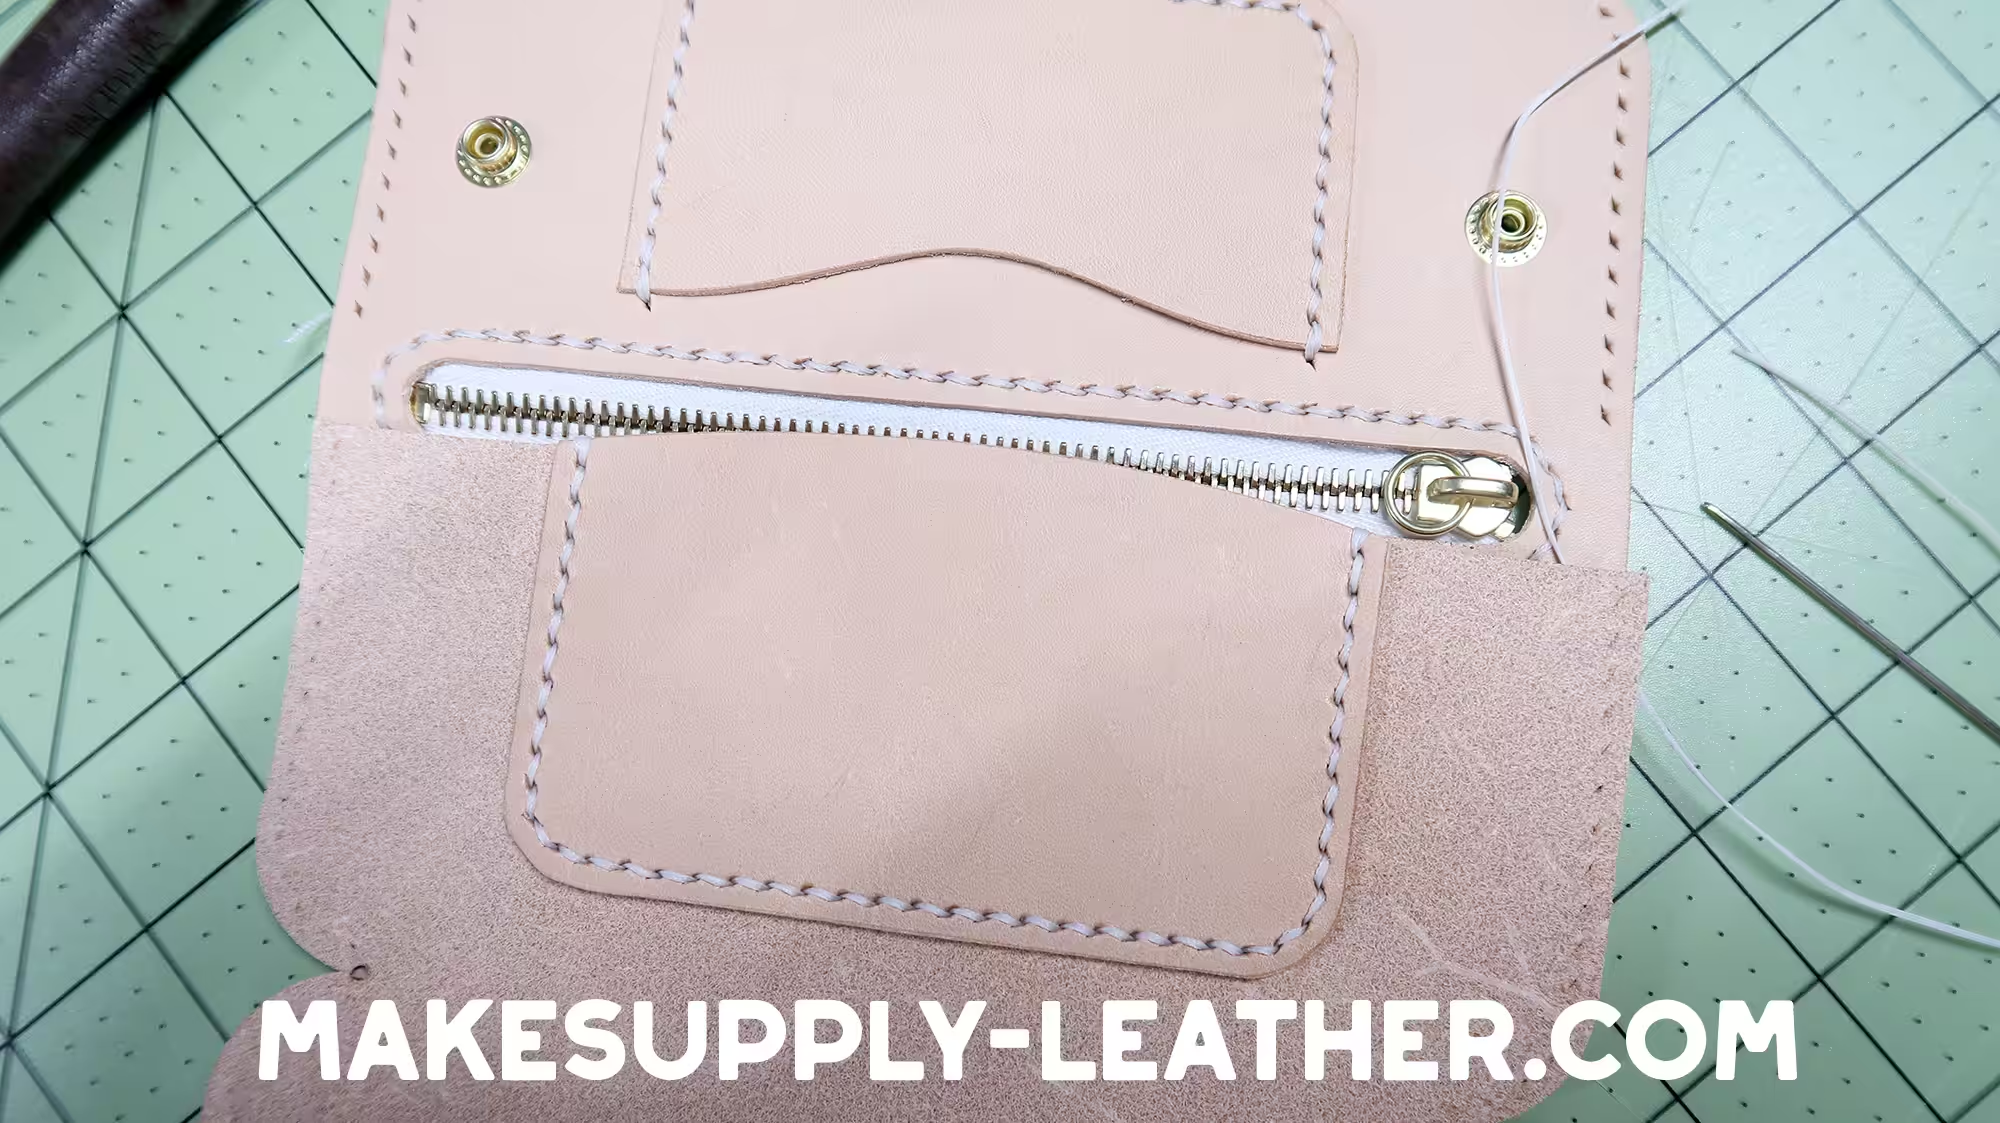
7. Punch Holes and Sew In Zipper
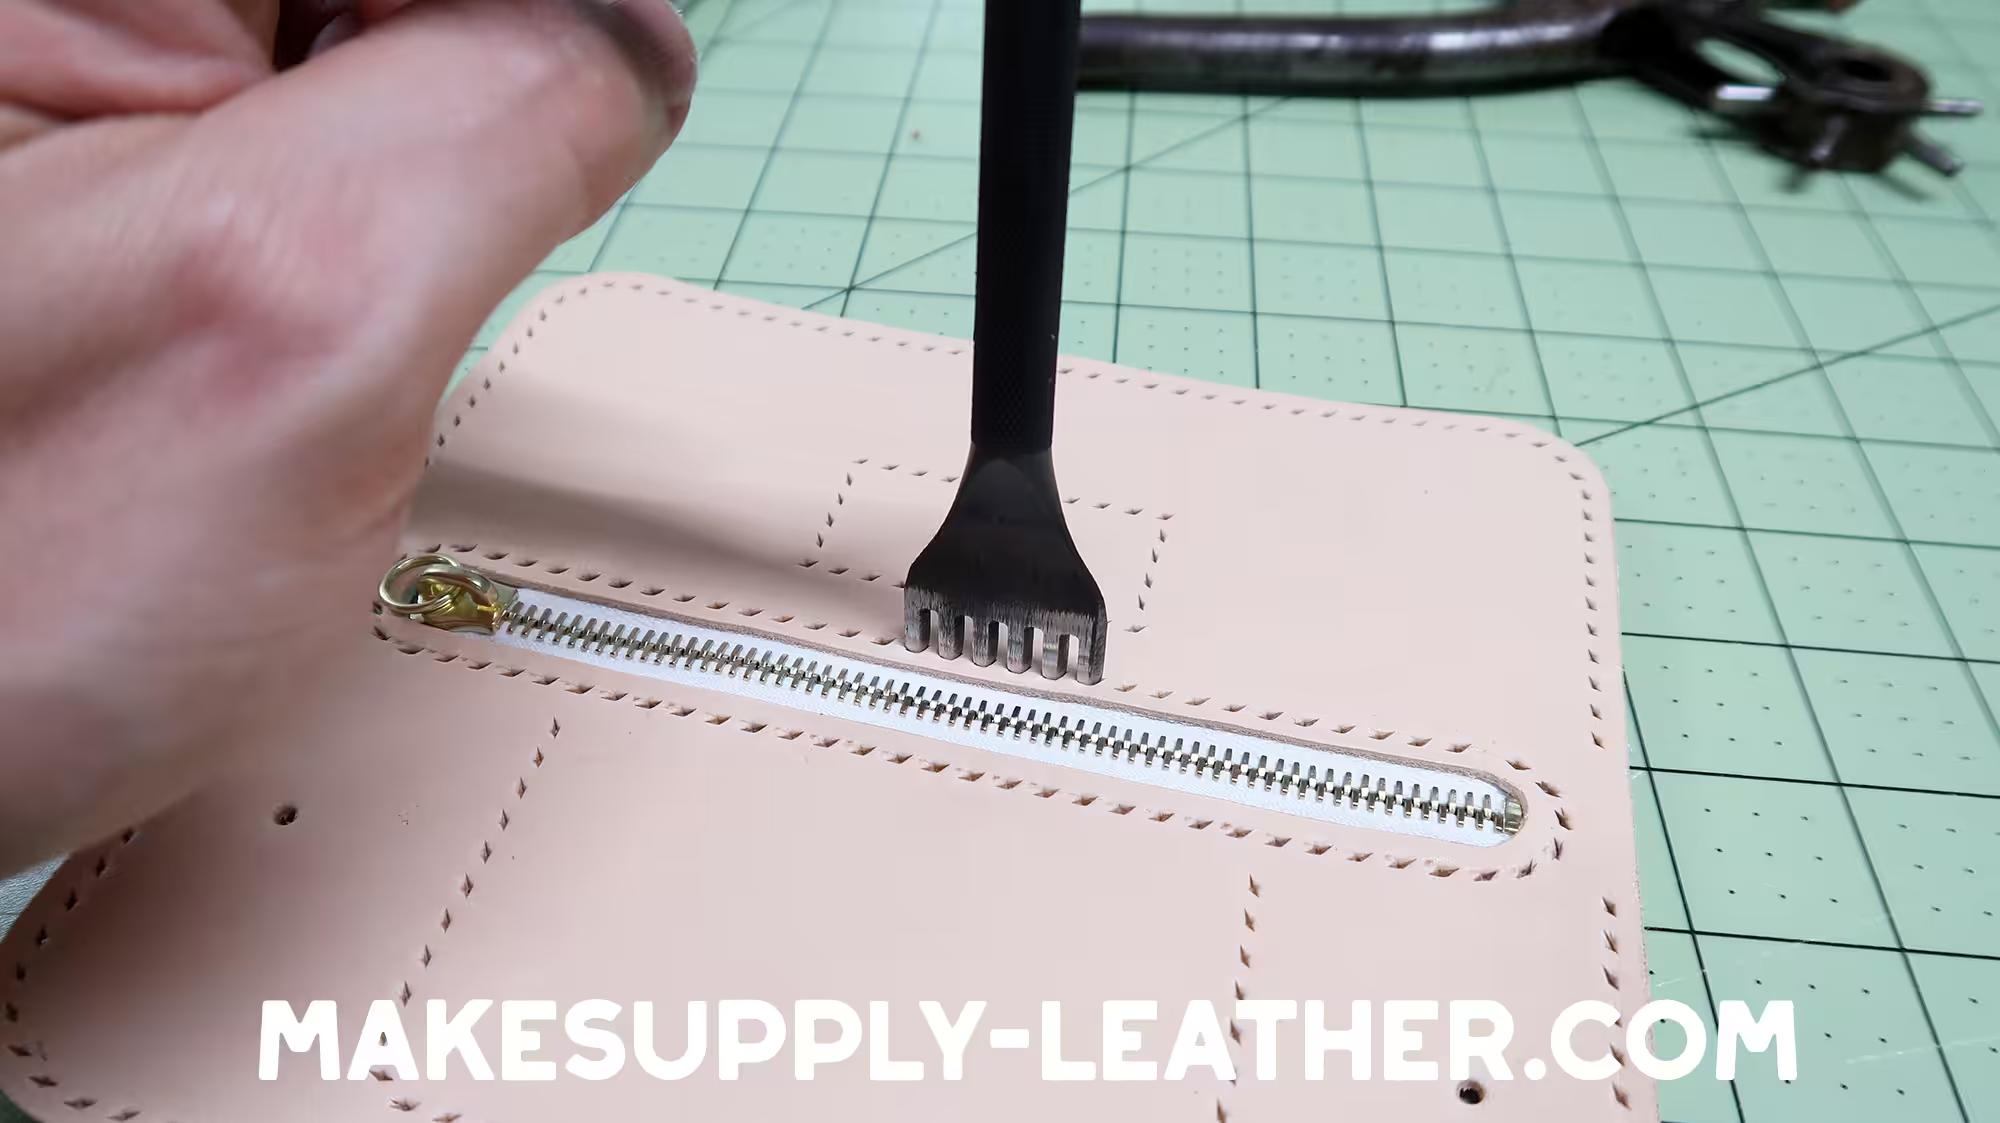
Punch through the remaining holes on the zipper compartment. Your chisel will be going all the way through the zipper tape. Now, you will sew your zipper in place.
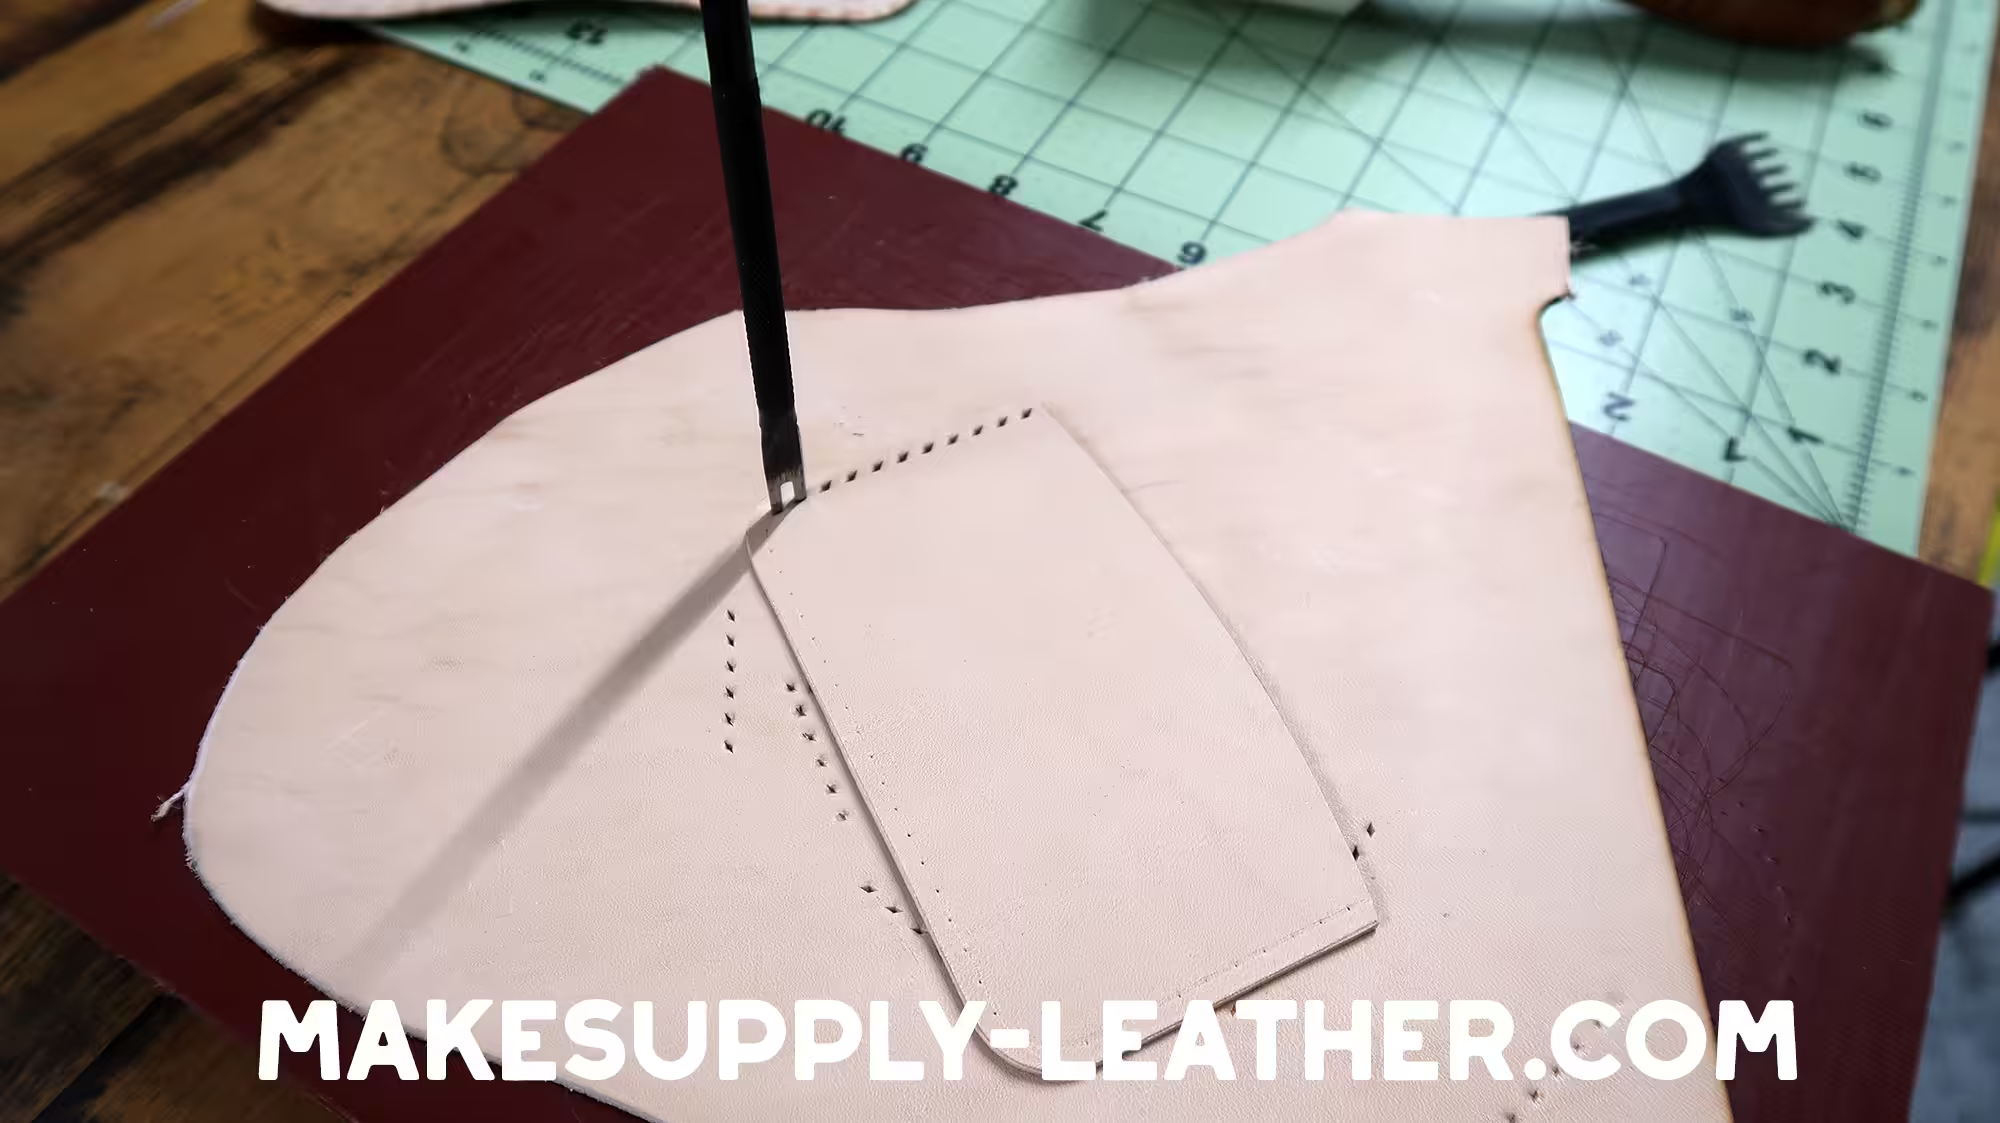
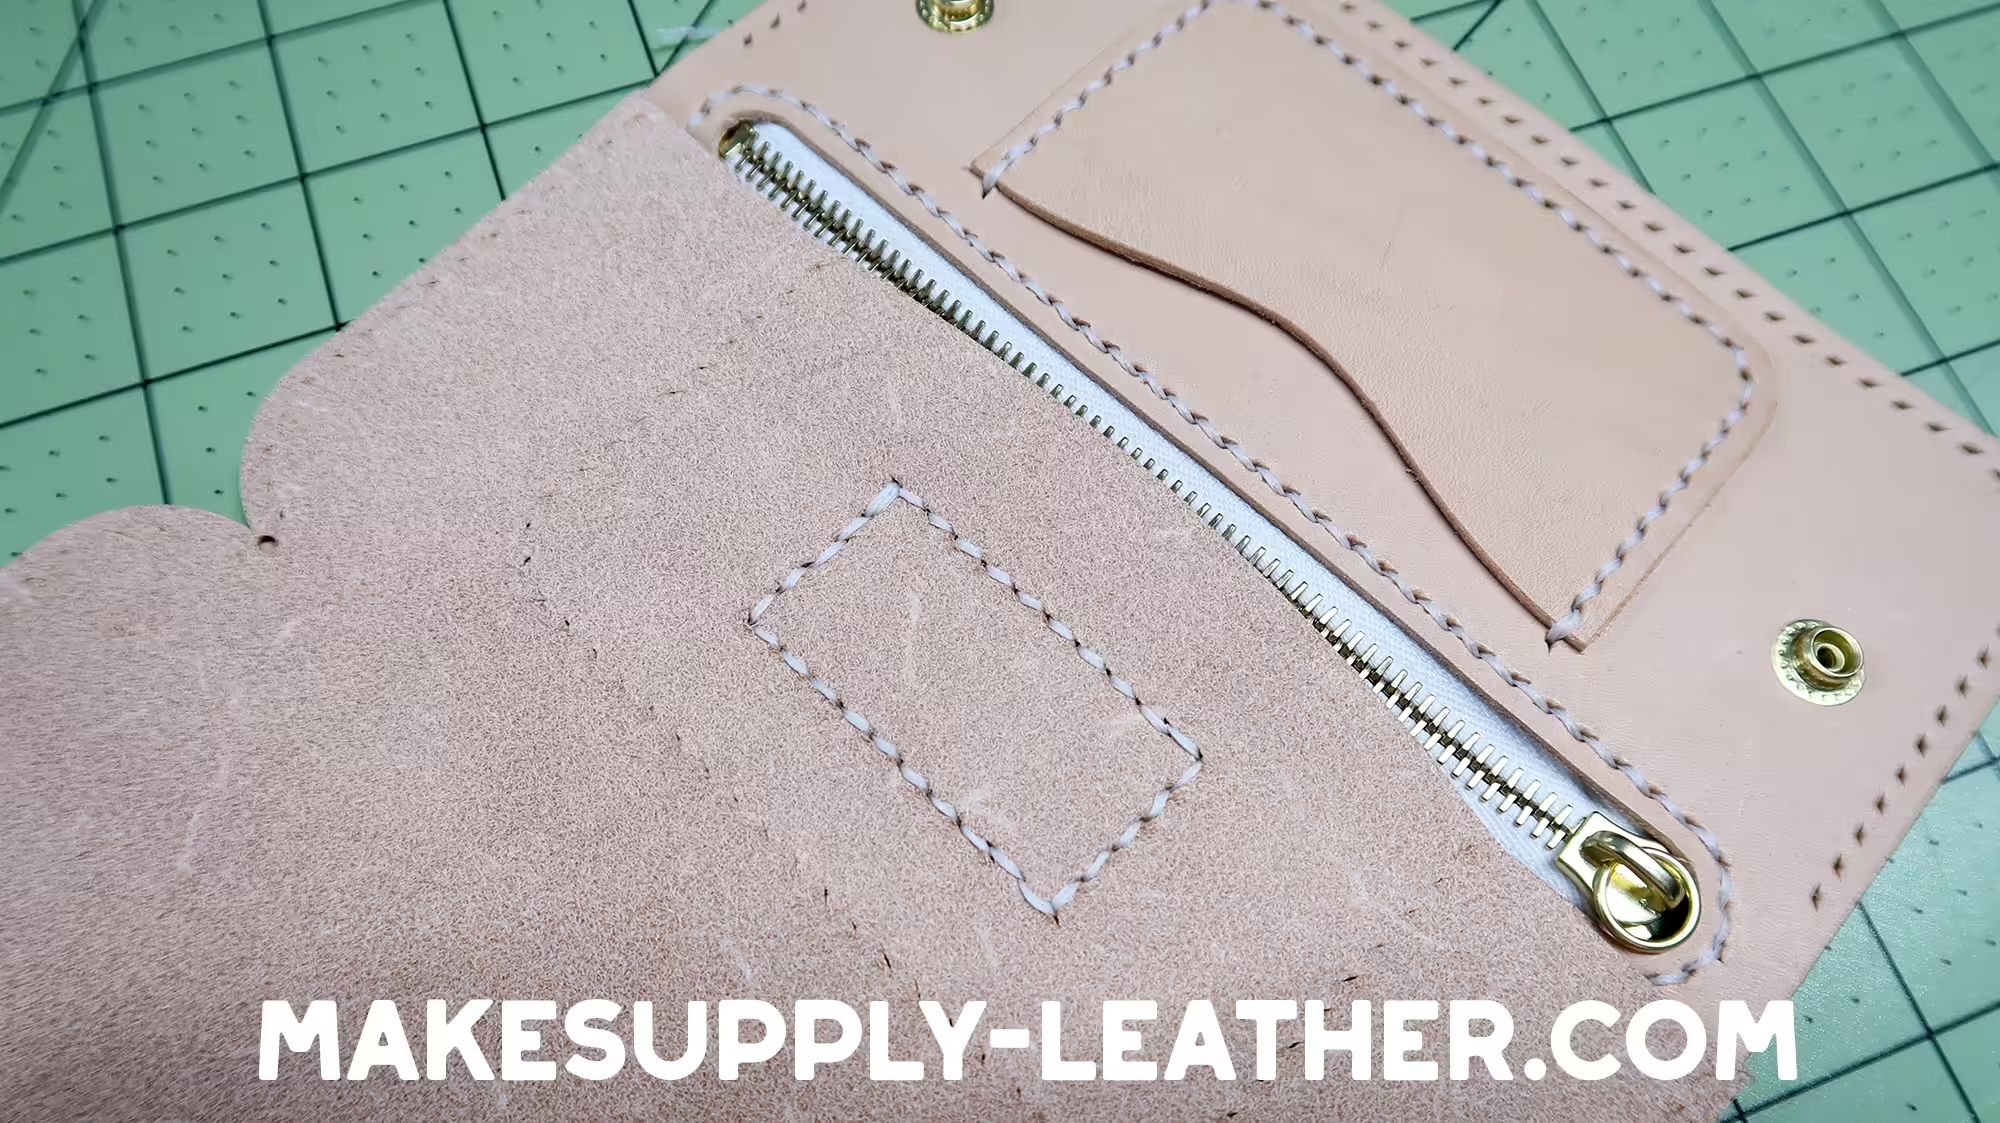
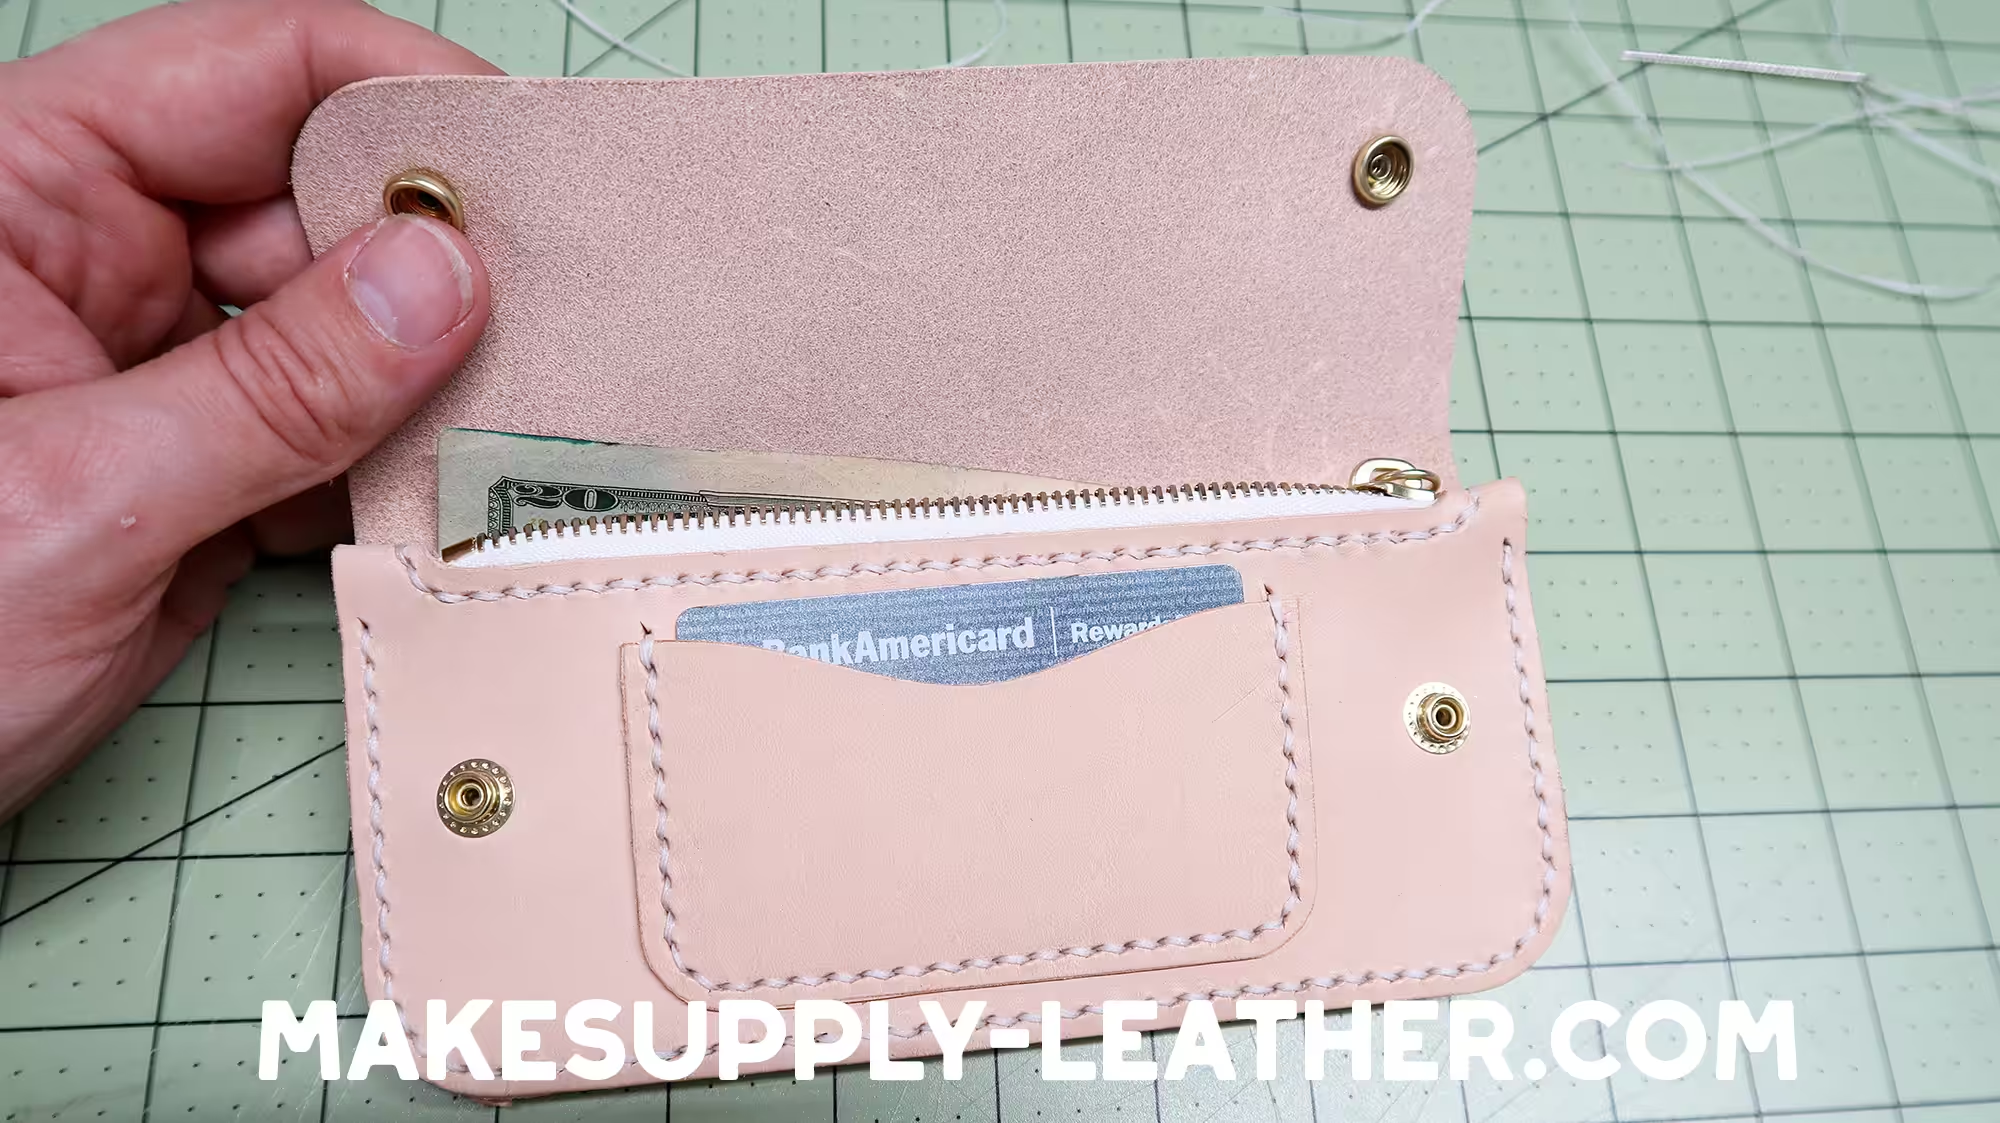
9. Install The Exterior Card Slot
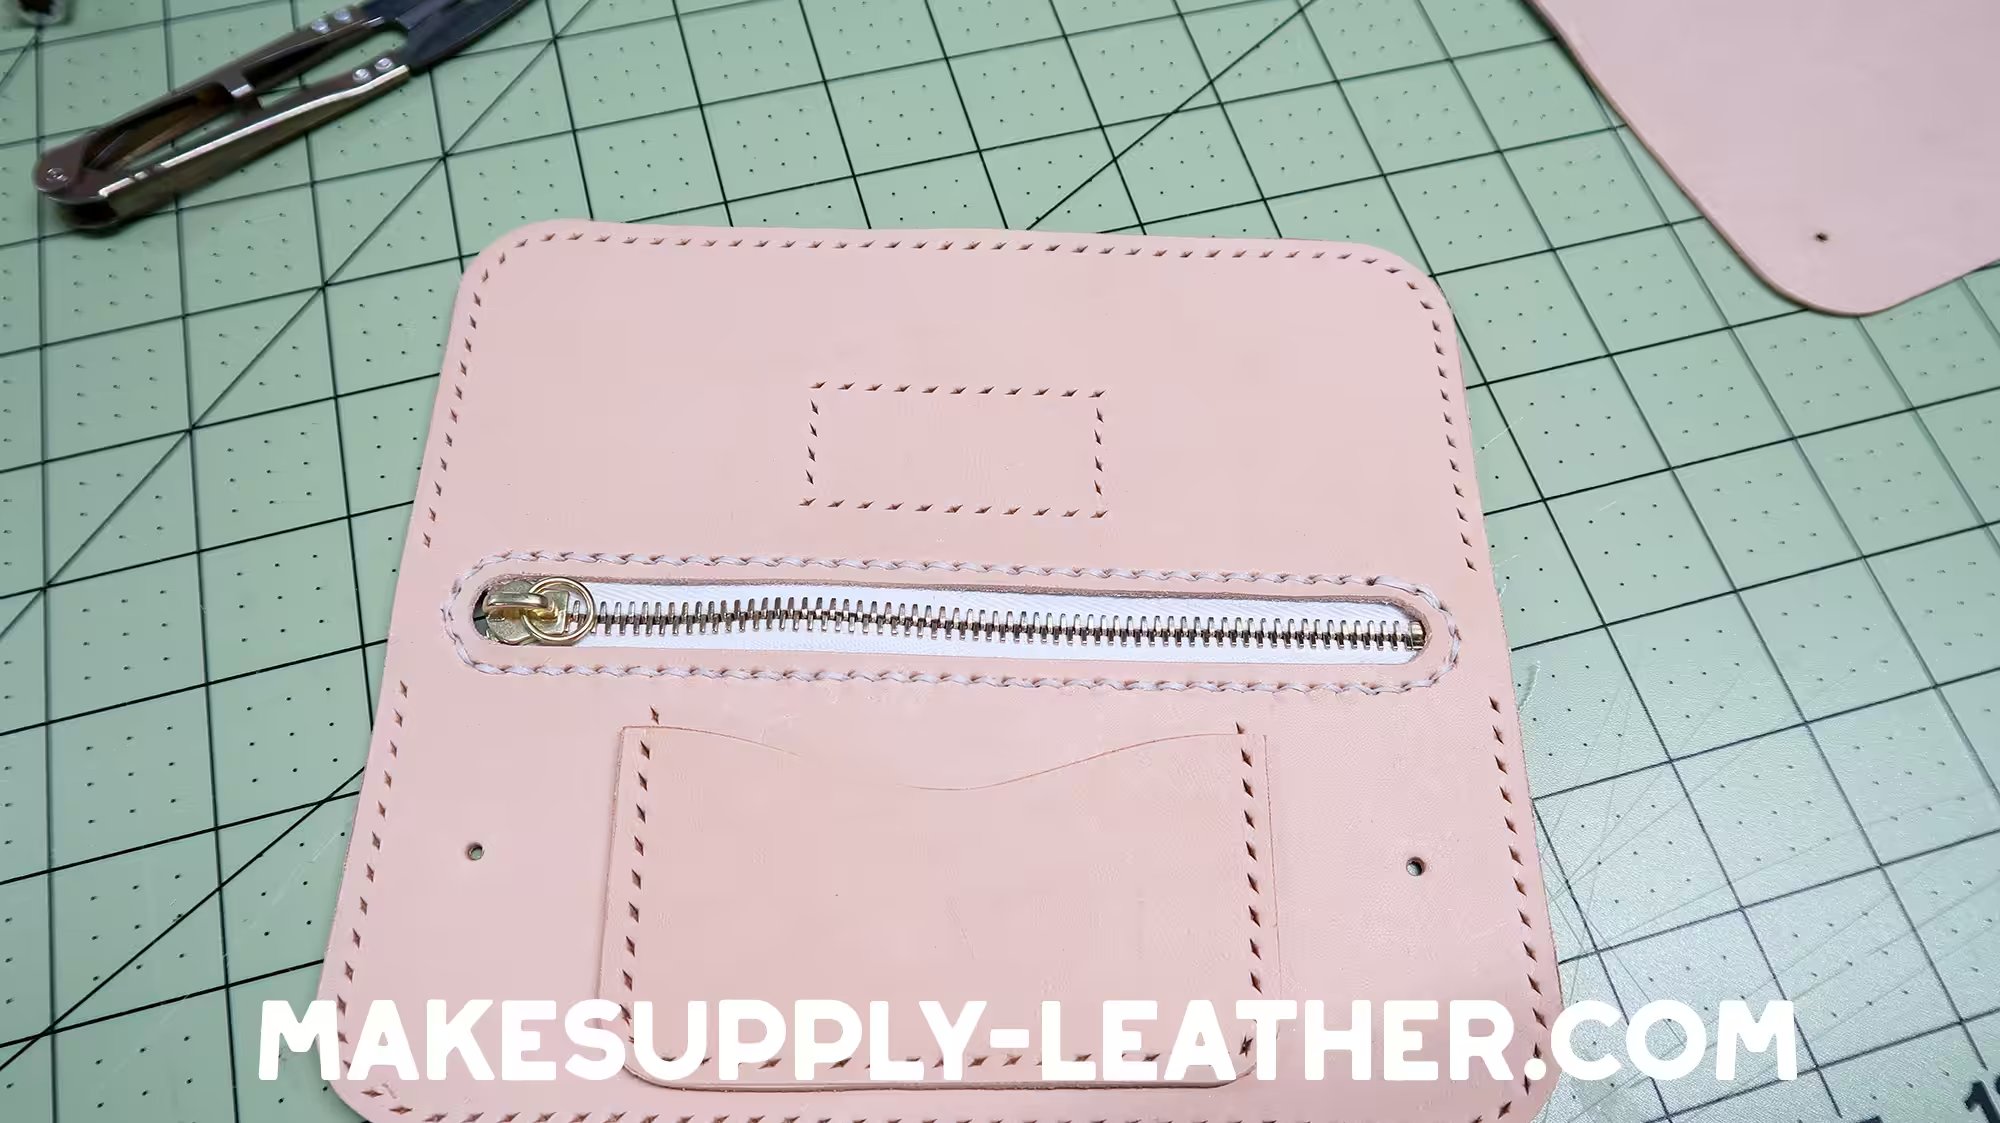
Take the smaller exterior card slot and align with the holes. You can use a little bit of glue around the edges to set it place. After it dries, stitch it to the body.
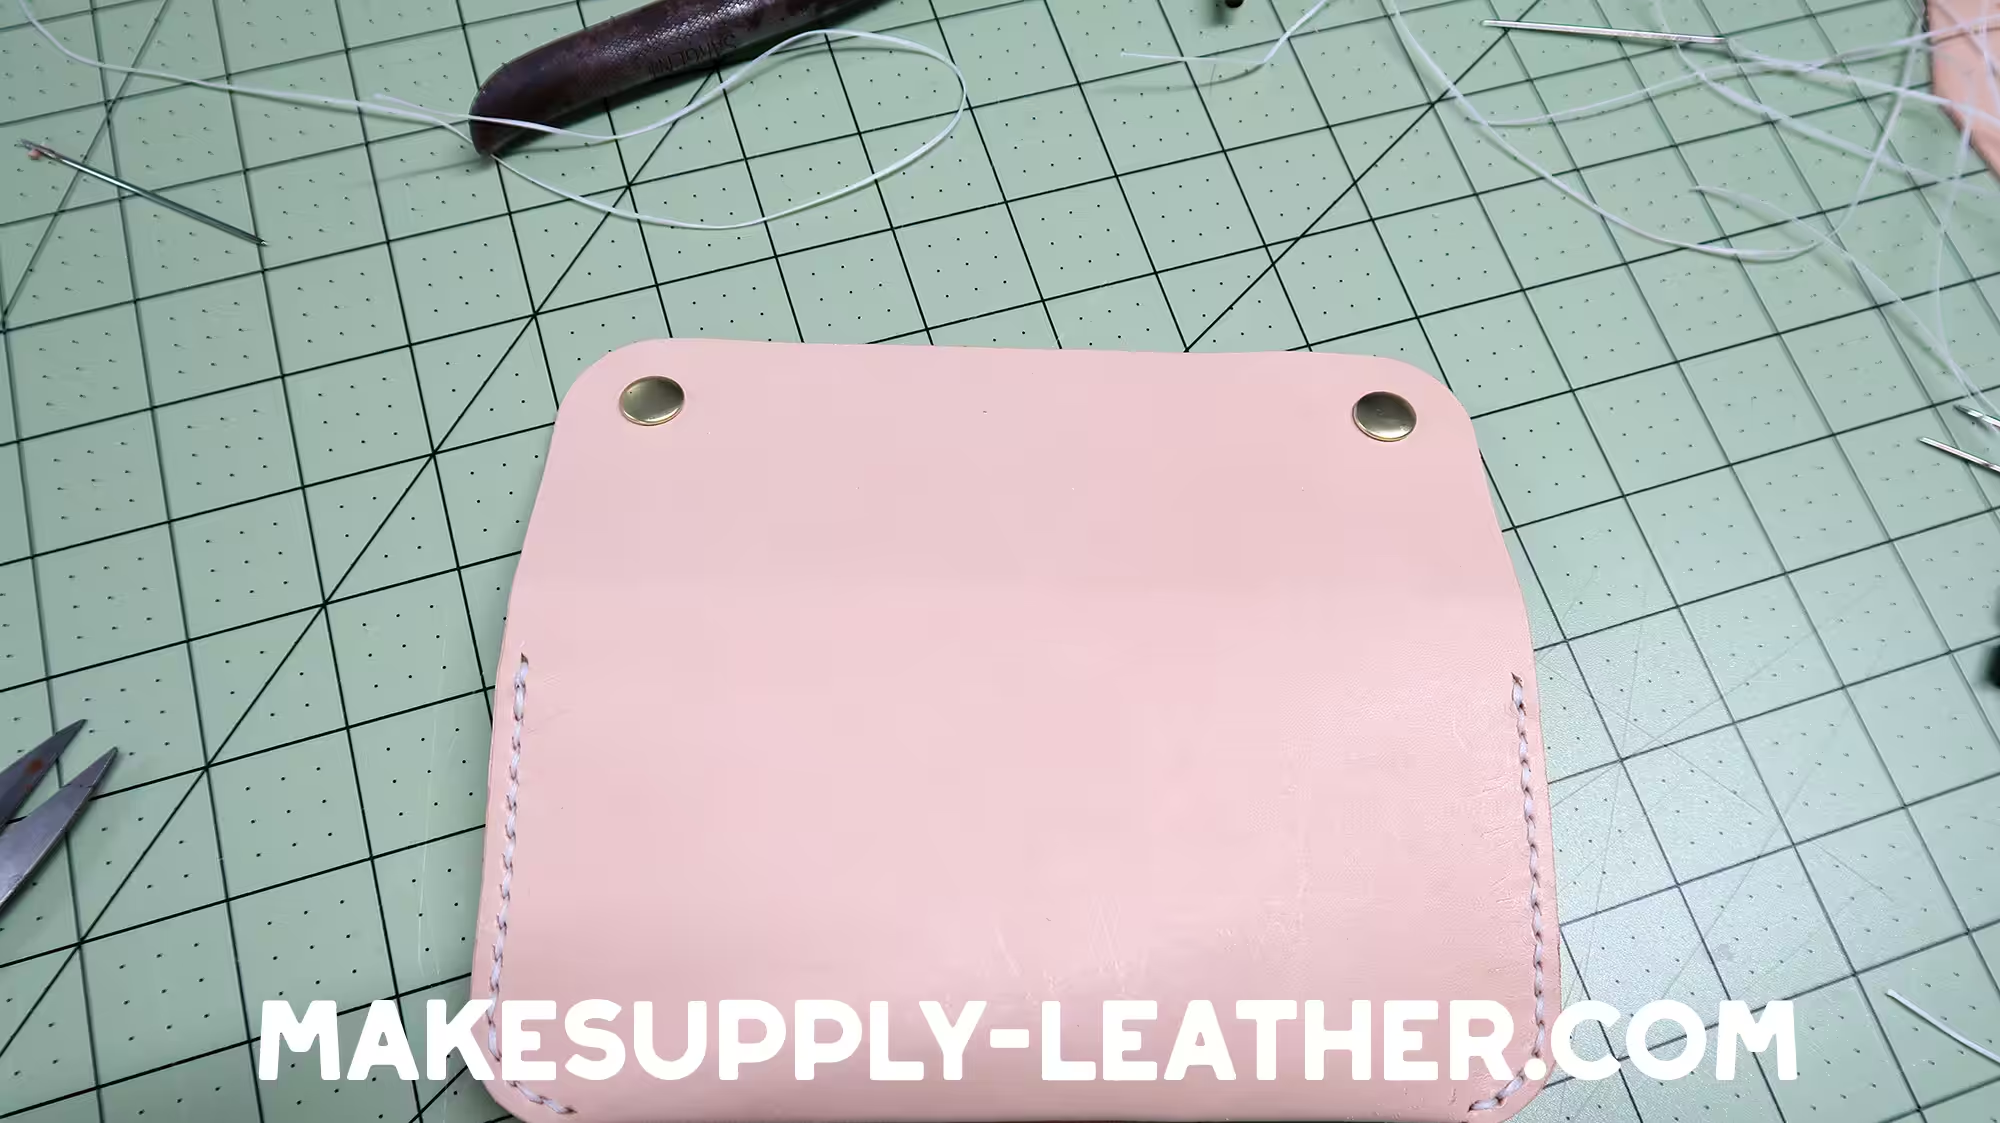
9. Install The Snaps
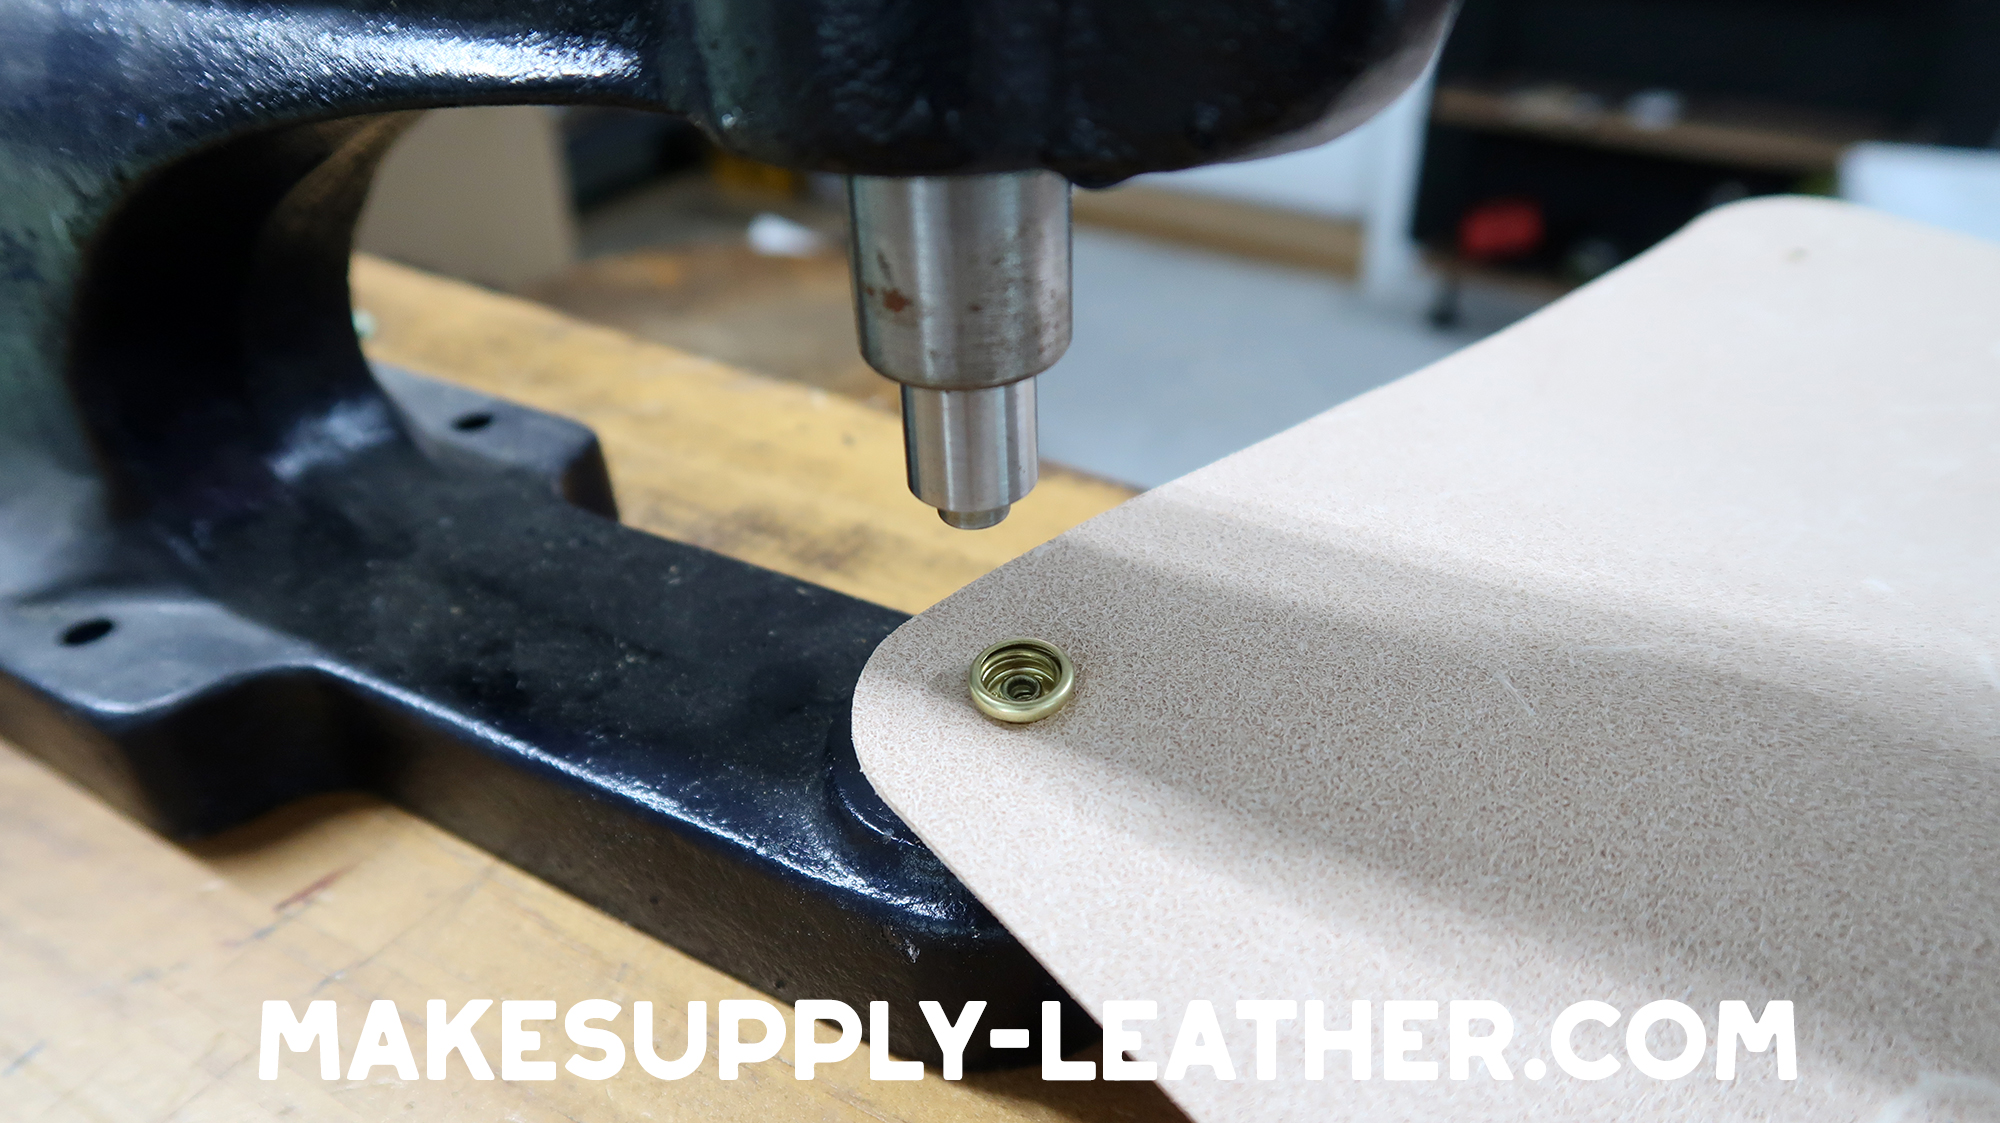

Now is a good time to install those snap fasteners. Two on the top flap, and 2 on the zipper body.
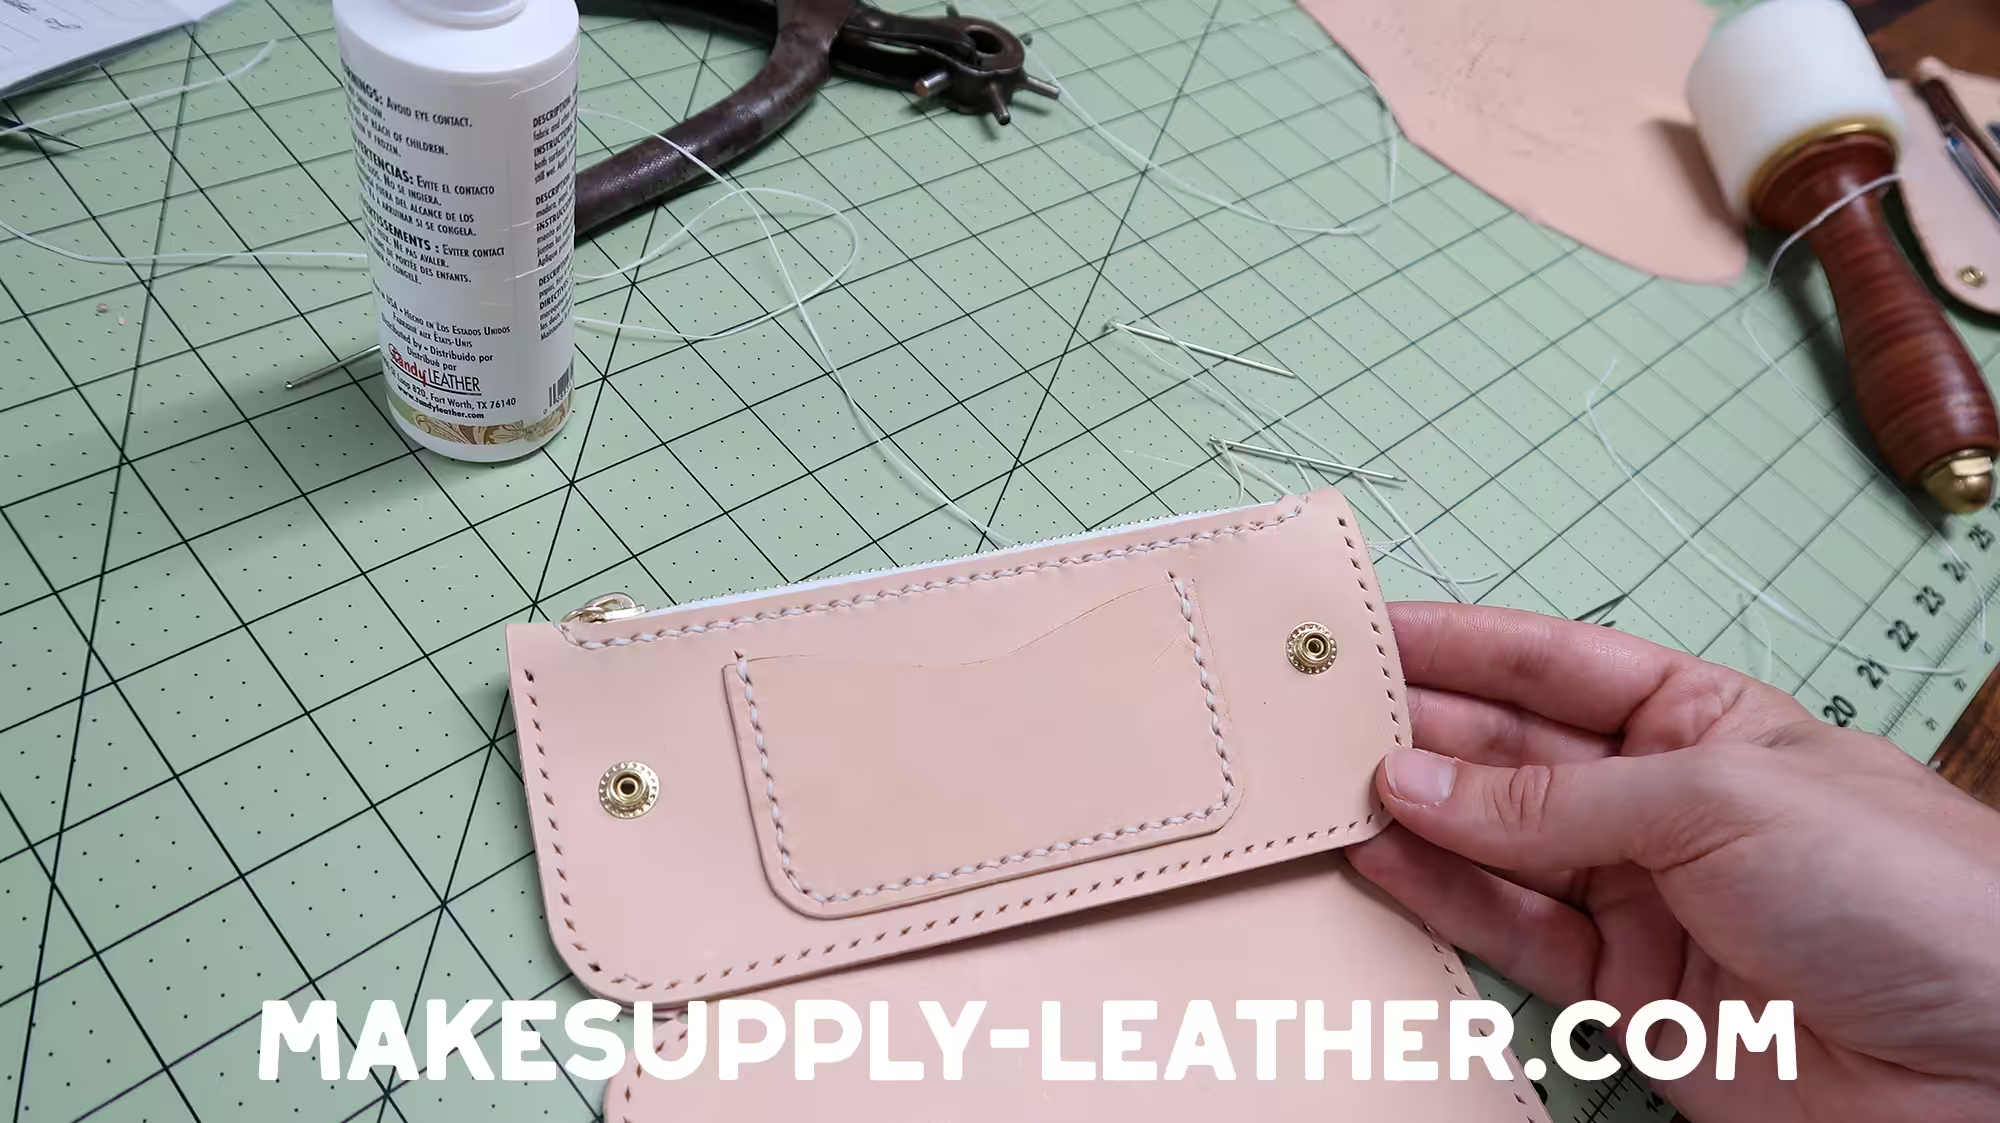
10. Attaching Zipper Pouch to Body

Now we must attach the zipper pouch to our main body piece. To do this we will glue and stitch the rectangle box that was labeled “ZIPPER ATTACH” on the template. It is very important you do this step correctly. Lay the zipper pouch with grain side up. Flip over the main body panel (grain side down) and glue in place. Once the glue dries, complete the stitch.
11. Install the Interior Card Slot
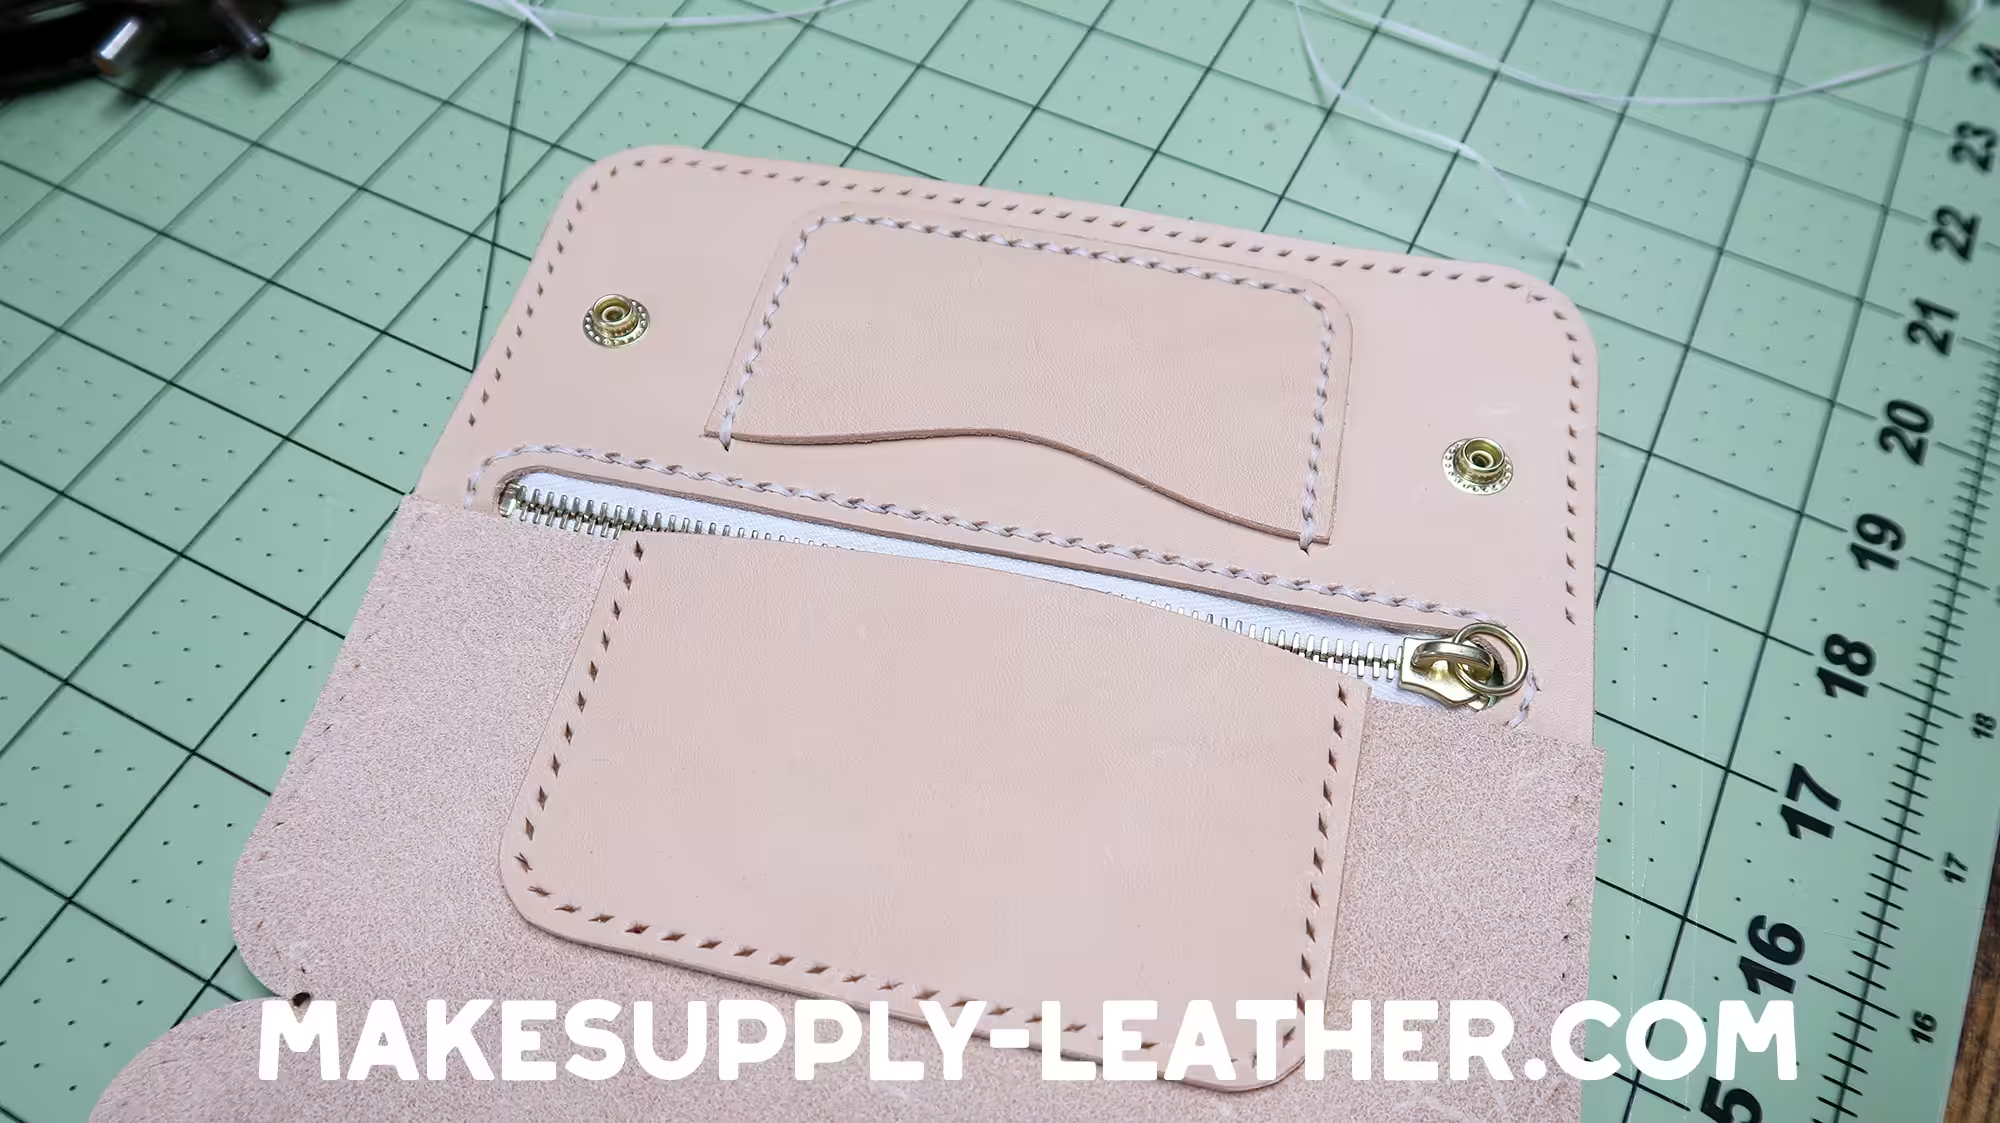
Take the large interior card slot piece and put it in place (flesh side to flesh side). Glue and stitch.
12. Finishing The Zipper Pouch
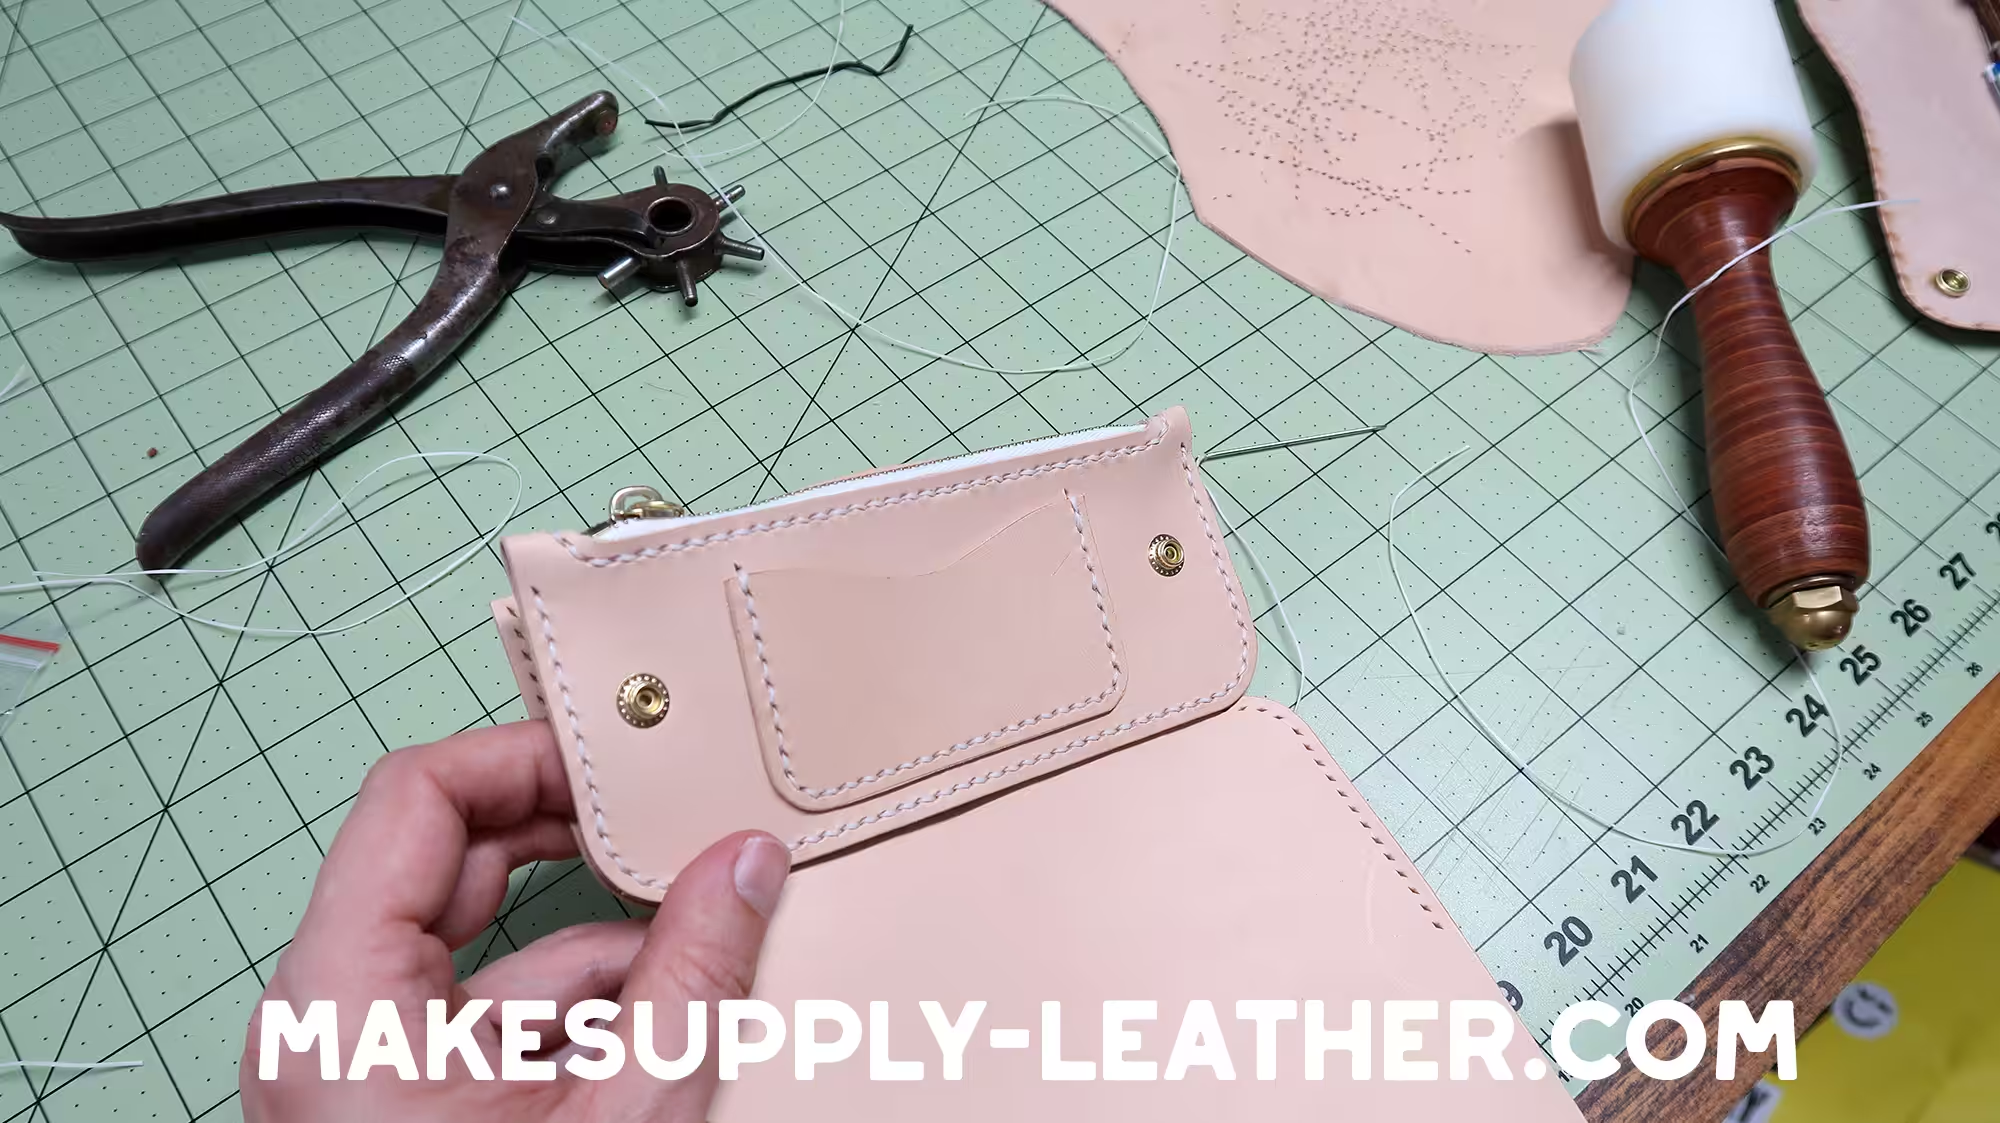
Put a little bit of glue on the edges of the zipper pouch and connect together. Use binder clips to make this step easier and make sure your holes are properly aligned. After it dries, complete the stitch around the edge.
9. Stitching The Body Together
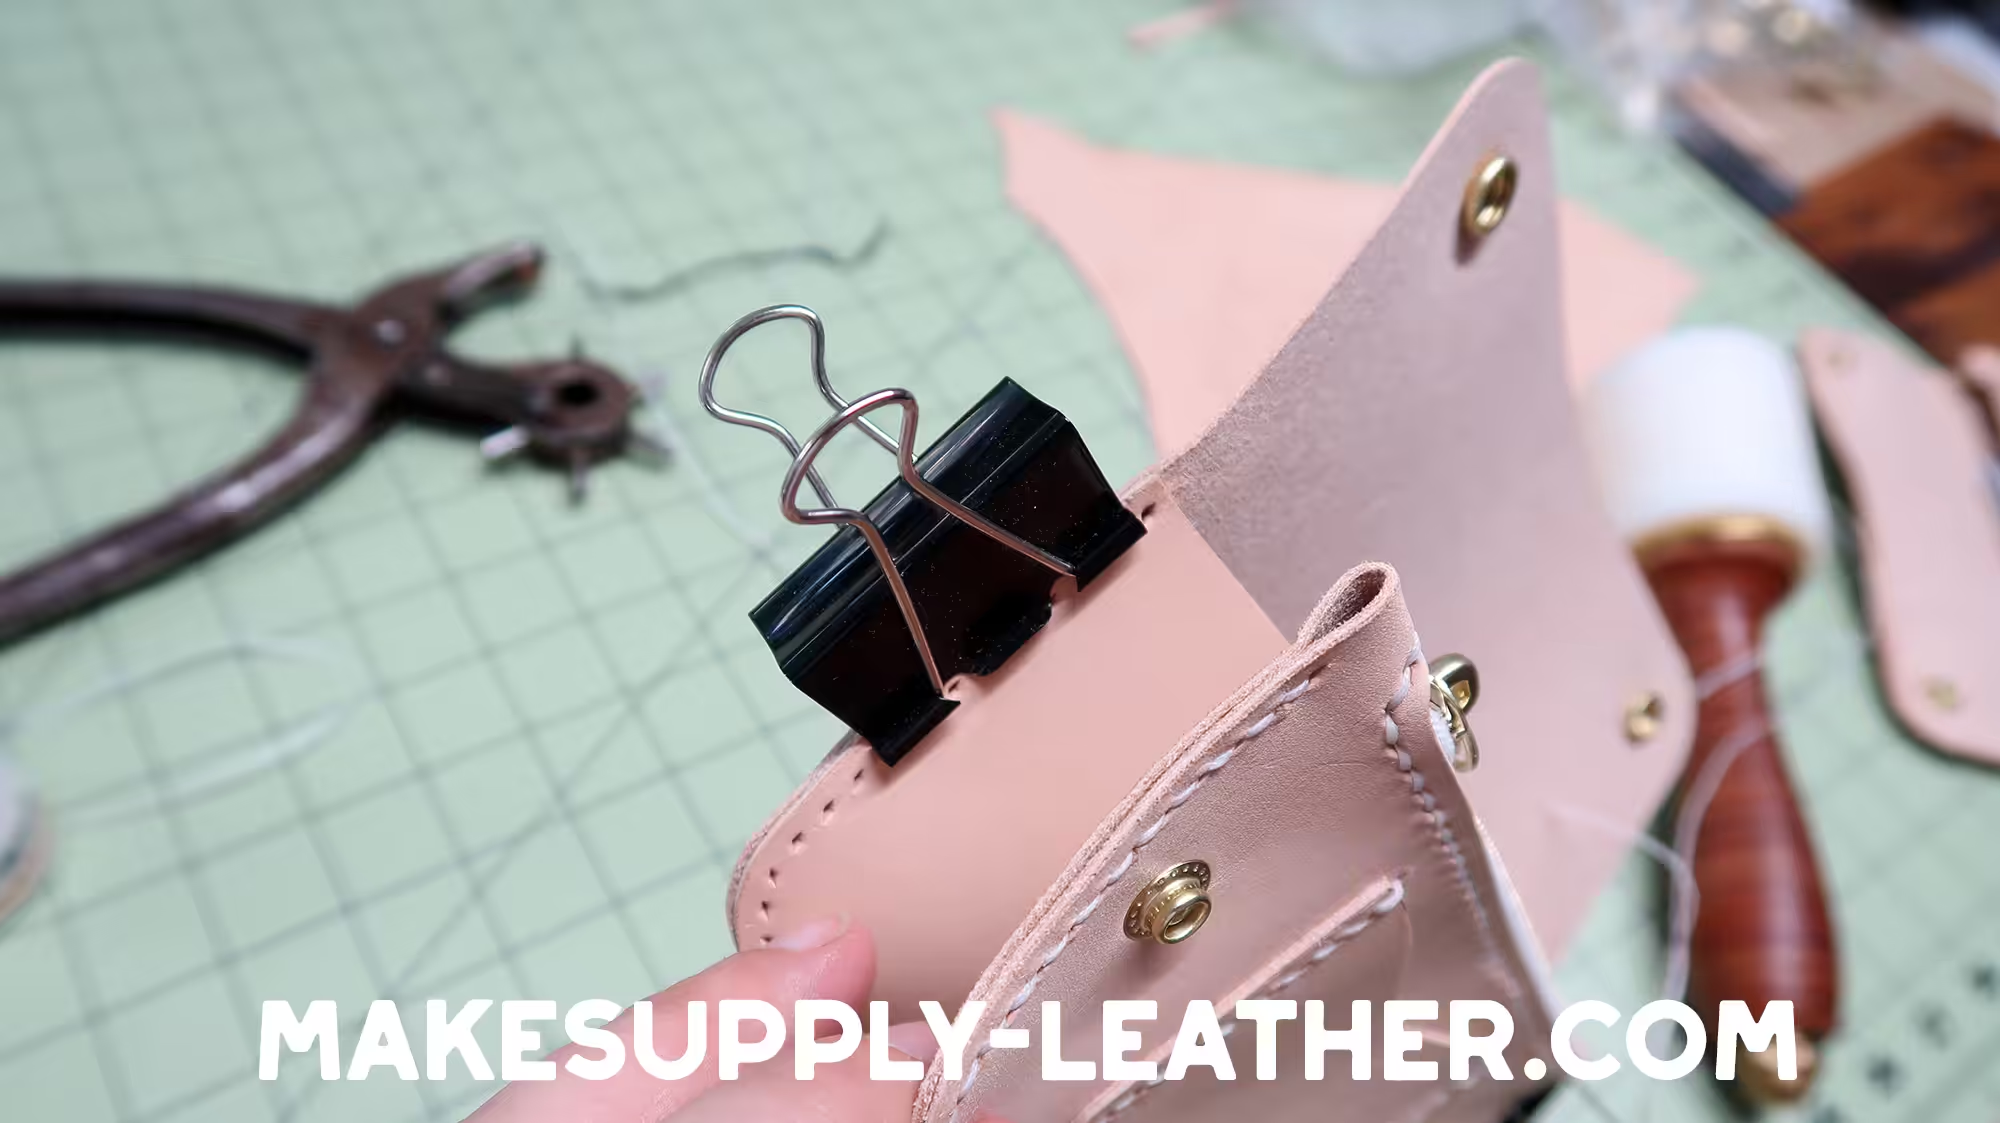
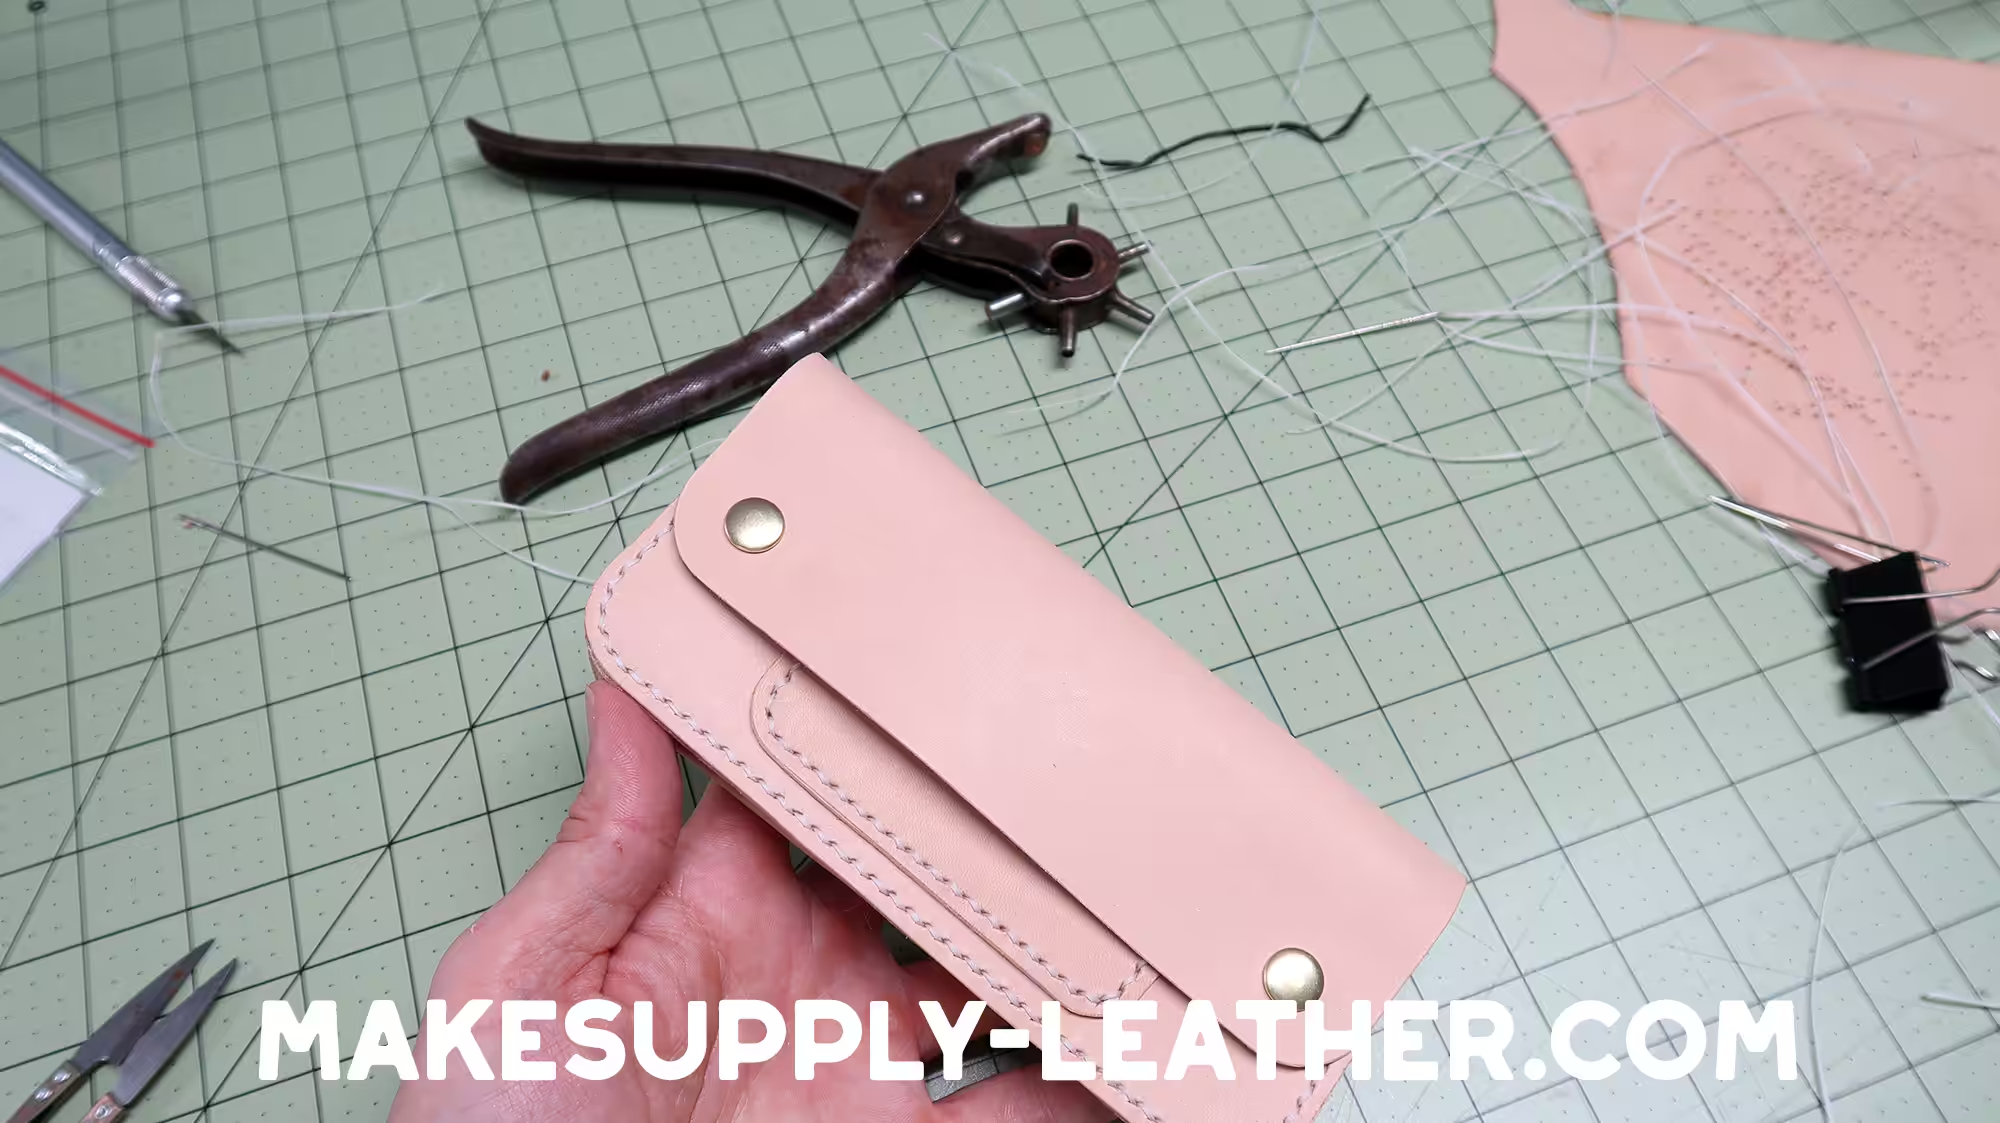
We are in the home stretch. Add a little glue to both sides of the body panel and connect together. Make sure your holes are aligned before it dries. Again, using binder clips is great for this step. Once it is dry you will complete the stitch on both sides. Congrats you are done!
Leather Selection Suggestions
In this video we used Wickett & Craig American Vachetta (natural) in 3-4oz. Any 3-4oz veg tan leather would be a great all around weight for this project. If you want to use a slightly thicker piece for the outside main panel that is probably OK. However I would pair that with 3oz or less for the interior pieces so that it doesnt get too bulky. If you are using thin leather you might want to consider making a couple “leather washers” for the snap fasteners. This will help with the overall strength and durability of the connection.
Guidelines of Template Usage
We put a lot of time and effort into producing these templates, videos, and blog posts. Please do not distribute the template you have purchased from Makesupply. It’s not cool and hurts our feelings (CRY EMOJI). However, you are free to do whatever you want with the end product you create using the template design. Even sell them on Etsy!


8 comments
I have so many tools and can share how to use them and let you try them. I have some value to share which I would enjoy. Been in leather working 4 and half years learning for over 4,000 hours and just give my products away. Labor of love in retirement from UPS
Best wishes
Tim
Nice, compact little trucker wallet! I like it!
Thank you for the motivation to start leather working again.
Thank you Mark!
Thank you
JUSTIN,
Thank you for this free PDF pattern of the Trucker Wallet. I will make good use of this pattern. Thank you again. You are awesome!
Glad to see you back. Was wondering if you were going to return.
Thanks so much for providing us with patterns, I was struggling… for now I will start with my project
Comments are closed.